Download

1 / 10
110 likes | 1.44k Vues
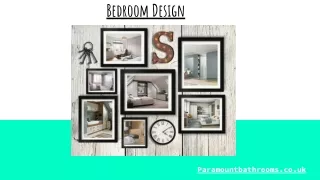
Bedroom Design Using Google Sketchup Mr. Martin Computers, Stella Maris Academy Opening Sketchup To open: double click on the hard drive icon double click on Applications scroll down to “Google Sketchup” double click on Google Sketchup folder double click on Google Sketchup

E N D
Bedroom Design Using Google Sketchup Mr. Martin Computers, Stella Maris Academy
Opening Sketchup • To open: • double click on the hard drive icon • double click on Applications • scroll down to “Google Sketchup” • double click on Google Sketchup folder • double click on Google Sketchup • Alternately, use Spotlight typing in Google Sketchup. • Google Sketchup can be downloaded for free at home. http://sketchup.google.com/
Start in Two Dimensions • Camera, Standard, Top • Camera, Parallel Projection • Erase man • Use hand to move where axes cross to lower left
Drawing Rectangle • Use pencil tool • Draw line parallel to red axis - line color will be red. • To set distance, stop drawing, type in 25’ (‘ is next to right return key), hit enter. • From stopping point draw line up in green direction. Set distance at 25’ as before. • From stopping point draw line to left in red direction. Set distance at 25’ as before. • From stopping point draw line down in green direction. Set distance at 25’ as before. (Or just follow the “inferences.”)
Offsetting to Create Wall Thickness • Click on “offset” tool - • Click inside rectangle • Drag out • Press .5’ Enter • Possible Problem: On some computers you may not be able to see the offset. To see it, rotate the rectangle slightly with the “orbit” tool.
Switch Back to 3D • Camera, Standard, Iso • Camera, Perspective • Adjust with Orbit tool
Lifting Walls with Push/Pull Tool • Select Push/Pull tool. • Carefully move over until just the wall is selected. • Pull up • Enter 8’
Adding Doors and Windows • Use pencil or rectangle tool to make opening the size you want. • Use push/pull tool to punch in opening.
Making Furniture • Make your own simple furniture. For example, for a bed, make a rectangle, and then pull up using push/pull tool. You can see dimensions in lower right corner of screen. • Make couch by pulling up different portions of rectangle. • Use your own creativity!
Adding Furniture • File, 3D Warehouse, Get models. • Follow directions to load directly into your bedroom. • Position. (This can be tricky.) Press escape to get out of. • Tools. Scale to resize.