Download
1 / 25
250 likes | 564 Vues
Setting up Eclipse Locally. CS 15 Fall 2017. Ready?. This guide assumes you have already gone through the working from home guide , and now want to use it with the Java IDE that we know and love, Eclipse. Download Eclipse (Mac). To use Eclipse on your laptop, you’ll need to download it.

E N D
Setting up Eclipse Locally CS 15 Fall 2017
Ready? This guide assumes you have already gone through the working from home guide, and now want to use it with the Java IDE that we know and love, Eclipse.
Download Eclipse (Mac) • To use Eclipse on your laptop, you’ll need to download it. • Click the link on the right for Mac OS X • Click the orange button to download
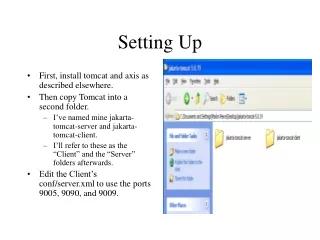
Download Eclipse (Mac, cont.) • Unzip the downloaded file. • Go into your Downloads folder, move the “eclipse” folder into your Applications folder. • Open Eclipse and click OK on the Workspace Launcher open by clicking this! then click this
Download Eclipse (Windows) • To use Eclipse on your laptop, you’ll need to download it. • Select either 32-bit or 64-bit download on the right • To determine whether your PC is 32 (x86) or 64 (x64) -bit, see the links on page 9 here
Download Eclipse (Windows) • Click the orange button to download • “Download from” location may be different
Download Eclipse (w, cont.) • Click on Open or go to download folder and find “eclipse-java-luna-SR2-win32-x86_64” and right click → “Extract All” • You should see this. • Double click to get into this folder. .
Download Eclipse (w, cont) Now your folder should look like this:
Start Eclipse Double Click to start Eclipse
IMPORTANT (for Windows) • If you get this error when you try to open Eclipse: “Eclipse executable launcher error: Unable to locate companion shared library,”the .zip file was not extracted properly • Try using 7zip or another application that allows you to extract files
Download Eclipse (w, cont) If you get this error, go through the Working From Home Help Session slide 39 and download the JRE and JDK
Setting up Eclipse This next part may look familiar, but be sure to follow the directions very carefully. Need we remind you?
Setting up Eclipse (0) • Select workspace
Setting up Eclipse (1) (First, exit out of the Welcome screen if one pops up) • Go to File » New » Java Project, a window will pop up. • For “Project name” type: “cs0150” • Under JRE, click “Configure JREs”.
Click on the “Compiler” tab Next, switch to the “Installed JREs” tab. Setting up Eclipse (2) Make sure the “Compiler compliance level” is 1.8
On the “Installed JREs” tab. Setting up Eclipse (3) Select Java SE 8 (or jdk1.8.0_60 or 1.8.<something>) Then, click “Edit…”
Setting up Eclipse (4) In the window that pops up, change the “JRE name” to “usr” Then click “Finish.”
Setting up Eclipse (5) Make sure “usr(default)” is now selected. Your screen should now look like this. Click OK when you’re ready to move on
Setting up Eclipse (6) Under JRE, click the radio button next to “Use project specific JRE, and be sure that “usr” is selected in the dropdown menu. Under Project layout, check the first radio button that says “Use project folder as root for sources and class files”.
Setting up Eclipse (7) Uncheck “Use default location” at the top of the window. Click “Browse,” and navigate to your local cs0150 folder (e.g. /Users/npucel/Desktop/cs0150)
Setting up Eclipse (8) Check to make sure everything* outlined in red matches your window. * Everything should be exactly the same EXCEPT the Location to your cs015 folder Then, click “Next”
Setting up Eclipse (10) You should now be in “Java Settings,” under the “Source” tab If you don’t have a “src” folder, skip to here Right-click the “src” folder and select “Remove from Build Path” Then, right-click the “cs0150” folder and select “Use as Source Folder”
Setting up Eclipse (11) Next, click on the “Libraries” tab Click “Add External JARs” and find the “cs015.jar,” which you will have to transfer from /course/cs0150/lib (see transferring files)
Setting up Eclipse (12) Now, your screen should look like this Click “Finish,” and your Project setup is done!
Life with your own Eclipse Phew! Eclipse is now all set up! You can now use it just like you would Atom, and transfer your projects over. (See the Working from Home guide!)