Download
1 / 27
270 likes | 507 Vues
Imaging with a Meade LX200 10” and the Canon Digital Rebel Using DSLRFocus 3.xx. By: Jerry Hilburn – San Diego Astronomy Association – Astro Imaging Chair – http://aisig.sdaa.org. Gather the Parts. Camera Battery or Power Supply Canon USB/SIPP Cable & Connector

E N D
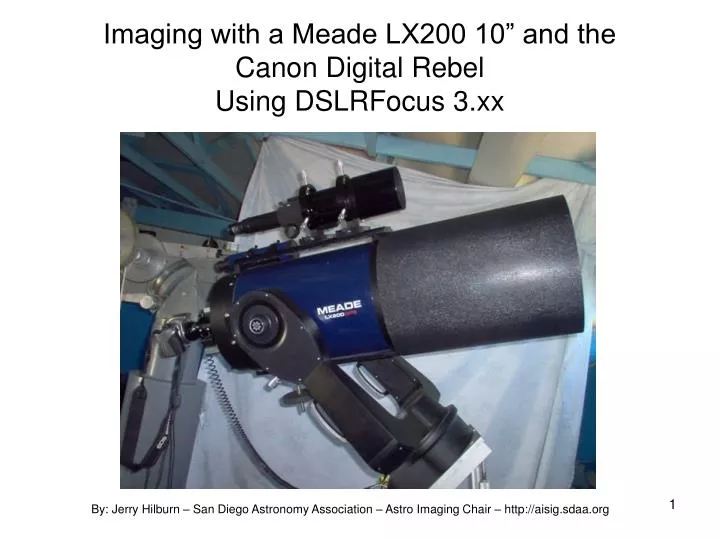
Imaging with a Meade LX200 10” and the Canon Digital RebelUsing DSLRFocus 3.xx By: Jerry Hilburn – San Diego Astronomy Association – Astro Imaging Chair – http://aisig.sdaa.org
Gather the Parts • Camera Battery or Power Supply • Canon USB/SIPP Cable & Connector • Parallel DB-25/SIPP Connector – Bulb Mode Control • Canon Digital Rebel • Meade or Celestron 6.3 Focal Reducer • T-Ring Canon EOS 35 MM SLR Camera • Meade or Televue Basic Camera Adapter – 1.25 or 2 in. • Laptop – XP running DSLRFocus 3.xx
Prepare the Telescope • Set Tube and Forks to North / 90 • Using the Auto Star Hand Controller • Perform One Star Alignment • Perform Polar Align & GPS Detect • Site Polaris – Adjust Wedge • Find Alignment star • Align Guide Scopes to Eye Piece Center • Perform Drift Alignment – Adjust Wedge • Perform PEC Update/Alignment • Set Micro Focuser to Center Position
Prepare the Camera • Insure Camera is OFF • Insure Laptop is OFF • Connect T-Ring to Camera • Connect Eyepiece Adapter • Connect Battery / PS • Connect Bulb Cable • To Camera • To PC Parallel • Connect USB Adapter • To Camera • To PC USB • Connect Camera to Scope
Focus Setup Detail • Unlock Mirror • Attach Eyepiece and Set Gross Focus on Target Focus Star • Remove Eyepiece • Attach Camera and Set Micro focuser to Center Point
Power On the Laptop - Start DSLR Focus • Turn on Camera – Set to Manual Mode • Cancel EOS Kiss Rebel 300D Device Connected Dialog
Port Setup • Find Ports – LPT • Enable Parallel • Test Port • Close Dialog
Setup DSLRFocus Connection Select Application – Connect to Camera Acknowledge Camera Model Selection Dialog Box
Start Focus Mode8 Second Cycle800 ISO2 Second ExposureFrame Image at 30% to Start
Manually Gross Focus • Lock The Mirror
Electronic Focus Analysis Mode HFWHM (Horizontal Full Width Half Maximum) VFWHM (Vertical Full Width Half Maximum) A measure of the size of the image, it is defined as the width of the Gaussian fit at half the maximum value. Ideally both should be the same. If different it indicates a problem in collimation, or bad seeing conditions. RSV (Radial Sum Value) Radial sum value is a relative measure of star width. As the star gets smaller this number gets bigger. Peak (Peak Value) Peak Value is the measure of the brightest pixels in an image. A perfectly focused image will have a higher peak value than an out of focus image. Your goal is to obtain the highest peak value possible.
NEEDS FOCUS! H&V=10.00 RSV=4.00 Peak=248 See DSLRFocus Help File System For Detail Info on Focus Analysis Mode When using this Mode be sure to only use the micro focuser to adjust focus
BEST FOCUS! H&V=6.00 RSV=3.16 Peak=254.5
Mask Focus Technique • Add Mask - Continue Gross Focus • When you have a dot then Lock the Mirror • Zoom to 100% - Focus Till 3 Dots = 1 Dot • Change ISO 200 Time to 1 Second • Zoom in to 200% Focus until Dot is Best Circle • Use Micro Focuser to Adjust To Best Circular Dimension
Getting Closer – Change Micro Focuser Speed To Slow
Once you have a dot at 100%... Zoom to 200% Set ISO to 200 Exposure to 1 Second Focus till at best focus
Setup Long Exposure ISO 800 Large Fine or Raw Bulb Mode 30 Seconds 5 Second Lead in Voice Countdown 3 Seconds Between Exposures
Setup File Naming Set Directory Set Object Name
M104 – 5 Stacked800 ISO – 90 Seconds6.3 Focal Reducer & Photo Shop & Neat Image
M17 – 5 Stacked800 ISO – 90 Seconds6.3 Focal Reducer & Photo Shop & Neat Image
M57 – 5 Stacked800 ISO – 60 Seconds6.3 Focal Reducer & Photo Shop & Neat Image
Comet Temple 9b – 5 Stacked800 ISO – 60 SecondsPrime Focus & Photo Shop & Neat Image
http://aisig.sdaa.org http://www.sdaa.org