Download
1 / 2
20 likes | 26 Vues
With QuickBooks Online, you can save time and get paid faster by printing or emailing invoices and other sales forms at once.

E N D
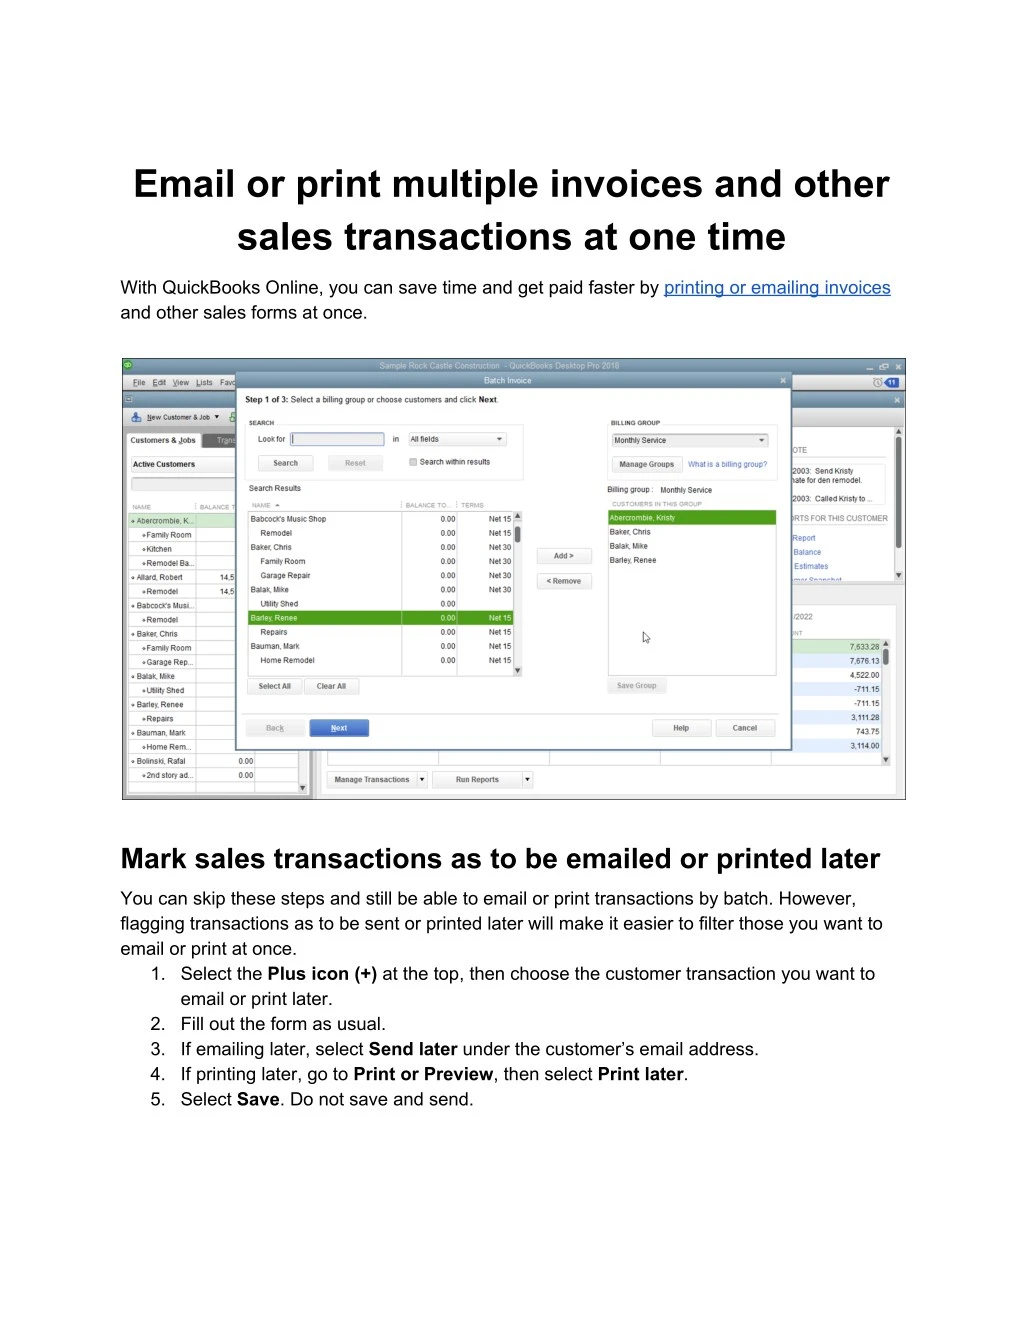
Email or print multiple invoices and other sales transactions at one time With QuickBooks Online, you can save time and get paid faster by printing or emailing invoices and other sales forms at once. Mark sales transactions as to be emailed or printed later You can skip these steps and still be able to email or print transactions by batch. However, flagging transactions as to be sent or printed later will make it easier to filter those you want to email or print at once. 1. Select the Plus icon (+) at the top, then choose the customer transaction you want to email or print later. 2. Fill out the form as usual. 3. If emailing later, select Send later under the customer’s email address. 4. If printing later, go to Print or Preview, then select Print later. 5. Select Save. Do not save and send.
Send or print multiple invoices and other sales transactions at once 1. Select Sales or Invoicing from the left menu. 2. Select the All Sales tab. 3. Select the Filter drop-down. 4. Filter by Type, Status, Date, and Customer as you see fit. 5. Optional: To see transactions you’ve marked as to be emailed or printed later, select Delivery method, then choose Send later or Print later. 6. Mark the transactions you want to send or print. 7. Tip: To mark them all, select the master checkbox beside the Date column. 8. Select Batch actions, then choose Print transactions or Send transactions. Not sure if the customer email addresses are correct? Add the Email column to see if the email addresses attached to transactions are correct. To do this, select the Gear icon above the Action column, then choose Email. To change the attached email address, select then edit the transaction. You have another option for get help by human support not bot call 18009350532 Quickbooks pos support