Download
1 / 3
0 likes | 37 Vues
Learn about the history of nail brush art, the different types of brushes available, and DIY techniques for creating stunning nail designs at home.

E N D
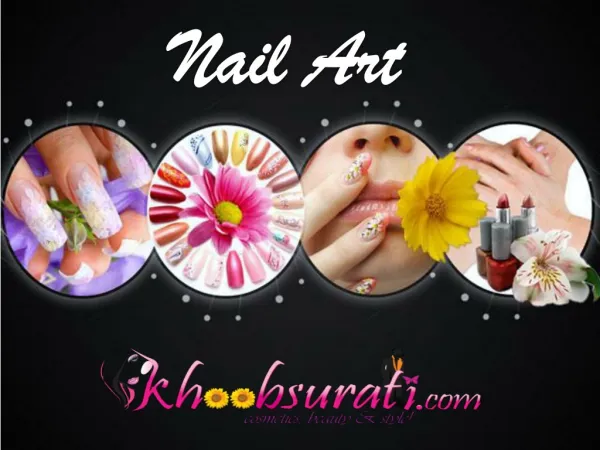
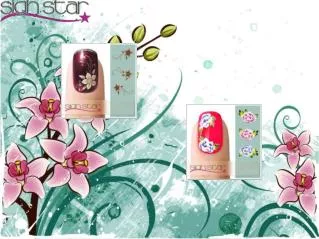
History Techniques of Nail Brush Art, Types and DIY Nail art has come a long way from being a simple coat of nail polish. Today, it has evolved into a captivating form of self-expression and artistry. Besides, nail brushes are a versatile instrument that empowers individuals to unleash their creativity at their fingertips. With the best nail art brushes, you can transform your nails into mini canvases of art. A Brief History of Nail Art Brushes Nail art is not a recent trend; it has a rich history that dates back thousands of years. The origins of nail decoration can be traced to ancient civilizations such as Egypt, where women used henna to paint their nails. In ancient China, nail art was a symbol of social status and was achieved using various ingredients. For instance: ● Beeswax ● Egg whites ● Natural dyes Fast forward to the 20th century - nail art experienced a revival. The introduction of nail polish as we know it today by Revlon in the 1930s made it easier for people to experiment with nail art. However, it wasn't until the 21st century that nail art truly exploded in popularity due to: ● Advancements in nail technology ● The rise of social media One of the essential tools in modern nail art is the nail brush. These brushes come in various shapes, sizes, and materials, allowing artists to create intricate designs with ease. Types of Best Nail Art Brushes Before diving into the DIY techniques, let's explore the different types of nail brushes commonly used in nail art: Detail Brushes: These brushes are characterized by their fine bristles, perfect for making detailed artwork. However, you can use them from freehand designs and delicate patterns. Striping Brushes: Moreover, striping brushes have long, thin bristles. They make them ideal for making stripes, lines, and outlining designs. Therefore, this kind is excellent for creating uniform and straight lines on your nails. Fan Brushes: The best part? They are shaped like a fan, with widely spread bristles. Furthermore, they are perfect for creating ombre effects, blending shades, and adding a touch of elegance to your nail art. Dotting Tools:
Dotting tools are needed for having dots and small circular patterns. Moreover, they come in diverse shapes, making it simple to have multiple dot sizes. Angled Brushes: These best brushes for nail art have angled strands, making them suitable for slanted or diagonal lines. Also, it is good for filling in larger areas with precision. DIY Nail Brush Art Techniques Now that we are familiar with the types of nail brushes let's explore some popular DIY nail brush art methods to beautify your nail game: Floral Designs: ● Start with a well-prepared nail surface and ensure it is clean and dry. Further, it must have a base coat applied to protect your natural nails. ● Choose a variety of nail polish colors for your flowers. Typically, flowers have a central shade for the petals and a contrasting color for the centers. ● However, use a detail brush with a fine tip to make the flower petals. ● Afterwards, dip the brush in your chosen nail polish and go for small strokes for the petals. ● For the flower centers, use dotting tools with different sizes to add dimension. You can also use a toothpick or the end of a small brush. ● Now, allow each layer to dry before applying the next to prevent smudging. French Tips with a Twist: ● Select vibrant and contrasting hues for your French tip design. You can also use metallic or glitter gel nail polish for added flair. ● Use a striping brush to create lines for the tips. Furthermore, you may also play with other curves, shapes, and even asymmetrical patterns. ● If you make any mistakes, have a spare brush dipped in nail polish remover for touch-ups. ● Also, you are required to finish with a clear topcoat to seal the design and add shine. Geometric Shapes: ● When developing geometrical designs, uniformity is important. To keep crisp lines, make sure your nail polish is not too thick. ● You can experiment with contrasting colors to make the shapes pop. ● Consider using nail striping tape as a guide for making straight lines or various patterns. Note: Don't rush; take your time to perfect the angles and shapes. Marbling Effect: ● Firstly, apply a base coat and let it dry completely. ● Use a palette or a piece of aluminum foil to drop small amounts of different nail polish colors. ● Afterwards, gently swirl the hues using a fan brush, toothpick, or a water marble tool. Be careful not to overmix; you want a marbled, not a blended look.
● Quickly dip your nail into the mixture or use a sponge to transfer the design onto your nail. ● Clean up any excess polish around your nail with a brush dipped in nail polish remover. Gradient Nails: ● Go for a sponge-tip applicator or a fan brush to apply the gradient colors. Start at the base of the nail with the lightest shade and work your way toward the tip with the darker shades. ● You can go for multiple layers as needed to achieve a smooth transition. ● Besides, don’t forget to finish with a top coat to seal the gradient. Animal Print: You know what? Animal prints require a steady hand and attention. You can find inspiration from actual animal patterns or create your own. ● Use a fine-detail brush to paint spots, stripes, or other patterns with contrasting colors. ● Experiment with the size and spacing of the animal print elements for a unique look. Abstract Art: Abstract nail art allows for creative freedom. Therefore, mix and match colors, shapes, and patterns. Most importantly, use various brushes to make your abstract design. Don't be afraid to layer colors, blend them, or even splatter them for an expressive and artistic result! Tips for Nail Brush Art Success Achieving beautiful nail art with brushes requires practice and patience. Further, here are some tips to help you succeed: ● Invest in high-quality nail brushes as they may be more expensive, but they will provide better control and longevity. ● Keep your brushes clean by using nail polish remover or brush cleaner after each use. Moreover, this prevents colors from mixing and maintains the integrity of your brushes. ● Don't be discouraged if your first attempts don't turn out perfectly. Certainly, nail brush art takes practice. ● Moreover, nail art is all about creativity. Never be afraid to experiment with different combinations and designs. ● Always finish your nail art with a clear topcoat to seal in your design and add shine. Conclusion Nail art is a captivating form of self-expression that has a rich history and continues to evolve. Whether you are a beginner or an experienced nail artist, the world of nail art offers various styles for you. So, grab your brushes, pick your shades, and embark on a journey of nail artistry that will leave your fingertips looking stunning and unique. Cally Cosmetics is a provider of professional nail art brushes in the UK. Our team at Cally Cosmetics has carefully curated a selection of brushes that are essential for creating stunning nail art. Besides, you can trust that each brush in our collection has been chosen for its quality and performance.


![get [PDF] Download DIY Nail Art: Easy, Step-by-Step Instructions for 75 Creative Nail Art Designs](https://cdn7.slideserve.com/12573368/slide1-dt.jpg)