Download
1 / 20
200 likes | 478 Vues
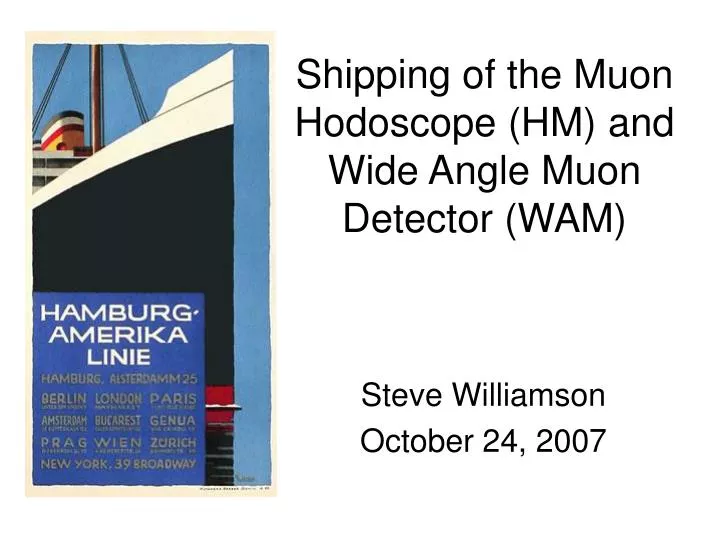
Shipping of the Muon Hodoscope (HM) and Wide Angle Muon Detector (WAM) Steve Williamson October 24, 2007 The Strategy We will use a “standard” 20-foot shipping container.

E N D
Shipping of the Muon Hodoscope (HM) and Wide Angle Muon Detector (WAM) Steve Williamson October 24, 2007
The Strategy • We will use a “standard” 20-foot shipping container. • Because crating of individual detectors is too expensive (~$10k), we will try to ship the detectors strapped (or otherwise fastened) to a skid (A.K.A. pallet). • The bottom layer on the pallet will be the WAM detectors. • On the WAM detectors will be two stacks of HM detectors (six detectors panels in each stack).
The WAM Stack • The WAM detectors are actually quite weak. • The main structure is a framework of 1-inch aluminum tubing as shown in the line drawing below. But the framework does not cover (support) the full area of the scintillators. • Note that the light-guides, and scintillators are not drawn for the sake of clarity.
More on the WAM Stack • The two WAMs can be nested together. • Because the aluminum-square-tube framework does not fully support the scintillators, some 1”X1” wooden shims must be added. • To keep the WAMs from sliding, some ply-wood side braces are also needed. These are bolted to existing holes in the aluminum square tube. • The next slide shows the WAMs piled on top of each other in this nesting configuration (with braces and shims in red).
Top shims Side brace Bottom shims just peeking out WAM Stack • The width of the stack is adjusted to be about 1.67 meters to get the largest base for supporting the stacks of HM detectors. • The 1”X1” shims are placed diagonally so that if they move a bit, they will still support the other WAM (bottom shims) and HM detectors (top shims). • Note that the nesting puts the aluminum frame of one WAM on the bottom and the frame of the other on the top.
Holes for bolts Side Brace • The side braces are made of 19 mm ply-wood. • Four 8 mm holes are used to fasten the two WAMs together using existing holes in the aluminum framework. • The corners of the braces are cut out to provide space for the 1”X1” wooden shims. • Here’s a close-up of one of the braces (bolts not drawn).
The Skid • The two stacked WAMs are centered on a skid. • In the picture here, the skid is made of 3 20x20 cm beams, each 5.2 meters long. This is covered with a sheet of 19 mm thick ply-wood. • I don’t know if these dimensions are actually available. The Crating Company will have to engineer this.
The HM Detector Stacks • The HM detectors are made to be bolted together in pairs (one horizontal, one vertical). • Unfortunately this configuration is too wide to fit in the container. • Instead the detectors can be stacked with the scintillators all in the same direction (with a few exceptions). • Each detector panel is separated from its neighbors by two wooden beams, shown here with dimensions 10X10 cm by 2 meter long (in red). • One big problem is that the wall mounting hardware on the back of the vertical panels can not be easily dismounted. This is because the screws are trapped under the scintillators. The stacking has to deal with this problem.
2V 1V 3V 2H 3H 1H The Upper HM Detector Stack • This consists of the panels that were above the beamline. (1H, 1V, 2H, 2V, 3H, and 3V). • The picture shows one way of stacking up these detectors. • Note that the light-guides, and scintillators are not drawn so that more to be seen.
Wall mount for V2 pointing up. V2 V1 V3 One of the bottom wall mounts for V1 (resting on beam) Top wall mounts for V3 (bolted to beam) One Way to deal with the wall mounts • Here is shown one method for dealing with the wall mounts of the upper vertical detectors. • The V1 and V3 panels are very similar to each other. • By arranging these detectors as shown, one set of mounts of each panel can be bolted to a wooden beam (bolts not shown). • The V2 detector is placed on the top of the stack and oriented so that its wall mounts point up. • This scheme does not work for the panels below the beam line because the wall mounts are different.
This hanger on 2H doesn’t line up. It can be unbolted and shipped in a box. This hanger on 3H lines up with a beam. It should be bolted to the beam. More on Stacking of Panels • The wood beams should be covered with some kind of protective material (corrugated card-board, foam, etc.) as shown in this photo to keep the wood from scratching through the black Tedlar® covering of the scintillators. • In some cases, the hangers for the horizontal panels can be used to bolt a panel to one of the beams – this will help stabilize the stack.
Strapping of HM Panels • In order to further stabilize the stack of detectors, the wooden beams can be strapped together. • This compresses them down on the panel sandwiched in between. • Steel or fiber-reinforced plastic straps are commonly used to hold things down to shipping pallets. The Crating Company (or DESY shipping and receiving) should have the special tools and material for doing this kind of strapping. • The picture below shows schematically how the stack can be strapped together (see red and blue ovals).
6V 4V 5V (rotated 90°) 5H 6H 4H The Lower HM Detector Stack • This consists of the panels that were above the beamline. (4H, 4V, 5H, 5V, 6H, and 6V). • As with the upper detector stack, the panels should be strapped together • Note that the vertical detectors have a different wall mounting scheme so the method used for the Upper HM detectors to deal with the wall mounts won’t work here. • Instead we take advantage of the fact that V5 is particularly short. It can be rotated by 90 degrees from the rest and still go through the shipping container door.
This top wall mount on 4V is right next to the adjacent beam. The top wall mount on 4V are right next to the side of 5V. The bottom wall mounts of 4V would actually punch through 5V so they must be removed. Dealing with the Lower HM Stack Wall Mounts • One must be careful about where the beams are placed relative to the wall mounts for the vertical panels (the top 3) in the stack. • The bottom wall mounts for 4V actually interfere with 5V so must be removed (see next slide). • This method of dealing with the wall mounts might work for the upper HM detectors as well. This could be checked with the 3D CAD model.
The bottom wall mounts of V4 interfere with the V5 panel. Here one is intersecting a PMT (!). The offending wall mount is held on with a single (captive) screw. It should be possible to just turn it to remove it. Removing Single Screw Wall Mounts on Vertical Panels • The bottom wall mounts on all vertical detectors are held on with only a single captive screw. • One should be able to simply unscrew them to remove them. • The screw will remain, with screw threads projecting out of the frame of the detector panel. • All of these bottom wall mounts can be removed. But the ones on V4 must be removed if my stacking strategy is to be followed.
All of the detectors • The picture below shows the two HM detector stacks on top of the WAM detectors, in turn, on top of the skid. • The HM stacks must be constrained to prevent them from sliding on top of the WAMs. This might be done with more straps, or perhaps with the “industrial quality heat shrink” suggested by the Crating Company.
Top View Side View View from Container Door More Views of All Detectors
Additional Boxes • We have around 15 additional boxes and crates which must also fit in the shipping container. • The picture above shows 13 of the boxes stacked in a way that will fit in the shipping container. • But there are some important additional considerations: • The boxes must be strapped down (perhaps with heat-shrink film from the Crating Company?). • Some of the boxes are quite heavy and it may not be OK to stack them on top of the HM detectors as shown above. There is still quite a bit of space in the container so there should be room somewhere for all of the boxes.
Door View from Container Door Door Top View Does it Fit? • The shipping container is shown in blue in these pictures. • Dimensions of the container were found on the web. The actual container may be slightly different, but there is a bit of space to spare.