Download
1 / 8
70 likes | 315 Vues
Telephone Wiring Services is an independent Local telephone repair and maintenance company that have a telephone engineer near me with over 20 years of experience in phone and broadband services. Providing fully trained and qualified telecom engineers across the UK We will try to help any way we can. We were set up to provide a 1st class, helpful, speedy service for our customers. We aim to be the better alternative to other big companies that charge you an arm and a leg for a simple service call. If you are having problems with your phone or broadband, then we can help. All our work is fully guaranteed and our telephone engineers are all 10 – 15-year serving engineers. We charge much less than other national companies and can normally complete the work in a shorter time as we are local and will always try do suit your needs.<br><br>Call Gary on: 07860244274 to book your Telephone engineer today. http://telephonewiringservicves.co.uk

E N D
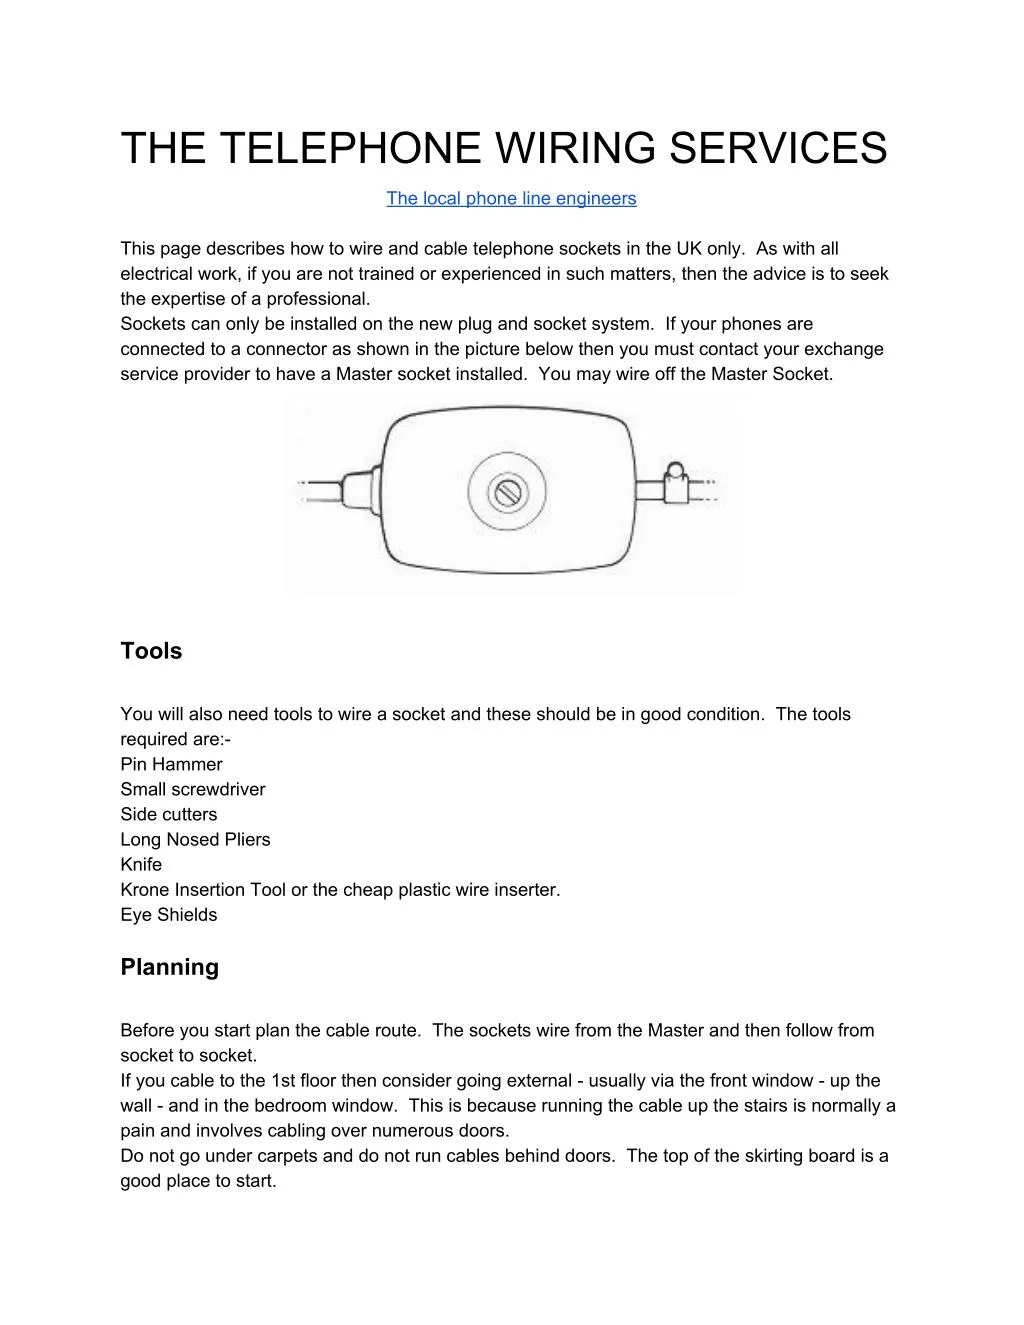
THE TELEPHONE WIRING SERVICES The local phone line engineers This page describes how to wire and cable telephone sockets in the UK only. As with all electrical work, if you are not trained or experienced in such matters, then the advice is to seek the expertise of a professional. Sockets can only be installed on the new plug and socket system. If your phones are connected to a connector as shown in the picture below then you must contact your exchange service provider to have a Master socket installed. You may wire off the Master Socket. Tools You will also need tools to wire a socket and these should be in good condition. The tools required are:- Pin Hammer Small screwdriver Side cutters Long Nosed Pliers Knife Krone Insertion Tool or the cheap plastic wire inserter. Eye Shields Planning Before you start plan the cable route. The sockets wire from the Master and then follow from socket to socket. If you cable to the 1st floor then consider going external - usually via the front window - up the wall - and in the bedroom window. This is because running the cable up the stairs is normally a pain and involves cabling over numerous doors. Do not go under carpets and do not run cables behind doors. The top of the skirting board is a good place to start.
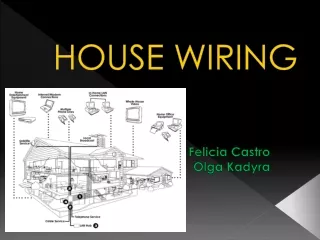
Remember - telephones normally have 3 metre cords. Fitting the Socket If the sockets are fitted after the house is built, then surface mounted are the best option. These should be fixed to the wall or skirting board with the appropriate fixings. Always wear eye shields when drilling. WARNING - Before attaching the socket to the wall, ensure that you have selected a position where you will not hit any concealed pipes or electrical cables. Check with a cable locator - purchase at a DIY shop. Remember to keep the sockets well clear of the floor to avoid damage by floor cleaning equipment and to enable the cable to be brought neatly out of the socket box and on to the skirting board. Once you have decided on the positions for the sockets, carefully cut out the appropriate cable entry hole in the side or base of each socket using a sharp knife. Mount the sockets in position, using the two screws and plastic wall plugs supplied with each socket. The socket box mounting holes are slotted to allow horizontal and vertical adjustment before tightening the screws fully. Cabling House telephone wiring uses cable containing six 0.5mm diameter solid conductors. It is important that this size of wire is used or a good electrical connection cannot be guaranteed and there could be problems in the future with the system. Never use stranded wire, mains cable or bell wire. Run the cables to the Extension socket positions in accordance with your plan. Feed the cable through each socket box entry hole and leave about 200mm (8”) of cable spare at the socket. WARNING - When fixing the cable, take care not to puncture or damage it in any way. Damaged cable may cause faulty operation or damage to the system and must be replaced, not taped up. On straight runs it is easier to fix the cable at one end of the cable run, pull the cable tight, fix the other end and then insert intermediary cleats at approximately 300mm (12”) intervals. You can also use two cleats as shown to hold a cable bend neatly in place, not a single cleat on the bend.
Straight Runs Fixing on Corners Wiring the Sockets
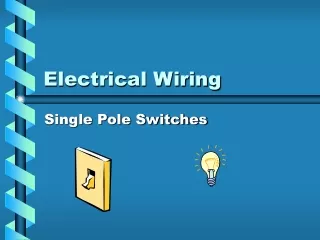
Start at the last socket and finish at the Master Socket. For every cable at each socket, cut the sheath at the end of a cable about 13mm (1/2 in) with a pair of side cutters and expose the white nylon ripcord. Grip the rip cord with a pair of long nosed pliers (curl the cord around the tips if it slips out) and pull firmly down, exposing the wires to about 50mm (2”). Next cut away the unwanted sheath with the side cutters. Do not remove the PVC insulation from the wires themselves. Fix the cable sheath(s) neatly to the cable mount on the faceplate of the socket using the nylon tie provided with the socket. Thread the tie through the slot/hole in the back of the faceplate. Put the cable in place and tighten the tie (see diagram below). N.B. Cable securing methods may differ depending on the make of the socket. Spread out the individual wires so that you can identify the colours. The first colour identified is the base colour of the plastic insulation, the second colour is printed over the first; for example, Green/White means green base, white overprint, White/Green means white base, green overprint.
In each socket the wiring HAS to be connected as follows:- White/Orange 4 -3Orange/White White/Blue 5 -2 Blue/White White/Green 6 -1 Green/White WARNING - make sure that you follow the colour coding correctly. Incorrect wiring may cause faulty operation or damage to the system. Terminating the wires No wire stripping or soldering is necessary to make a good termination.
The Krone tool (IDC - Insulation Displacement Connector) or cheap plastic wiring tool will be used to connect the wires to the socket. IMPORTANT - do not attempt to insert the wires with anything other than the proper tools. Always wear eye shields when using IDC tools as the wire ends can fly off. Support the socket faceplate firmly and hold the tool vertically making sure that the ‘blade’ of the tool is the correct way round. This is essential, as not only will the tool be damaged but also the wire will not be terminated properly if the tool is incorrectly used. It is recommended that you practice first by placing the IDC tool over a terminal, without a wire in place. In the correct position the tool will easily slide as far as the chamfer of the plastic insulator on the terminal. Leaving a small amount of slack in the wire place the wire to be terminated in the appropriate slot of the terminal. Put the tool into position. A firm vertically applied pressure to the tool will force the wire into the connector fork and the connection is made. You will hear it go into place. Then remove any excess wire beyond the connector with the wire side cutters. The picture shows the cheap wiring tool, if the Krone version is used, then the scissors side locates in the recessed side (shown to the right in the picture). The Krone tool also automatically cuts off the spare wire. If two cables are to be connected to the socket, a second wire will need to be inserted at the same terminal. Each wire must be inserted individually and not both at once. Ensure that wires are pushed into the connector fork fully, one on top of the other. The socket will only accommodate two cables maximum. Where two wires are to be terminated at the same terminal, make sure that the colours of the wires from each cable match each other. After you have made the three terminations on one side of the socket, e.g. 1,2,3 as shown above, turn the tool around to make the terminations for 4,5,6 so that the ‘blade’ of the tool (longer edge), is again facing towards the middle of the socket. If you should make a mistake, a wire can be removed by pulling it upwards out of the connector fork. Do not attempt to reinsert the same part of the wire until the damaged portion has been cut off. Leave each terminated socket out of its box for the moment. Lay the wires down onto the socket to make a neat job and then securely fix the socket to the back box. Testing
Check for dial tone at each socket and then ask a friend to call you back. Whilst the line is ringing, plug a phone into each socket to ensure that it rings. If not check the termination on pin 3 of the socket. Additional Information Telephone Wiring Services is an independent Local telephone repair and maintenance company that have a telephone engineer near me with over 20 years of experience in phone and broadband services. Providing fully trained and qualified telecom engineers across the UK We will try to help any way we can. We were set up to provide a 1st class, helpful, speedy service for our customers. We aim to be the better alternative to other big companies that charge you an arm and a leg for a simple service call. are having problems with your phone or broadband, then we can help. All our work is fully guaranteed and our telephone engineers are all 10 – 15-year serving engineers. We charge much less than other national companies and can normally complete the work in a shorter time as we are local and will always try do suit your needs. The Telephone Engineers UK Name: Gary Pearce Tell: 07834549340 http://telephonewiringservices.co.uk If you