Download
1 / 25
300 likes | 626 Vues
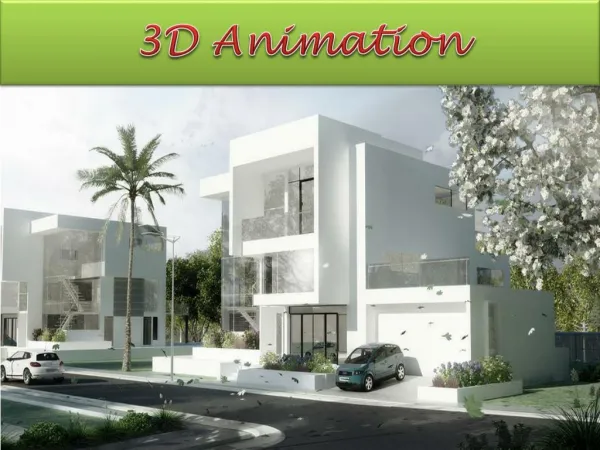
Introduction to 3D Art and Animation. Lesson A ( week 1): Introduction to 3D Space, the Maya Interface, and Modeling. Welcome to Autodesk Maya.

E N D
Introduction to 3D Art and Animation Lesson A (week 1): Introduction to 3D Space, the Maya Interface, and Modeling
Welcome to Autodesk Maya Maya is one of the most commonly used 3D art and animation software in the film and game industries. It is node-based and so highly flexible for programmers to modify in Melscript or Python. For artists it provides an extraordinary range of tools for 3D Modeling, Surfacing (textures + lighting), Rigging, Animation, Rendering, and Visual Effects. DOWNLOAD: You can get a free, full student copy of this program using your .EDU email address at Students.Autodesk.com. Create a student account and keep the download window open for the entire installation process! Maya works best on a system that is less than 3 years older than the version number. 3-BUTTON MOUSE: this program is intended to be used with a 3-button mouse, and you will usually need to treat the middle scroll-wheel as a button.
Maya Interface 1: Quick Overview QUICK INTERFACE OVERVIEW (see image, next slide): Maya’s top MENU changes based on the chosen MODULE (upper left rolldown). Choose “Modeling” (called “Polygons” in older versions) for modeling menus like Mesh, Edit Mesh, Mesh Tools, Mesh Display, UVs etc. To set preferenceor activate plugins, look under the Window menu. The SHELVES below the menus contain quick creation options. Use the Polygons shelf for modeling in this course. These items are also to be found in the Create menu. The Viewports are the work area in the center, with their own menu options. You can turn off the Grid under “Show” and make objects see-through by hitting Shading > X-Ray. Under Panels you can change the view to Perspective, a flat Front/Top/Side, or a camera you create. The vertical Leftbar contains Transforms, recent Tools, and viewport configuration presets. LeftDoubleClick any of these for options. The bottom contains animation controls. The right side is the Panels, including: • Channel Box: enter basic transforms on a selected object • Attribute Editor: dive into that object’s node parameters • Modeling Toolkit: access to useful tools like MultiCut and Extrude.
Maya Interface 3: Viewport/Object Controls Note the upper-rightPerspective (Persp) viewport, meaning distant objects appear smaller. Use a 3-button mouse, hold down [Alt] + a button to change the view (NOTE: treat middle as BUTTON to Pan the camera, not as a wheel): Change the Viewport Camera Location and Angle: Orbit: [Alt]+LeftClickDrag mouse. Pan: [Alt]+MiddleBUTTONclickDrag Zoom: [Alt]+RightClickDrag (choppy zoom = scroll the middle wheel). Change the Viewport Camera Type: In the last viewport menu Panels, choose an Orthographic (top, front, side, bottom) or Persp view. Change back to original Persp view for now. Create Geometry from the Polygon Shelf(top). Start with a box. Change the display mode of the selected viewport with number keys: [4] = Wireframe, [5] = Surface, [6] = Textures, [7] = Lighting.
Maya Interface 4: Viewport/Object Controls We use Object Transforms to change objects we create: [w]= move, [e] = rotate, [r]= scale MOVE: Gizmo has 3 arrows/axis for up-down (Y= green), side-to-side (X=red), and forward-back (Z=blue). LeftClickDrag an axis to move the object in that direction (selected=yellow). You can also LeftClickDrag the blue square at the gizmo center to move in an orthographic view (top, front, side), but use axis-arrows for precision in Persp view. ROTATE: 3 circles making a gimbal ball. Each circle goes around an axis, for example the green circle at the equator is around the vertical Y axis. SCALE: Click the center block (light blue, or yellow when selected) to scale UNIFORMLY (equally in all dimensions, no distorting). Click a single axis to scale NON-UNIFORMLY (to stretch or squash the object only in that direction).
Maya Practice 1: Make a Tower Tap the SpaceBar to see all four Viewports: Top, Persp, Front and Side (Right). You can hover the mouse over any of these and tap spacebar again to fill the screen with that view. Make a bunch of objects from the polygon shelf and use multiple views to help you stack them into a tower. Consider putting them all in the same place in the Top View (upper left), and then raising them above each other in the Front (lower left) or Side View (low right). Have fun-- rotate the objects in interesting directions to make them feel like they are just barely balancing!
Maya: Change the Pivot By default, the pivot location on most objects is in their center. This means if you rotate an object, it rotates around the center. If you want to rotate around a side, like opening and closing a door, you need to move the pivot: • hit [d] to get the special gizmo for pivot changing, grab an arrow and move the pivot where you want it to go. • As always, orbit around your view ([Alt]+LeftClickDrag) to see your object from multiple directions and check your placement. • Hit [d] again to return to the normal transform gizmos (it is a toggle) This can also be used to scale an object sitting on the ground so that it “scales upward” and stays on the ground, rather than scaling outward and needing to be repositioned: hit [d] and move the pivot to the base of the object. When you Combine or Boolean objects, the resulting new pivot is usually in the world center (0/0/0), regardless of where the object is located. To quickly put the pivot in the center of a selected object, go to the Modify menu and choose Center Pivot. The you can hit [d] to further adjust.
Maya: Object Inputs and Duplicate Create a box (Polygon Shelf), stay selected, see the Channel Box (right panel) ENTER TRANSFORMS: At the top of the Channel Box panel (on the right) note the Transforms at the top: specific axis channels for Move, Rotate, and Scale. You can type a value directly into these channels and hit [Return]. You can also drag dynamically: If you select one or more Channels by name (LeftClick on the name, or LeftClickDrag to select multiple names), you can then MiddleMouseClickDrag in the Viewport to scroll through values on those Channels! ENTER INPUTS: Scroll down the Channel box to see Inputs. Click the object name below inputs to open parameters for that object, including size/shape and subdivisions. Try increasing your box size. Set all subdivisions to 3x3x3, to cut two lines around the box on every side (see example next screen). DUPLICATE: To copy an object, select it and hit [Ctrl]+[d] and then use the Move [w] tool to pull the copy away. Note by default the duplicate lacks the Input node. You can make a duplicate that also has the Input node by clicking that option under Edit menu > Duplicate Special (where you can otherwise create an instance relationship and/or a mirror by setting a scale axis to -1).
Maya Component Transforms ENTER COMPONENT MODE: RightClickHold on a selected object to choose a component: Vertices, Edges, or Faces. Then select a part of the object and Transform (Move [w], Rotate [e] or Scale [r]) that part. SELECT either by clicking-on or selecting-around. You can add to your selection by holding [Shift] while you click on or select around other parts of the object. Remove a part from your selection by holding [Ctrl] while clicking on the part. [Shift]+[Ctrl] while selecting around ensures previously selected areas do not get deselected, which holding [Shift] alone can do. NON-UNIFORM FLATTEN: Use Non-Uniform Scale to flatten components: Select a bunch of vertices and choose the axis that is perpendicular to the flat surface you want to make. Click and drag that axis to flatten the vertices into a single plane! SELECT A LOOP OR RING: In Edge component mode, LeftDoubleClick an Edge in the middle of your box to select the edge loop around the form. To get a ring, select an Edge, then [Shift]+LeftDoubleClick a parallel Edge. You can also select a Face and [Shift]+LeftDoubleClick a neighboring Face to get a ring of Faces. EXIT COMPONENT MODE: To stop working on the components of one object in order to work on another object, you need to get out of component mode and go to Object Mode: RightClickHold on the object to choose Object Mode, and then LeftClick at empty space in the Viewport to completely deselect that object.
Maya Modeling Tools 1 MODELING TOOLKIT: Switch from Channel Box to the Modeling Toolkit, upper right. At the top, easy buttons for choosing components (Vertex, Edges, Face) or Object Mode. Below are lots of useful tools for revising your model: EXTRUDE: Select one or more Faces, hit Extrude, and pull out new geometry. Transform, then hit extrude again! Or, select faces and hold [Shift] to drag-Extrude. CONNECT: Select two or more parallel Edges, hit Connect to draw a line perpendicular between them. In parameters below, change number of lines drawn. If you select 2 vertices, Connect will draw a line between. MULTICUT: Cut lines anywhere on your model. Must END on a line or vertex. Hit [Return] to end one cut and start the next! Hit [W] to end a cut by switching to the Move tool. BRIDGE: Select opposite Edges or Faces and create bridging geometry between them. BEVEL: Select an Edge at a corner to make it many Edges, resulting in a curved corner. Select the four vertices of a square to make them into 8 vertices in order to extrude a more rounded shape (circle the square!). TARGET WELD: Select a Vertex, LeftClickDrag a yellow indicator to a target / destination vertex, release to snap and weld that Vertex to the destination. Also works with edges! COMBINE: Select two objects in Object Mode and hit Combine to make them a single object. Then Bridge Edges/Faces or TargetWeld/Merge Vertices between them!
Maya Modeling Tools 2 Important Menu tools (NOTE: Stay in Modeling Module): Mesh menu: FILL HOLE (Edges):LeftDoubleClick an Edge of a hole to select hole ring. Hit Fill Hole to create a polygon connected to all sides. Fails if mesh has interior geo or doubles Vertices. Edit Mesh menu: MERGE (Vertices):Weld together all selected vertices within a certain distance threshold. By default this is set low, perfect for removing doubled vertices caused by accidental/un-pulled extrusion. Select around all or some vertices and hit Merge. COLLAPSE (Edges):Turn a selected edge to a vertex, located at the old edge center. Mesh Tools menu: CREATE POLYGON: In Front, Top, or Side Viewports, draw the outline of a desired 2d shape using as few vertices (LeftClicks) as you reasonably can. Hit [Return] to complete the shape. You can then select the face and extrude! Mesh Display menu: SOFTEN/HARDEN (Edges): Select around all edges and hit Soften or Harden edges to remove or add the appearance of facets or hard seams to your model. REVERSE (Faces): Select all faces on a black-appearing model to flip “Normals” (Normals are the direction the surface faces. Should be outward, but can accidentally get flipped, like a Create Poly extruded in the wrong direction).
Maya: How to Fill Holes 3D Modeling is a process of solving problems by combining the provided tools into techniques. There are many solutions to most geometry problems, and deciding which to use is sometimes based on circumstance and sometimes purely by artist preference. For example here are 3 ways to fix a hole in your mesh: FILL HOLE: In Edge Component mode, Double click an edge to select around the hole, then in the Mesh menu click “Fill Hole.” Only works on clean geometry. OR: BRIDGE: Select an Edge on one side of the hole, [Shift]+ select an edge on the opposite side, and hit Bridge. OR: STRIP MODELING: Select an Edge on one side, hold [Shift] for Extrude and PULL OUT a plane (dynamic edge extrusion, called “Strip Modeling”). TargetWeld the new Edge to an Edge on the opposite side.
Maya Practice 2: Make a Chair from Primitives Make a basic chair with a seat, four thin legs, and a back support. Arrange duplicates of a Polygon Box into this form using the Channel Box, multiple Viewports, and Transforms (Move, Rotate, and Scale). Use Edit > Duplicate Special to turn on Duplicate Input Graphs so each duplicate retains inputs.
Maya Practice 3a: Extrude a Chair From 1 Box INPUTS: Create a Box, and in the Channel Box panel set these Inputs: Width = 10, Height = 2, Depth = 10 Subdivision Width=3, Subdivision Height=1, Subdivision Depth=3 ADJUST COMPONENTS: RightClickHold to choose the Vertex component mode. In the Top View, select AROUND each center row of vertices to MOVE it closer to the side (vertically and horizontally), in order to make the corner squares smaller for extruding legs. (You can alternatively select both center rows and use a non-uniform scale to push them away from each other).
Maya Practice 3b: Extrude a Chair From 1 Box EXTRUDE LEGS: In the Persp view switch to Face component (RightClickHold), orbit to view the bottom ([Alt]+LeftClickDrag), and select the four bottom corners (Hold [Shift] to add to selection). In the Modeling Toolkit, hit Extrude once and use the Move tool (W) to pull the new legs straight down to your desired length.
Maya Practice 3c: Extrude a Chair From 1 Box EXTRUDE BACK POSTS AND BRIDGE: Orbit to view the seat top, select the back two corner squares, and Extrude the back posts. To make the back-support between those posts, either Extrude up again or select all the post vertical Edges and hit Connect to draw the line between them. Then select the top facing Faces (between the posts) and hit Bridge!
Maya Practice 4a: Build a room Make Walls and Floor out of thin boxes. Create a window and a door by arranging the wall as a few smaller boxes surrounding a hole instead of a single big one. Arrange objects to represent furniture, getting as detailed as you can. To extrude a round shape from a square (like a round handle from the cabinet door), select the vertices of the square and hit Bevel in the Modeling Toolkit. This will split each vertex into at least 2 vertices, and the square becomes an octagon.
Maya Practice 4b: Build a room FOR HOMEWORK, please build your room with a floor, all (four) walls, and a ceiling. Make these out of boxes and keep the walls as separate objects, for easy adjustment and later texturing. Windows and doors, as seen above, can be made by Moving and Scaling multiple boxes to fit each other. Place the ceiling box in its own Display Layer so it an easily be made visible/ invisible.
Maya Practice 5a: Make a Wooden Dinosaur With Create Poly westart a model with a complex shape and Extrude: • Start in the Front Viewport. • Activate Mesh Tools > Create Polygon. • Draw the outline of your dinosaur by LeftClicking (to make a vertex, immediate release) and moving the mouse (to choose the next place to LeftClick). • Use as few vertices as possible to outline the rough form. Go all the way around and just before you get back to the start hit [Return] to finish the shape. • Make adjustments in the Vertex Component mode with the Move tool. Use MultiCutto draw more vertices if desired. In the Persp Viewport use the Face component mode to select the entire shape and Extrude out the form. Go to Object Mode and you are done making a flat wooden toy dinosaur!
Maya Practice 5b: Make a Wooden Dinosaur For a more rounded form with all 4 legs, remove the 2 legs, Extrude torso from either side, re-Extrude legs: • Use MultiCut or Connect to draw lines between the two vertices at the top of each leg (on both sides) to make the legs separate faces from the rest of the body (note: if these tools are not working, you may have accidentally extruded multiple times, thus creating extra vertices. Select around all vertices and hit Edit Mesh > Merge). • In Face mode select legs, hit [Delete], DoubleClickthe hole edges and hit Mesh > Fill Hole. • In Vertex mode use MultiCut or Connect to separate the tail and the neck from the body, then select the body and Extrude on both sides. • At the bottom of your model there are now four spaces. Extrudethe new legs. • Use Edge-Connect on the legs to add knees, select all edges and Mesh Display > Soften Edge.
Maya: Organizing Your File DISPLAY LAYERS: Located at the bottom of the Channel Box. Allow us to store objects for hiding/ showing and freezing/ unfreezing. Create as many layers as desired(see create button top of Display Layers rolldown), select one or more objects and RightClickon the layer to add them. OUTLINER:One of your panel options is the Outliner, which lists all objects in your scene alphabetically and hierarchically (child objects appear below parents). You can open the Outliner in many ways: from the Window menu, from the Viewport configuration presets at the bottom of the left Tools panel, or under the Panel menu in any Viewport. To make full use of this tool, consider how you name your objects. NAMING: Objects can be named at the top of the Channel Box. Don’t leave default names on any objects– change them to a relevant name for your project, and include prefixes for categories. For example, if you are making a bookshelf with a variety of book sizes, consider naming the furniture Bookshelf and the books themselves BookBig, BookWide, etc. so they will be grouped together in the Outliner (you can also get them to group together by parenting them under the main object, by dragging them in the Outliner on top of the main object). Avoid spaces in names (use humpCap notation or underscores _), always start with a letter, and avoid special characters (like punctuation).
Maya: Clean Modeling BROKEN GEOMETRY (unheigenic, non-modular) tends to not work well. It breaks tools like MultiCut and selection techniques like loop-selection, and gives unpredictable or broken results with rendering and animation (polygons flying everywhere). Practice cleaning up your models! Always have one or more FACES selected before hitting Extrude. Never hit Extrude in Object Mode, or you extrude the entire object, with doubled faces everywhere. If you cannot undo (because you saved/closed the program) you will likely have to start the model over. Always extrude with faces selected! If you Extrude multiple times without pulling out the faces, you are doubling all of the vertices around those faces. To quickly clean this up, select the object, RightClickHold for Vertices, select around the entire mesh, and hit Edit Mesh > Merge (at default threshold, 0.001)to weld the doubled vertices. MOST IMPORTANTLY, DELETE HISTORY:With EVERY model: as you edit a mesh you add HISTORY to it, as seen at the bottom of the Channel Box. If this history gets too long it can cause Maya to become unstable and crash. Every hour or so of modeling, select the object and hit Edit > Delete By Type > History!