Download
1 / 22
220 likes | 440 Vues
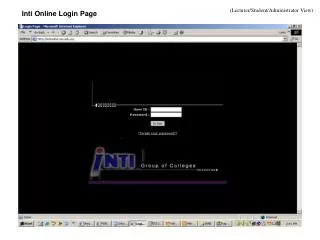
POWERDIAL LOGIN PAGE. Enter the POWERDIAL web address in your web browser's address bar. In our case it will be http://192.168.4.5 Click on the administrator link. POWERDIAL ADMIN LOGIN. Enter Admin as username and power dial as the password. POWERDIAL USER LISTING.

E N D
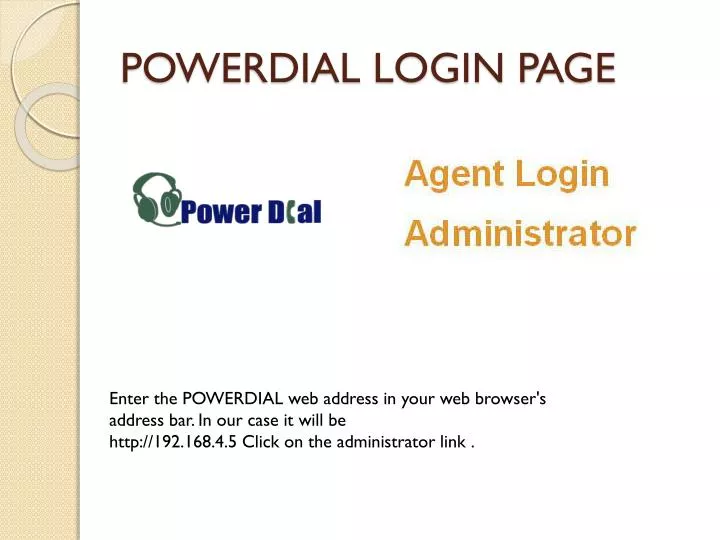
POWERDIAL LOGIN PAGE Enter the POWERDIAL web address in your web browser's address bar. In our case it will be http://192.168.4.5 Click on the administrator link .
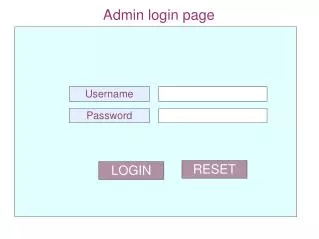
POWERDIAL ADMIN LOGIN Enter Admin as username and power dial as the password.
POWERDIAL USER LISTING Now we can see the user listing. In order that a user has the full administrator privilege, we need to modify the user settings. Click on the “MODIFY” link corresponding to the user admin row
MODIFYING ADMIN PREVILEGES Scroll down to the section “ADMIN INTERFACE OPTIONS”. Change all the options value to 1. This will ensure that the user has full administrative privilege and have access to all administration pages. Click “SUBMIT” to the changes made.
POWERDIAL USER GROUP LISTING Click on User Groups. Right now we have only two groups i.e. ADMIN. Let us create a user group. Click on “Add A New User Group” on Left side under User Groups.
CREATING A NEW USER GROUP Fill up the details as per the details below Group: AGENTS Description: POWERDIAL AGENTS Click “SUBMIT” to create the group.
ADDING A NEW USER • Let us add user for the group created. Click on the “Users” button on the Left side, then Click on “ADD A NEW USER” left side of the page. • Enter the details as shown above. Click “SUBMIT”. You will be presented with the detail view of the user you just created. Just leave everything as it is for now.
ADD A NEW CAMPAIGN • For a user to log-in to POWERDIAL, we must have a campaign. Click on the “Campaigns” on the Left side, then “Add A New Campaign”. Fill up as seen above. • Click “SUBMIT”. We can see the detail view now.
MODIFYING CAMPAIGN In the detail view of the campaign MYCAMP, In case you are not having any prefix change Dial prefix to X. ( Here in the screen you have 8 )and “Next Agent Call” to oldest_call_finish. For Auto Answering Detection Change the “Campaign VDAD exten: 8369”. Click “SUBMIT” Next.
POWERDIAL LEAD LIST FORMAT Even though, we have created a campaign for the agent, this campaign does not have any phone numbers/leads to be dialed by the agent. We need to upload a phone list/lead list . Leads list should be in the basic text pipe-delimited or tab-delimited format or CSV file or a simple Excel spreadsheet file. For We will use the tab-delimited text file. A tab-delimited or pipe delimited text file must end with “.txt”, a CSV(Comma Separated Values) file must end with “.csv” and an Excel file must end with “.xls”. The format of this lead file is: 1. Vendor Lead Code - shows up in the Vendor ID field of the GUI 2. Source Code - internal use only for system and database administrators 3. List ID - the list number that these leads will show up under 4. Phone Code - the country code prefix - 1 for US, 44 for UK, 61 for AUS,etc 5. Phone Number - at least 8 digits long and no more than 11 digits long. 6. Title - title of the customer - Mr. Ms. Mrs, etc... 7. First Name 8. Middle Initial 9. Last Name 10. Address Line 1 11. Address Line 2 12. Address Line 3 13. City 14. State - limited to 2 characters 15. Province 16. Postal Code 17. Country 18. Gender 19. Date of Birth 20. Alternate Phone Number 21. Email Address 22. Security Phrase 23. Comments For Example:
IMPORTING/UPLOADING LEAD LIST • Click on the “Lists” on Left side then click on “Load New Leads”. Use the Browse button to upload the lead list. If you want to override the List ID or the phone code given in the Lead List, enter them here as shown above. • Press the “SUBMIT” button
CAMPAIGN WITH LEADS COUNT Click on the “Campaign” then MYCAMP, it will show no of leads loaded in the campaign. It says the campaign has 24 leads to be dialed .Now our agent can log-in and start making call.
IN Red Highlighted Place We have to Enter the Agents Phone Login & Phone Password Agent Login Screen
After Phone Login Screen we get this screen . IN RED Highlighted Area We have to give the User Login Details. As Shown in the Picture And also need to Choose the CAMPAIGN From the Campaign List Which also Highlighted in RED Then Click on SUBMIT Button. CAMPAIGN & USER LOGIN
AGENT CRM This is the agent screen. This is where agent sees the call information make call and dispose call. After login agent will receive a call from the server to login, (agent has to accept the call to to login) If the mode of dial is predictive then you will see two buttons under Status (top left corner). Click on Resume button to start receiving the calls. If the agent wants to stop receiving calls click on Pause button. At any given time agent can click on any one of these buttons
After receiving the call agent screen appears like this. On the top right corner agent sees a ‘LIVE CALL’ in green color. Agent can see all the information related to the call on the screen. After completing the call Click on the HANGUP CUSTOMER to hangup the call. Agent CRM With Customer Information
Agent can transfer the call to verifier (Closer) or to an external number or but the customer on hold and dial 3rd party and have conference. And many more combination are possible. To do call conference/transfer Click on ‘ TRANSFER – CONF’. To send the call to closer click on ‘INTERNAL CLOSER’. To dial 3rd party number enter the number in ‘NUMBER TO CALL’ and click ‘DIAL WITH CUSTOMER’ to have 3 way conference or click on ‘PARK CUSTOMER DIAL’ to put the customer on hold and dial after the call in established agent can bring the customer into conference by clicking on the same button again. Agent CRM with Call Transfer Facility
After the ‘HANGUP CUSTOMER’ button is pressed agent will be asked to select the disposition of the call. Disposition List Screen
To make calls manually click on MANUAL CALL link. You will see a window asking you to enter the number to be dialed. Enter the phone number in the Phone Number text field. If the country you are dialing is other then US then change the number in the Dial Code accordingly. MANUAL DIAL
FEATURES • MAJOR POWERDIAL FEATURES: • Inbound, Outbound and Blended call handling • Outbound agent-controlled, broadcast and predictive dialing • Web-based agent and administrative interfaces • Integrated call recording • Three-Way calling within the agent application • Scheduled Callbacks: Agent-Only and Anyone • Scalable to hundreds of seats • Ability to use standard Telco lines and VOIP trunks
FULL FEATURES Full Features List: • Ability to display a script for the agent to read with fields like name, address, etc. filled-in • Ability to dial predictively in a campaign with an adaptive dialing algorithm • Ability to dial on a single campaign across multiple Asterisk servers, or multiple campaigns on a single server • Ability to transfer calls with customer data to a closer on the local system • Ability to open a custom web page with user data from the call, per campaign • Ability to park the customer with custom music per campaign • Ability to send a dropped call to a voicemail box per campaign if no agent is available • Ability to set outbound CallerID per campaign • Ability to take inbound calls grabbing CallerID • Ability to function as an ACD for inbound and fronter/closer verification calls • Ability to have an agent take both inbound and outbound calls in one session(blended) • Ability to start and stop recording an agent's calls at any time • Ability to automatically record all calls • Ability to schedule a callback with a customer as either any-agent or agent-specific • Ability in Manual dial mode to preview leads before dialing • Definable Agent Wrapup-time per campaign • Recycling of Busy calls at a specified interval without resetting a list • Dialing with custom TimeZone restrictions including per state and per day-of-the-week • Dialing with Answering Machine Detection, also playing a message for AM calls • Multiple campaigns and lead-lists are possible • Internal DNC list can optionally be activated per campaign • All calls are logged and statuses of calls are logged as well as agent time breakdowns • Load Balancing across multiple inbound or outbound Asterisk servers is possible • Several real-time and summary reports available • 3rd party conferencing(with DTMF macros and number presets) • Skills-based ranking and call routing per inbound group and campaign • Ability to set user levels and permissions for certain features and campaigns • Ability for managers to listen-in on agent conversations • Ability for agents to select a Pause Code when they are not active • Ability for agents to control volume levels and mute themselves • Option of a drop timer with safe-harbor message for FTC compliance
Hardware Requirement For Dialer Minimum System Requirement for Dialer Branded Server with 4GB RAM and 250GB SATA(SAS) Hard Disk Dual Lan cards, compliance for Fedora Core 8/9 with DVD Drive 2MBPS Leased Line ( 1:1 Standard ) CONCLUSION • A POWERDIAL administrator should only add, modify or delete users, campaign, list and other items • The Administrator should provide each agent with the relevant information for login to the Agent interface • An Agent should never hang up his phone while login to any campaign. • He should always logout properly from the system