Download
1 / 1
10 likes | 17 Vues
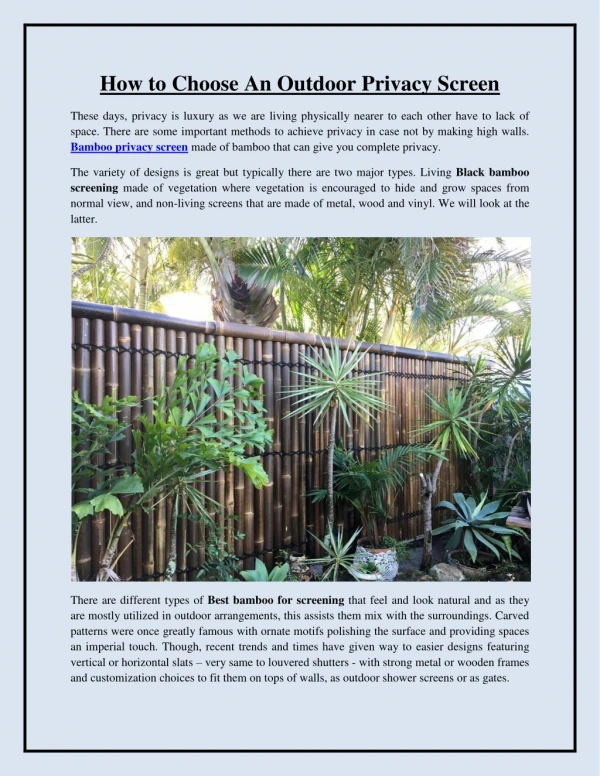
You can simply separate spaces within your backyard by building an outdoor privacy screen.

E N D
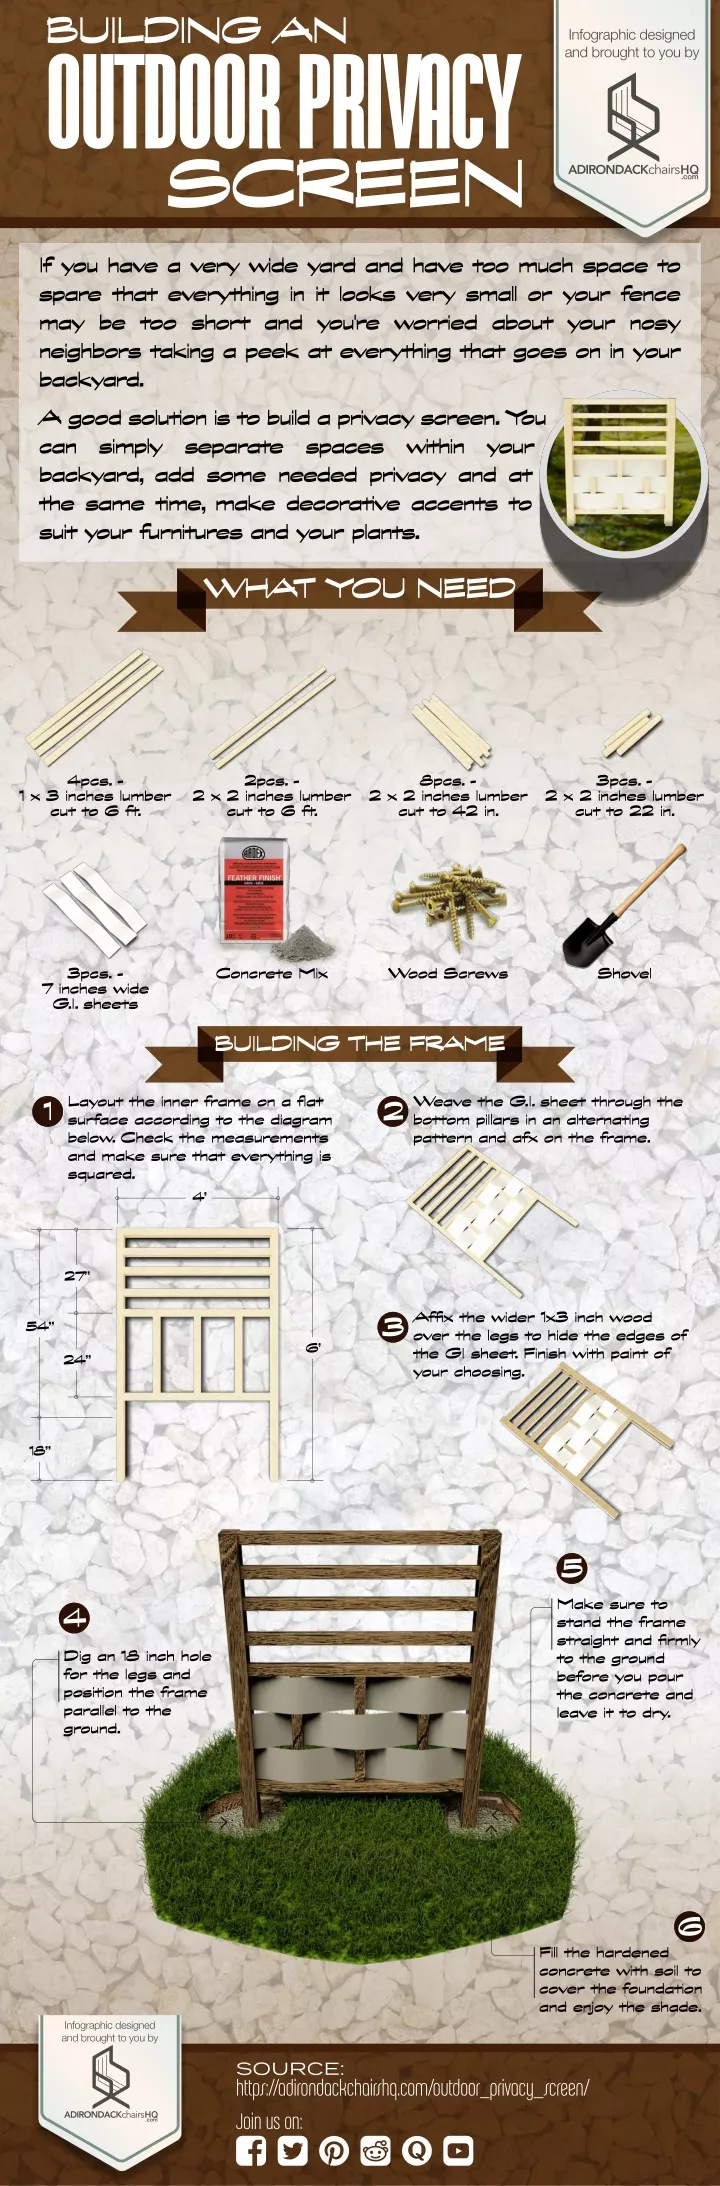
BUILDING AN Infographic designed and brought to you by OUTDOOR PRIVACY SCREEN If you have a very wide yard and have too much space to spare that everything in it looks very small or your fence may be too short and you're worried about your nosy neighbors taking a peek at everything that goes on in your backyard. A good solution is to build a privacy screen. Y ou can simply separate spaces within your backyard, add some needed privacy and at the same time, make decorative accents to suit your furnitures and your plants. WHAT YOU NEED 4pcs. - 2pcs. - 8pcs. - 3pcs. - 1 x 3 inches lumber cut to 6 ft. 2 x 2 inches lumber cut to 6 ft. 2 x 2 inches lumber cut to 42 in. 2 x 2 inches lumber cut to 22 in. 3pcs. - 7 inches wide G.I. sheets Concrete Mix Wood Screws Shovel BUILDING THE FRAME Layout the inner frame on a fat surface according to the diagram below. Check the measurements and make sure that everything is squared. 4’ Weave the G.I. sheet through the bottom pillars in an alternating pattern and afx on the frame. 1 2 27” Affx the wider 1x3 inch wood over the legs to hide the edges of the GI sheet. Finish with paint of your choosing. 3 54” 6’ 24” 18” 5 Make sure to stand the frame straight and frmly to the ground before you pour the concrete and leave it to dry. 4 Dig an 18 inch hole for the legs and position the frame parallel to the ground. 6 Fill the hardened concrete with soil to cover the foundation and enjoy the shade. Infographic designed and brought to you by SOURCE: https://adirondackchairshq.com/outdoor_privacy_screen/ Join us on: