Download

1 / 40
610 likes | 914 Vues
Android Development. http://www.mymultimediaworld.com/files/teaching/android. GABRIELLI Adrian PREDA Marius. Overview. Introduction Timeline Basics Activity lifecycle ADT/Eclipse IDE Install and Configure Emulators, APIs, debugger Project Structure ex1: Hello World GUI

E N D
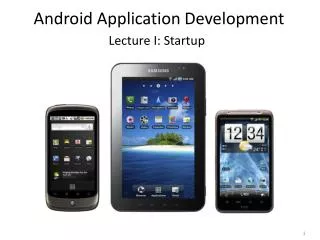
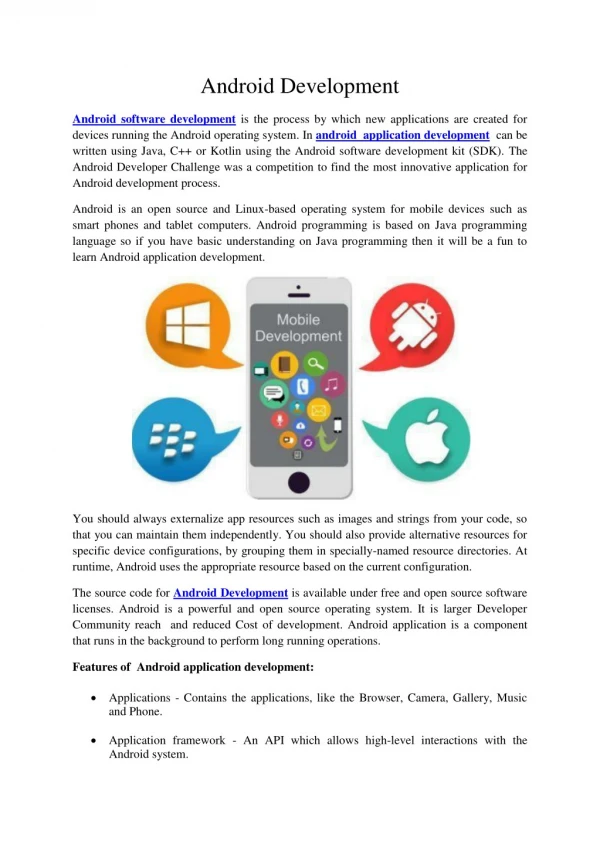
Android Development http://www.mymultimediaworld.com/files/teaching/android GABRIELLI Adrian PREDA Marius
Overview • Introduction • Timeline • Basics • Activity lifecycle • ADT/Eclipse IDE • Install and Configure • Emulators, APIs, debugger • Project Structure • ex1: Hello World • GUI • Colors and Fonts • Action Bar • Menu Bar • Activities • Exercise 2 • Fragments • Touch and Camera
Timeline …………………………………………………………………………………….. ……………………………………………………………………………………..
Basicslinks • http://developer.android.com • http://developer.android.com/sdk/index.html • http://developer.android.com/guide/components/index.html • http://developer.android.com/reference/packages.html • http://developer.android.com/training/index.html • http://www.vogella.com/android.html
BasicsKeywords • Activity • Service • Content Provider • Broadcast receiver • Intent • Manifest File • Layout • Resource • Device • Emulator • Screen size • Display density
BasicsManifest File <?xml version="1.0" encoding="utf-8"?> <manifest xmlns:android="http://schemas.android.com/apk/res/android" package="com.example.helloworld" android:versionCode="1" android:versionName="1.0" > <uses-sdk android:minSdkVersion="8" android:targetSdkVersion="17" /> <application android:allowBackup="true" android:icon="@drawable/ic_launcher" android:label="@string/app_name" android:theme="@style/AppTheme" > <activity android:name="com.example.helloworld.MainActivity" android:label="@string/app_name" > <intent-filter> <action android:name="android.intent.action.MAIN" /> <category android:name="android.intent.category.LAUNCHER" /> </intent-filter> </activity> </application> </manifest>
BasicsLayout <RelativeLayout xmlns:android="http://schemas.android.com/apk/res/android" xmlns:tools="http://schemas.android.com/tools" android:layout_width="match_parent" android:layout_height="match_parent" android:paddingBottom="@dimen/activity_vertical_margin" android:paddingLeft="@dimen/activity_horizontal_margin" android:paddingRight="@dimen/activity_horizontal_margin" android:paddingTop="@dimen/activity_vertical_margin" tools:context=".MainActivity" > <TextView android:layout_width="wrap_content" android:layout_height="wrap_content" android:text="@string/hello_world" /> </RelativeLayout>
Install and configure ADT http://developer.android.com/sdk/index.html
Emulators, APIs, debugger !!! adb kill-server;adb start-server !!!
Project Structure <resources_name>-<config_qualifier> http://developer.android.com/guide/topics/resources/providing-resources.html#table2
Exercise 1Hello World! • Task: Create a Hello World application • TextField: “Hello World” • Add a button below the text • Set the text of the button • On button click change “Hello World” to “Goodbye world!” • When in landscape layout, the place the button to the right of the text • !!!State not saved between reorientations!!! • android:configChanges="orientation|screenSize“ • application class; global variable • public Object onRetainNonConfigurationInstance() • getLastNonConfigurationInstance() • setRetainInstance() -- Fragments
GUIColors and Fonts <Button android:id="@+id/button1" android:layout_width="wrap_content" android:layout_height="wrap_content" android:layout_below="@id/textView1" android:layout_marginTop="75dp" android:layout_toRightOf="@id/textView1" android:onClick="changeText" android:typeface="serif" android:fontFamily="sans-serif-thin" android:background="@drawable/ic_launcher" android:text="@string/Button" /> <Button android:id="@+id/button2" android:layout_width="wrap_content" android:layout_height="wrap_content" android:layout_below="@id/button1" android:layout_marginTop="75dp" android:layout_toRightOf="@id/button1" android:onClick="changeText“ android:background="@color/black" android:textColor="@color/red" android:text="@string/Button" />
GUIAction Bar Is default in Android 3.0 or higher (API level >= 11) <menu xmlns:android="http://schemas.android.com/apk/res/android" > <!-- Search, should appear as action button --> <item android:id="@+id/action_search" android:icon="@drawable/ic_action_search" android:title="@string/action_search" android:showAsAction="ifRoom" /> <!-- Settings, should always be in the overflow --> <item android:id="@+id/action_settings" android:title="@string/action_settings" android:showAsAction="never" /></menu>
GUIAction Bar - Up <application ... > ... <activity android:name="com.example.myfirstapp.MainActivity" ...> ... </activity> <activity … android:parentActivityName="com.example.myfirstapp.MainActivity" > <meta-data android:name="android.support.PARENT_ACTIVITY" android:value="com.example.myfirstapp.MainActivity" /> </activity></application> @Overridepublic void onCreate(Bundle savedInstanceState) { … getActionBar().setDisplayHomeAsUpEnabled(true); //getSupportActionBar().setDisplayHomeAsUpEnabled(true); }
GUIMenu Bar <menu xmlns:android="http://schemas.android.com/apk/res/android" > <item android:id="@+id/action_settings" android:orderInCategory="100" android:showAsAction="never" android:title="@string/action_settings"/> </menu> @Overridepublic boolean onOptionsItemSelected(MenuItem item) { switch (item.getItemId()) { case: …. …. case: …. …. default: return super.onOptionsItemSelected(item); }}
Activities <activity android:name=".MainActivity" android:label="@string/app_name"> <intent-filter> <action android:name="android.intent.action.MAIN" /> <category android:name="android.intent.category.LAUNCHER" /> </intent-filter></activity>
Activities @Overridepublic void onSaveInstanceState(Bundle savedInstanceState) { // Save the user's current activity state ………………………………… // Always call the superclass so it can save the view hierarchy state super.onSaveInstanceState(savedInstanceState);} @Override public void onRestoreInstanceState(Bundle savedInstanceState) { // Always call the superclass so it can restore the view hierarchy super.onRestoreInstanceState(savedInstanceState); // Restore state members from saved instance ………………………………… }
Exercise 2extending Hello world! • Task 1: Add Style • Create another button below the first button only for the portrait orientation • Add background image and set a text color for the first button • Add a background color and change the font style for the second button • Task 2: Add Functionality • Create another activity with only a TextView • Implement the Up button • Remove the settings menu • Add a “Exit” menu to both activities • Add “Toggle Font” menu to the new activity: • Switches between Bold and Normal text in the TextView Intent intent = new Intent(this, com.example.helloworld.SecondActivity.class) startActivity(intent); Intent intent = new Intent(Intent.ACTION_MAIN); intent.addCategory(Intent.CATEGORY_HOME); intent.setFlags(Intent.FLAG_ACTIVITY_NEW_TASK); startActivity(intent);
Fragments <LinearLayout xmlns:android="http://schemas.android.com/apk/res/android" android:orientation="horizontal" android:layout_width="fill_parent" android:layout_height="fill_parent"> <fragment android:name="com.example.android.fragments.ArticleFragment" android:id="@+id/article_view" android:layout_weight="2" android:layout_width="0dp" android:layout_height="match_parent" /></LinearLayout>
Fragments public class ArticleFragment extends Fragment { @Override public View onCreateView(LayoutInflater inflater, ViewGroup container, Bundle savedInstanceState) { // Inflate the layout for this fragment return inflater.inflate(R.layout.article_view, container, false); }} FragmentManager fragmentManager = getFragmentManager() FragmentTransaction fragmentTransaction = fragmentManager.beginTransaction(); ExampleFragment fragment = new ExampleFragment();fragmentTransaction.add(R.id.fragment_container, fragment); //fragmentTransaction.addToBackStack(null); fragmentTransaction.commit();
Exercise 3RSSReader • Download and run FragmentExercise application • Add the details fragment for the portrait orientation • Change the program so you use only dynamic fragments • Add a fragment to the bottom displaying the logo • Add transition animation to fragments FragmentTransaction transaction = getFragmentManager().beginTransaction(); getFragmentManager().findFragmentByTag("details"); transaction.replace(R.id.portraitLayout, fragment, "details"); http://developer.android.com/reference/ -> setCustomAnimations(int, int, int, int)
Files <uses-permission android:name="android.permission.WRITE_EXTERNAL_STORAGE" /> <uses-permission android:name="android.permission.READ_EXTERNAL_STORAGE" /> File file = new File(context.getFilesDir(), filename); String filename = "myfile";String string = "Hello world!";FileOutputStreamoutputStream = openFileOutput(filename, Context.MODE_PRIVATE);outputStream.write(string.getBytes());outputStream.close();
MediaAudio MediaPlayermediaPlayer = MediaPlayer.create(context, R.raw.sound_file_1);mediaPlayer.start(); Uri myUri = ....; // initialize Uri hereMediaPlayermediaPlayer = new MediaPlayer();mediaPlayer.setAudioStreamType(AudioManager.STREAM_MUSIC);mediaPlayer.setDataSource(getApplicationContext(), myUri);mediaPlayer.prepare();mediaPlayer.start();
MediaVideo <VideoView android:id="@+id/videoview" android:layout_width="fill_parent" android:layout_height="wrap_content" /> VideoView mVideoView = (VideoView)findViewById(R.id.videoview); String uriPath = "android.resource://com.android.AndroidVideoPlayer/"+R.raw.k; Uri uri = Uri.parse(uriPath); mVideoView.setVideoURI(uri); mVideoView.requestFocus(); mVideoView.start();
User Interaction @Override public boolean onTouchEvent(MotionEvent event) { float x = event.getX(); float y = event.getY(); switch (event.getAction()) { case MotionEvent.ACTION_DOWN: touch_start(x, y); invalidate(); break; case MotionEvent.ACTION_MOVE: touch_move(x, y); invalidate(); break; case MotionEvent.ACTION_UP: touch_up(x,y); invalidate(); break; } return true; } • implements onClickListener • implements onTouchListener • implements onGestureListener ………… • view.setOnTouchListener …………
Camera <uses-feature android:name="android.hardware.camera" android:required="true" /> Intent intent = new Intent(MediaStore.ACTION_IMAGE_CAPTURE); intent.putExtra(MediaStore.EXTRA_OUTPUT, outputFileUri); startActivityForResult(intent, CAPTURE_IMAGE_ACTIVITY_REQUEST_CODE); @Override protected void onActivityResult(int requestCode, int resultCode, Intent data) { if (requestCode == CAPTURE_IMAGE_ACTIVITY_REQUEST_CODE) { if (resultCode == RESULT_OK) { // Image captured and saved to fileUri specified in the Intent } else if (resultCode == RESULT_CANCELED) { // User cancelled the image capture } else { // Image capture failed, advise user } }
Exercise 4 • Create a new Android Application that has the following functionality • When the application starts it shows a splash screen (video) • Then the camera starts • The user takes a picture • Then a game of “Whack-A-mole” starts • the background is the picture previously taken • every 10 seconds the user has a special skill that allows to slash. There is a message that shows when this skill is available (FRAGMENTS!!!) • Every action creates a different sound (mole hit, mole missed, slashing)
Advanced usage • Android Debug Bridge: • Emulator 1, console: 5554Emulator 1, adb: 5555Emulator 2, console: 5556Emulator 2, adb: 5557 • adb [-d|-e|-s <serialNumber>] <command> • adb devices • adb shell : am (activity manager), pm (package manager), screenrecord, logcat • adb install; adb uninstall • adb kill-server; adb start-server • telnet localhost 5554: • issue calls, sms,… • set sensor values (Acceleration, Rotation, Magnetic-Field, …) • set GPS values
Sensors and location <uses-permission android:name="com.google.android.providers.gsf.permission.READ_GSERVICES" /> <uses-permission android:name="android.permission.ACCESS_COARSE_LOCATION" /> <uses-permission android:name="android.permission.ACCESS_FINE_LOCATION" /> <uses-permission android:name="com.vogella.android.locationapi.maps.permission.MAPS_RECEIVE" /> <uses-permission android:name="android.permission.INTERNET" /> <uses-permission android:name="android.permission.WRITE_EXTERNAL_STORAGE" />
Sensors and location implements LocationListener locationManager = (LocationManager) getSystemService(Context.LOCATION_SERVICE); Criteria criteria = new Criteria(); provider = locationManager.getBestProvider(criteria, false); Location location = locationManager.getLastKnownLocation(provider); @Override public void onLocationChanged(Location location) { int lat = (int) (location.getLatitude()); int lng = (int) (location.getLongitude()); latituteField.setText(String.valueOf(lat)); longitudeField.setText(String.valueOf(lng)); } @Override protected void onResume() { super.onResume(); locationManager.requestLocationUpdates(provider, 400, 1, this); } @Override protected void onPause() { super.onPause(); locationManager.removeUpdates(this); }
Sensors and location implements SensorEventListener sensorManager = (SensorManager) getSystemService(SENSOR_SERVICE); @Override public void onSensorChanged(SensorEvent event) { if (event.sensor.getType() == Sensor.TYPE_ACCELEROMETER) { Log.d("accelerometer", "moved!"); x_acc.setText(Float.toString(event.values[0])); } @Override protected void onResume() { super.onResume(); sensorManager.registerListener(this, sensorManager.getDefaultSensor(Sensor.TYPE_ACCELEROMETER), SensorManager.SENSOR_DELAY_NORMAL); sensorManager.registerListener(this, sensorManager.getDefaultSensor(Sensor.TYPE_MAGNETIC_FIELD), SensorManager.SENSOR_DELAY_NORMAL); } @Override protected void onPause() { super.onPause(); locationManager.removeUpdates(this); sensorManager.unregisterListener(this); }
MAPS • SDK Manager → Extras → Google Play services → add library to project • keytool -list -v -alias androiddebugkey \ -keystore <path_to_debug_keystore>debug.keystore \ -storepass android -keypass android • https://code.google.com/apis/console/ • <uses-permission • android:name="com.vogella.android.locationapi.maps.permission.MAPS_RECEIVE" /> • <uses-permission • android:name="android.permission.INTERNET" /> • <uses-permission • android:name="android.permission.WRITE_EXTERNAL_STORAGE" /> • <uses-permission • android:name="com.google.android.providers.gsf.permission.READ_GSERVICES" /> • <uses-permission • android:name="android.permission.ACCESS_COARSE_LOCATION" /> • <uses-permission • android:name="android.permission.ACCESS_FINE_LOCATION" /> • <meta-data • android:name="com.google.android.maps.v2.API_KEY" • android:value="your_apikey" />
MAPS <fragment xmlns:android="http://schemas.android.com/apk/res/android" android:id="@+id/map" android:layout_width="match_parent" android:layout_height="match_parent" class="com.google.android.gms.maps.MapFragment" /> map = ((MapFragment) getFragmentManager().findFragmentById(R.id.map)).getMap(); LatLng NIMES = new LatLng(43.821, 4.368) map.addMarker(new MarkerOptions().position(NIMES).title("Nimes")) map.moveCamera(CameraUpdateFactory.newLatLngZoom(NIMES, 15)) map.animateCamera(CameraUpdateFactory.zoomTo(10), 2000, null);
Exercise 5 • Create a new Android Application that has the following functionality • Uses google maps • Draws a path based on where the user has traveled • map.addPolyline(new PolylineOptions() .add(new LatLng(51.5, -0.1), new LatLng(40.7, -74.0)) .width(5) .color(Color.RED)); • The phone makes a sound when the user crosses an existing path • The phone vibrates when the user crosses an existing path • <uses-permission android:name="android.permission.VIBRATE"/> • import android.os.Vibrator; • Vibrator v = (Vibrator) this.context.getSystemService(Context.VIBRATOR_SERVICE); • v.vibrate(500); • Create .apk file • Install the apk file with the adb install command