Download
1 / 30
300 likes | 972 Vues
Computer Applications Week 2 Introduction Unit to PowerPoint,Word and Internet Research Agenda Keyboarding Practice (15 min) Internet Research Parts of the computer Unit Objectives Learn about key components of the computer. Use tables and basic formatting in Word

E N D
Computer Applications Week 2 Introduction Unit to PowerPoint,Word and Internet Research
Agenda • Keyboarding Practice (15 min) • Internet Research • Parts of the computer
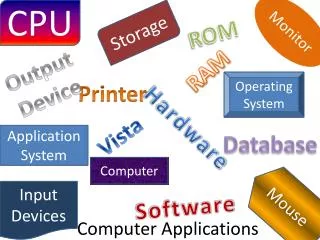
Unit Objectives • Learn about key components of the computer. • Use tables and basic formatting in Word • Use pictures, text and AutoShapes in Powerpoint. • Use the internet as a research tool.
Key Assignments • Internet research for Computer Terms • One Picture Presentation -Computer (Partners) One Picture Presentation- Choose Your Own (Individual)
Internet Research for Computer Terms • Pick Partner • Researcher- Uses Internet to find definitions of key computer terms. • Recorder- Uses Word to record definitions.
Internet Research for Computer Terms • Template is on the Desktop • Definitions must be complete, clear sentences. • Save in your server file. SAVE AS: 1 lastname lastname • Email as an attachment to Mr. Jacobson
Demonstrations • How to save to server file • How to use google toolbar • How to email with attachment to Mr. Jacobson and your partner.
Simple Dialog Box Expands Dialog Box
Check Filename Select your ID number Hit Save
Get to Work Work is due at the end of the period Next Time: We will use these definitions to make a power point presentation. Make sure you have a copy!
WARM UP- Quick Questions about Definitions • Which of the terms store memory? • Write a sentence that connects the meanings of at least three of the definitions.
Week 2 Day 2 • Review- last time you researched with yourb partner and made a Word document summarizing your research. • Today- You will use the definitions to do a “One Picture Presentation”
Sending Email as Attachment • Login in to the email. • Create a new message • Clicking the “paper with pencil”
Sending Email as Attachment • In the TO: line put jjacobson@lbusd.k12.ca.us • In the subject line: # last names example 1 smith carrera • In the CC line: Partners ID# (Why put your partners ID?)
Sending Email as Attachment • Hit “Add” button • Hit “OK” • Hit “Send” button • Click the attach button (Find file to attach) • Hit “Choose File” button Select your document
One Picture Presentation- Background • In PowerPoint, more pictures does not always mean, better presentation. • The audience’s attention can be unfocused and the communication becomes unclear. • One picture, that does not move from slide to slide allows audience to have an anchor.
One Picture Presentation • Allows the audience to understand relationship between “whole” and “parts” • Picture does not move from slide to slide • Arrows and text change to control the focus of the audience
One Picture Presentation- Demo • Watch the demo first • Take notes second- the details are what your grade will be based upon. • Notes are available online. • You will be doing this technique on your own (for a project grade) so take good notes.
One Picture Presentation-Notes Find a Picture of a computer • In web browser, find a nice picture or drawing of a computer. • Be sure the picture is high quality, and shows most of the definitions in your list. • Save the image to the local desktop or to your file server. • Drag and Drop • Copy and Paste
One Picture Presentation-Notes • Open Powerpoint • Make New Document (APPLE N) • Use Title slide for first slide • Put appropriate title and name
One Picture Presentation- Notes • Second Slide is most important • Blank Slide • Insert Picture • (INSERT-PICTURE-FROM FILE) • Insert 2 Text boxes • Insert 1 Arrow DUPLICATE THIS SLIDE 7 TIMES (APPLE D)
Get to work Get Notes Get Computer Picture Start Powerpoint presentation
End of Day 2 • Email your presentation by the end of the day. • Keep your notes handy for next time.
Week 2 Day 3 • First Project Grade: One Picture Presentation: Pick your own picture
Last Time • One Picture Presentation allows audience to understand the relationship between the whole and its parts. • You created a presentation with your partner. • You took good notes.
Today is a little different • Your will not have a partner • You will pick your own picture • Very important: pick a picture that has the whole to parts relationship • Each slide needs a term and a “definition” in the form of a complete sentence.
Mr. Jacobson’s examples • Bad Example • Good Example
Get to work • Find a picture • Create a list of items in the picture (at least 7) • Create a sentence that describes each item.