Download
1 / 49
520 likes | 710 Vues
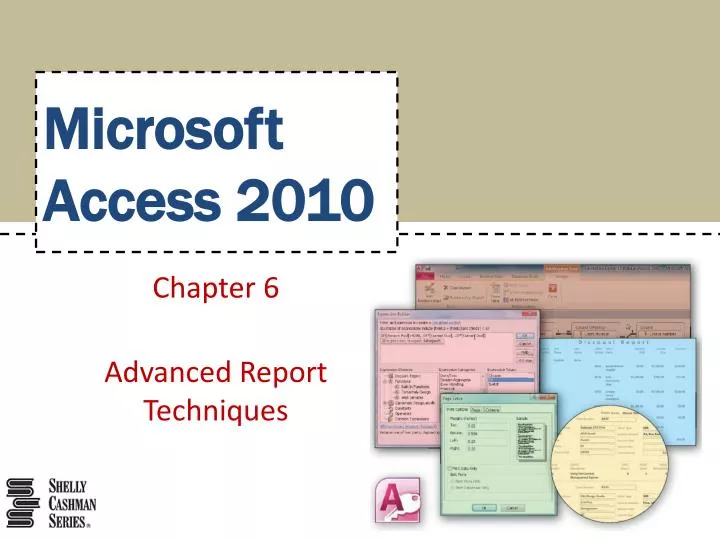
Microsoft Access 2010. Chapter 6 Advanced Report Techniques. Objectives. Create and relate additional tables Create queries for reports Create reports in Design view Add fields and text boxes to a report Format report controls Group and ungroup report controls

E N D
MicrosoftAccess 2010 Chapter 6 Advanced Report Techniques
Objectives • Create and relate additional tables • Create queries for reports • Create reports in Design view • Add fields and text boxes to a report • Format report controls • Group and ungroup report controls • Update multiple report controls Advanced Report Techniques
Objectives • Add and modify a subreport • Modify section properties • Add a title, page number, and date • Preview, print, and publish a report • Add totals and subtotals • Include a conditional value in a report Advanced Report Techniques
Project – Advanced Report Techniques Advanced Report Techniques
General Project Guidelines • Determine the intended audience and purpose of the report • Determine the source of data for the report • Determine the fields that belong on the report • Determine the organization of the report • Determine any calculations required for the report • Determine the format and style of the report Advanced Report Techniques
Relating Several Tables • Click the Relationships button (Database Tools tab | Relationships group) to open the Relationships window • Click the Show Table button (Relationship Tools Design tab | Relationships group) to display the Show Table dialog box • Click each table to add, clicking the Add button after each table, and then click the Close button • Drag the primary key from one table to the same field in the related table • If desired, click the Enforce Referential Integrity check box • Click the create button to create the relationship • Click the Save button to save the changes and then click the Close button (Relationship Tools Design tab | Relationships group) Advanced Report Techniques
Relating Several Tables Advanced Report Techniques
Creating an Initial Report in Design View • Click the Report Design button (Create tab | Reports group) to create a report in Design view • Ensure the selector for the entire report, the box in the upper-left corner of the report, is selected • Click the Property Sheet button (Report Design Tools Design tab | Tools group) to display a property sheet • With the All tab (Property Sheet) selected, click the Record Source property box arrow to display the list of available tables and queries • Click the desired table or query to use as the record source for the report • Close the property sheet by clicking the Property Sheet button (Report Design Tools Design tab | Tools group) Advanced Report Techniques
Creating an Initial Report in Design View • Click the Group & Sort button (Report Design Tools Design tab | Grouping & Totals group) to display the Group, Sort, and Total pane • Click the ‘Add a group’ button to display the list of available fields for grouping • Click the field to group by • Click the ‘Add a sort’ button to display the list of available fields for sorting • Click the field to sort by Advanced Report Techniques
Creating an Initial Report in Design View Advanced Report Techniques
Adding Fields to the Report in Design View • Click the Add Existing Fields button (Report Design Tools Design tab | Tools group) to display a field list • Drag the field to add from the field list to the desired location • Adjust the positions of the labels to their desired location(s). To move the control or the attached label separately, drag the large handle in the upper-left corner of the control or label. You can align controls using the Align button (Report Design Tools Arrange tab | Sizing & Ordering group) or adjust spacing by using the Size/Space button (Report Design Tools Arrange tab | Sizing & Ordering group) Advanced Report Techniques
Adding Fields to the Report in Design View Advanced Report Techniques
Changing Labels • Click the label to change two times • Erase the current entry and type the new entry Advanced Report Techniques
Adding Text Boxes • Click the Text Box tool (Report Design Tools Design tab | Controls group) and move the pointer to the desired position • Click in the text box to produce an insertion point • In the text box, type the desired expression • Click in the text box label to select the label and then click the label a second time to produce an insertion point • Type the desired text box label text • Move the text box and label to the desired location Advanced Report Techniques
Adding Text Boxes Advanced Report Techniques
Viewing the Report in Print Preview • Click the View button arrow (Report Design Tools Design tab | Views group) to produce the View button menu • Click Print Preview on the View button menu to view the report in Print Preview Advanced Report Techniques
Formatting a Control • Click the control to format, and then click the Property Sheet button (Report Design Tools Design tab | Tools group) to display the property sheet • If necessary, click the All tab • Set the desired properties in the property sheet • Remove the property sheet by clicking the Property Sheet button (Report Design Tools Design tab | Tools group) a second time Advanced Report Techniques
Formatting a Control Advanced Report Techniques
Grouping Controls • Select the controls to group • Click the Size/Space button (Report Design Tools Arrange tab | Sizing & Ordering group) to display the Size/Space button menu • Click Group on the Size/Space button menu to group the controls Advanced Report Techniques
Grouping Controls Advanced Report Techniques
Modifying Grouped and Non-grouped Controls • To modify grouped controls, click any one of the grouped controls to select the group, and then modify the properties in the property sheet • To modify controls that are not grouped, select each control first, and then modify the properties in the property sheet Advanced Report Techniques
Adding a Subreport • Click the More button (Report Design Tools Design tab | Controls group) to display a menu of available tools • Be sure the Use Control Wizards button is selected, click the Subform/Subreporttool, and then click the mouse in the desired location for the subreportand display the SubReportWizard dialog box. Be sure the ‘Use existing Tables and Queries’ option button is selected Advanced Report Techniques
Adding a Subreport • Click the Next button • Click the Tables/Queries box arrow • Select the desired table or query for the subreport, and then add the desired fields • Click the Next button and then ensure the ‘Choose from a list’ option button is selected • Click the Next button, type the desired subreport name, and then click the Finish button Advanced Report Techniques
Adding a Subreport Advanced Report Techniques
Opening a Subreport in Design View • Open the Navigation Pane, scroll to the desired report to display, and right-click the report to produce a shortcut menu • Click Design View on the shortcut menu to open the subreport in Design view Advanced Report Techniques
Changing the Can Grow Property • Click the control for which you want to change the Can Grow property • Click the Property Sheet button (Report Design Tools Design tab | Tools group) to display the property sheet • With the All tab selected, scroll down until the Can Grow property appears, and then click the Can Grow property box arrow to display the list of possible values for the Can Grow property • Click Yes in the list to allow the Course Description control to grow as needed Advanced Report Techniques
Changing the Can Grow Property Advanced Report Techniques
Resizing the Subreport and the Report in Design View • Open the report containing the subreport in Design view • Click the subreport and then drag the right sizing handle to change the size to the desired size, and then drag the subreport to the desired location • Scroll down in the main report so that the lower boundary of the Detail section appears, and then drag the lower boundary of the section to the desired location Advanced Report Techniques
Resizing the Subreport and the Report in Design View Advanced Report Techniques
Modifying Section Properties • Click the label for the section to modify, and then press the DELETE key to delete the label • Click the Header bar to select the header, and then click the Property Sheet button (Report Design Tools Design tab | Tools group) to display the property sheet • Make the desired modifications in the property sheet Advanced Report Techniques
Modifying Section Properties Advanced Report Techniques
Adding a Title, Page Number, and Date • Display the Design tab, and then click the Title button (Report Design Tools Design tab | Header/Footer group) to add a title • Click the Page Numbers button (Report Design Tools Design tab | Header/Footer group) to display the Page Numbers dialog box • Click the desired format and position • Select the desired alignment, and whether you want the number on the first page • Click the OK button Advanced Report Techniques
Adding a Title, Page Number, and Date • Click the Date and Time button (Report Design Tools Design tab | Header/Footer group) to display the Date and Time dialog box • Click the desired date format, and select whether to include the time • Click the OK button Advanced Report Techniques
Adding a Title, Page Number, and Date Advanced Report Techniques
Removing the Alternate Color • Right-click the Detail section to produce a shortcut menu • Point to the Alternate Fill/Back Color arrow to produce a color palette • Click None on the color palette to specify that there is to be no alternate color for the selected section Advanced Report Techniques
Removing the Alternate Color Advanced Report Techniques
Adding and Moving Fields in a Report • Click the Add Existing Fields button (Report Design Tools Design tab | Tools group) to display a field list • Drag the field to add from the field list to the desired location Advanced Report Techniques
Resizing the Detail Section • Scroll down so that the lower boundary of the Detail section appears, and then drag the lower boundary of the section to the desired location Advanced Report Techniques
Adding Totals and Subtotals • Click the Group & Sort button (Report Design Tools Design tab | Grouping & Totals group) to display the Group, Sort, and Total pane • Group by the desired field • Click the Text Box tool (Report Design Tools Design tab | Controls group), and then click the desired position for the text box • Click the text box to produce an insertion point • Type the expression calculation for the sum (for example, =Sum([Current Due]) ) and then press the ENTER key Advanced Report Techniques
Adding Totals and Subtotals Advanced Report Techniques
Removing the Color from the Report Header • Click the View button arrow and then click Design View to return to Design view • Right-click the report header to produce a shortcut menu • Point to the Fill/Back Color arrow on the shortcut menu to display a color palette • Click White in the first row, first column to change the background color to white Advanced Report Techniques
Removing the Color from the Report Header Advanced Report Techniques
Assigning a Conditional Value • Click the Text Box tool (Report Design Tools Design tab | Controls group) and click the desired location for the text box • Click the text box to select it, and then click the Property Sheet button (Report Design Tools Design tab | Tools group) to display a property sheet • Click the Control Source property to select it Advanced Report Techniques
Assigning a Conditional Value • Click the Build button to display the Expression Builder dialog box • Double-click Functions in the first column to display the function subfolders • Click Built-In Functions in the first column to display the various function categories in the second column • Scroll down in the second column so that Program Flow appears, and then click Program Flow to display the available program flow functions in the third column • Double-click IIf in the third column to select the IIf function Advanced Report Techniques
Assigning a Conditional Value • Click the <expression> argument to select it and type the desired expression (condition) (for example, [Amount Paid]>4000 ) • Click the <truepart> argument to select it and type the desired truepart (for example, .04*[Current Due] ) • Click the <falsepart> argument to select it and type the desired falsepart (for example, .02*[Current Due] ) • Click the OK button to specify the expression as the control source for the text box Advanced Report Techniques
Assigning a Conditional Value Advanced Report Techniques
Chapter Summary • Create and relate additional tables • Create queries for reports • Create reports in Design view • Add fields and text boxes to a report • Format report controls • Group and ungroup report controls • Update multiple report controls Advanced Report Techniques
Chapter Summary • Add and modify a subreport • Modify section properties • Add a title, page number, and date • Preview, print, and publish a report • Add totals and subtotals • Include a conditional value in a report Advanced Report Techniques
MicrosoftAccess 2010 Chapter 6 Complete