Download
1 / 45
770 likes | 1.7k Vues
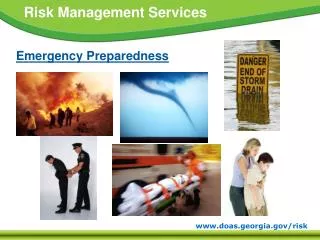
Emergency Preparedness & Evacuation Drill. Emergency Planning. Tuesday, March 24 Morning: Classroom Instruction Afternoon: Pre-drill Surveys & Drill Planning Wednesday, March 25 Morning: Emergency Evacuation Drill Afternoon: Drill Evaluation & Recommendations. Outline.

E N D
Emergency Planning Tuesday, March 24 Morning: Classroom Instruction Afternoon: Pre-drill Surveys & Drill Planning Wednesday, March 25 Morning: Emergency Evacuation Drill Afternoon: Drill Evaluation & Recommendations
Outline • Common Hazards • Emergency Preparedness Cycle • Emergency Action Plan • Drill Planning • Pre-drill Survey
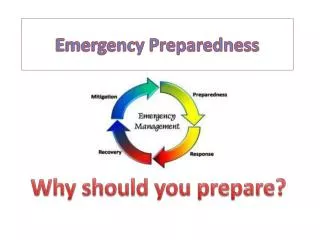
Emergency Preparedness Cycle Evaluation & Improvements Hazard & Vulnerability Surveys Written Plan & Procedures Implementation
Hazard Inventory • Laboratories and shops • Chemical/waste storage rooms • Maintenance facilities • Outside contractors
Written Plans • Emergency Action Plan (EAP) • Standard Operating Procedures (SOP)
Emergency Action Plan (EAP) • Emergency reporting • Evacuation procedures • Alarm system • Communication & training • Plan reviews
Standard Operating Procedures (SOP) • Fire • Chemical spill • Medical emergency • Natural disaster
Implementation • Written EAP & emergency procedures (SOP) • Emergency Management Team • Emergency communication methods • Emergency notification procedures • Available resources • Outside assistance • Post-emergency needs • Training & communication • Exercises & drills
Emergency Management Team(EMT) EMT Executive Public Information Officer Safety Officer Liaison Officer Operations Logistics Planning Finance
Emergency Communications • How will: • emergency response team be activated? • outside help summoned? • students/personnel be notified? • university handle incoming calls? • university inform parents, public, etc? • university handle media?
Emergency Notification • What will you do when you witness these incidents? • A student collapses in a classroom. • An elevator stuck in mid-floor with five students inside. • A stranger screams at you and threatens violence. • A fire in a trash can. • A fire on lab bench, the fire is spreading fast. • A maintenance worker cut off his finger with a table saw.
Emergency Procedures • Procedures for: • Reporting emergencies • Emergency evacuation • Account for all personnel/students • Personnel with duties during emergencies • Contact information
Communication equipment • Telephones • Hand-held radios • Internet • Mass media
Available Resources • Internal resources • Outside assistance • Types of assistance • Memorandum of Agreement (MOA) • Joint drills
Post-emergency • Assess damages: • Data/records, critical equipment, etc • Communications • Mental health counseling • Evaluate response actions
Training • Plan elements • Notification procedures • Emergency contacts • Evacuation procedures • Shelter-in-place/lockdown
Types of Emergency Exercises • Orientation • Drill • Tabletop (TTE or TTX) • Functional • Full Scale
Emergency Evacuation Drill • Announced VS Surprise • Orderly VS Speedy
Drill Objectives Occupants will: • Recognize alarm • Take appropriation actions • Immediately begin evacuation using prescribed exit routes • Provide assistance to visitors or persons having difficulty • Take evasive action when prescribed exit route is unsafe • Report to designated assembly area • Return to building when instructed
Organization Roles & Responsibilities Written procedures Evacuation route map Evacuation hours Pre-drill inspections Drill safety Communication & training Logistics during drill Coordination within facility & w/ outside Drill evaluation Planning an Evacuation Drill
Evacuation Management • Command structure • Chairperson • Command staff: team mobilization, outside notification, crowd control, site control, traffic control, search & rescue, etc • Floor coordinators
Honolulu Community College: Evacuation Drill Management Team Vice Chancellor-Administrative Services Health Nurse Safety Officer Maintenance Supervisor Security Supervisor Deans Evacuation Bldg clearance Site control
Escape Procedures • Classroom procedures • Procedures for offices, etc. • Communication of procedures • Locked exits during weekends
High Rise: Disabled Persons • Designated helpers • Establish procedures
Two-assistant Seat Carry • Helpers Stand on each side of wheelchair. • Helpers grasp each other’s upper arm or shoulder. • Person places arms firm around each helper’s neck. • Helpers lean forward, place arms under person’s legs, firmly holed each other’s wrists. • Working together, helpers lift, using legs, and then carefully stepping forward.
One-person Backpack Lift • Helper kneels at front of person. • Person places arms up and over helper’s shoulders & chest. • Helper leans forward before rising slowly to a full standing position.
Accountability • Designated assembly area • Account by name • Report missing persons • Wait for a clear signal
Re-Entry • Determine authority • Establish communication methods
Building Survey • Number of rooms & usage • Occupants & mobility problems • Evacuation routes • Exits • Alarm systems • Portable fire Extinguishers
Exit Routes: Design & Construction • Fire resistance • Adequate number & width • Clearly visible & marked • Unlocked & unobstructed • Side-hinged, open in direction of travel • Not through high hazard areas • Discharge to outside
Exit Routes: Maintenance • Adequate lighting • “Exit” sign • “Not an Exit” sign • Directional signs • No storage • During renovations
Fire Extinguishers • Policies on evacuation • Total or partial? • Personnel trained?
RISK ASSESSMENT • Fire too big? • Fight: Fire has not spread, flames not higher than your head • Flee: Fire involve flammable solvents, > 60 ft2, partially hidden • Air safe to breathe? • Fight: Adequate oxygen, small quantities of toxic gases • Flee: Need respiratory protection • Too hot or too smoky? • Fight:Temperature raised slightly, good visibility, PPE not needed • Flee: Too hot within 10-15 ft of fire, need to crawl, poor visibility • Safe evacuation path? • Fight: Clear path behind you as fighting fire • Flee: Fire is not contained; fire, heat, smoke may block path
Fire Extinguisher Basics • Fire tetrahedron • How extinguisher works • Types of extinguishers • Using an extinguisher • Monthly inspections
Classification of Fires Class A: Wood, paper, cloth, trash, plastics Class B: Flammable liquids Class C: Energized electrical equipment Class D: Metals (potassium, sodium, etc)
Extinguisher Type Type of Fire A, Water Combustibles (Paper, cloth, wood, rubber, plastics) B, CO2 or Flammable liquids Dry Chemical (Oils, gasoline, grease, solvents) C, CO2 or Electrical Equipment Dry Chemical (Wiring, electrical equipment, computer) A,B,C Combustibles, Flammable Liquids, Multi-purpose Electrical Equipment D Metals (Magnesium, sodium)
Using a Fire Extinguisher • Sound the alarm • Identify evacuation path • P.A.S.S • Back away • Evacuate
P A S S Pull the pin Aim low at the base of flames Squeeze the handle Sweep side to side
Maintenance • Monthly inspection • Location • Pin & tamper seal • Pressure gauge • Nameplate • General condition