Download
1 / 24
240 likes | 260 Vues
<br>hey guys, here is a free mini e-book for you about how you can build anything out of wood <br>

E N D
“ “ how you can build how you can build anything out of wood ” Presented By amro Presented By amro
“ “ how you can build how you can build anything out of wood ” Presented Presented By amro By amro https://tinyurl.com/mk53suj Wooden Storage Shed, You Wooden Storage Shed, You Too Can Build One Too Can Build One Build a Quality Home With These Supreme Build a Quality Home With These Supreme Materials Materials Click here to see this now Click here to see this now
Building Your First Bunk Bed: What Building Your First Bunk Bed: What You Need To Know You Need To Know Every single year over 36,000 people go to the emergency room because of injuries related to bunk beds. I'm not telling you this to scare you away from making or buying a lofted bed. I want you to know that before you build a bunk there are certain precautions you should take to lower your risk of injury or death. Let me tell you my story... A few years ago I wanted to build a high quality, long lasting bunk bed for my two young boys. Since I recently lost my job, our family had almost no money to buy new furniture. Our dwindling funds went toward paying the mortgage, putting food on the table, and keep clothes on our backs. When I told my wife that I was going to build a new piece of furniture for the boys, she thought I was crazy. Rightfully so, she was confused and a little upset. "How can you build a loft bed, when you can't make even minor fixes around the house. I'm sorry to tell you this but you're not really a handy man," said my wife. She was right. I should have avoided the thought completely. But, desperate times call for desperate measures, I thought.
Our boys needed new beds and I would feel even more like a failure if I couldn't even give them a place to sleep. So, I set out on learning the basics of building wooden furniture. To my surprise, the entire process didn't take me that long. To my surprise (and the surprise of my wife and kids) I built a beautiful, safe new loft bed. The truth is, I have a secret to my success.... I used pre-designed, professional made bunk bed plans. They truly helped me finish the job with no injuries, headaches, or wasted hours. If you're planning on building anything out of wood, especially a bunk bed, I cannot tell you how valuable having good designs are. When you have a plan for what you're doing, regardless of your skill level, your journey will be much smoother, and even more fun.
Build a Quality Home With These Build a Quality Home With These Supreme Materials Supreme Materials It is believed that architecture was born almost ten thousand years ago, right after the Ice Age ended when man started looking for ways to build more permanent structures. Anything beats living in caves! This signaled a fundamental shift where the nomadic lifestyle was left behind for small clusters of societies and villages in places where food and water was available in abundance. Mankind's quest for powerful materials to build societies, structures, and cities is a continuing one. Updating of the interior and exterior of older buildings is well under way by reputable general contractors and home remodeling firms for better efficiency. Let's take a look at five ever-lasting building materials that modern humans are still using after all these years. Wood Wood can not only be used as a primary building material, but also in conjunction with other materials. At the time of redecorating your house, it can be used for many purposes range from decoration to actual structures such as decks as well as wood floors that give a home instant appeal. It is also often used for supporting purposes. It is
easy to cut into length, lighter than stone, and once you season it to remove any moisture from it, it is durable and strong. There are some disadvantages of using wood though such as decay, moisture, termites, and sometimes fire. Inspite of all these disadvantages, wood continues to be one of the most used building materials in the world. The oldest building made out of wood is in Japan, which is the Horyu-ji Temple, which was built in the 8th century. Brick Clay is used to manufacture bricks which have been used extensively in many ancient structures like The Great Wall of China. Bricks are tough, fire resistant, weather resistant, and easy to manufacture for remodeling or new construction of homes. They are also very convenient to work with. This building material can be easily manufactured in even and uniform shapes which makes working with bricks simple. Not only homes built with bricks appear beautiful and vintage, but they also stand the test of time. Brick is a solution but remember to discuss your options with the general contractor you hire for your specific job. They should be able to guide you based on requirements and the structure of your home. Stone Stone is one of the most prolific building materials known to humankind and it is still used in construction of new buildings, usually
for esthetic purpose. The problem with using stones to build a home is that stones are extremely heavy which makes it difficult to move around, and they have limitations when it comes to stress and tension. Unlike bricks that require mortar to keep the bricks in place when it comes to stacking, stones can support heavy vertical loads without the need for mortar. If resources are available to excavate stones in large numbers and cut them in precise shapes, using stone as a construction material is very sensible. Stone is fire resistant, weather resistant, and even resists deformation. Some of the most extraordinary structures in the world have been constructed using stones. They are also widely used for decoration. Steel and concrete have dethroned stone though which is still used though for its aesthetic and vintage values. Concrete Concrete is made by mixing stone and sand mixed with binder and water. The resulting mixture is then left to dry. Concrete is usually made on the spot and can be given any shape and form which makes it an ideal replacement for stones and wood. Reinforced concrete was discovered in the 18th century which increased its tensile strength. Used by all remodeling contractors in the USA and areas around the world, rebar reinforcement helps make concrete usable for beams, walls, frames, slabs, foundations, and more.
It is now used to support huge structures made of steel rods and frames. Concrete is used to embed steel frames and rods. In order to increase concrete's water repelling characteristic and reduce its ability to contract and expand, pre-cast concrete is manufactured under extremely controlled environments. Click here to see this now Click here to see this now
Do You Have a Dream of Building a Do You Have a Dream of Building a Sailboat? Sailboat? My wife thinks I tricked her into sailing with me, but she claims she fell in love with sailing first, then she fell in love with me -- on the sailboat! I've been boating myself since I was 16 (which is too long ago to think about) and I remember my father buying my first little sailboat for me -- but I had to pay him back. I learned how to sail in the waters around San Diego -- someplace I also surfed as well. But I never thought I'd be dreaming of the day I could build a sailboat. Being out on the water, whether in the delta or on the ocean is a freeing experience. A little portable music, some cold beer, and spending a clear day burying a rail -- life couldn't get sweeter than that! We sold our little 22 footer sailboat last year because we were paying dock fees for nine years without sailing. Ten years ago we moved 200 miles away from where she was berthed and we just couldn't find the time to get down to her. I was sad to see her go, but, in the back of my mind I was thinking I'd get a bigger boat next time. So I've been thinking about building a sailboat -- now that I have a big enough shop. I've had sailboats all my life and building a sailboat won't be that hard especially with the plans that I found. I've been dreaming of getting back out on the water again -- hey maybe I can get the wife to go! I want to build a sailboat that has a dog house
big enough that we can sleep in, has a miniature refrigerator and maybe a small burner for cooking. Those lazy days back on the delta anchored close in near shore were great for letting the stress drift away on the morning tides. This time I'll build a sailboat that can easily fit on a trailer with a mast that hinges down -- I already have the trailer and since I put a new 5,000 pound axle on her -- she's just waiting for the boat. I love working with my hands and the smell of fresh wood is something that gets me going. Building anything takes work, but when you follow a systematic, step-by-step plan, and complete each step, in no time at all you will have yourself a finished product. This is how I was able to build my house, one board at a time. Though the task may seem daunting at first, if you keep your mind focused on just completing each step, keep it focused on what you need to complete in the moment and then when that is done, move onto the next step, pretty soon you will find that you have finished your sailboat!When I found these boat plans online, I realized that ANYONE COULD BUILD A SAILBOAT [http://youcanfixityourself.com/build-a- sailboat-easy-boat-building-construction-plans/] -- how hard can it really be when this guy makes it so simple? He lives in Denmark, where my relatives are from (how can you tell?) and Danes are known for their love of the water and boating, among other things. This guy comes from a long line of boat builders and woodworking men, so I'm pleased to get these plans at this great price.
Why Choose Wood and How to Do it Why Choose Wood and How to Do it Wood, as a durable material, does more good than just staying in our rainforests and providing homes for the animals in the wild. Wood provides lumber that is used for building homes and installation; hobbies such as sculpting and making furniture and a whole lot more. Techniques involving with woodworking as an art are carving, sawing, sanding, painting, laminating and finishing. So why choose wood? Lumber is readily available and it's a replaceable resource which can figure into plenty of resale value. This material never goes out of style. Some materials like vinyl may be pretty and are prominent on the market; however it is costly and lacks artistic detail. Using metal would mean having lack of strength causing it to dent, and in time it may rust. Wood, as a choice, offers a sophisticated and personal look. Each section is as exclusive as ones fingerprints. Each variety has a diverse feel and a clear-cut personality. From an entirely aesthetic point of view, nothing matches the elegance and appeal that wood offers. Synthetic materials mimic wood, but they can only try. How can the quality, intensity and beauty be captured? Unprocessed, untreated, natural or organic wood has massive ecological benefits against building materials that exist today. Wood is a hundred percent biodegradable, it functions as an excellent insulator, it is easier to process and uses a reduced amount of energy to manage than does steel, aluminum, concrete or plastic.
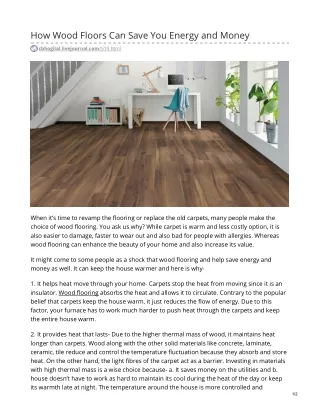
Many high class efficient construction techniques exist today. Conventionally, the use of wood framing isn't the most efficient in house production. Although it is undeniable that it has certain advantages. Constructing homes using wood is also inexpensive and cost-effective. What's more is that experienced contractors aren't difficult to find when building framed walls. In choosing the right flooring for a house, would you rather choose carpet, tile or wood? What are the advantages of having carpet? Sure it is slip resistant, comes in beautiful colors, and has a nice feel on the toes. Carpet may be all that but it can cause allergies especially with children. Given its texture, it traps in bacteria, dust and mold. Tile is easy to clean, but it can have a cold feel when walking barefoot. Hardwood is pretty easy to maintain and can cut down the number of allergy causing particles inside the home. Stepping on to any flooring made out of wood will make you appreciate the welcoming tones and shades. Using wood isn't the only thing there is. The most important part is how to choose the material carefully for the purpose of protecting it from termites and from rotting. Outdoor decks or those used for landscaping are mostly unprotected and are housed by termites and therefore will decay. There are types of woods that are naturally resistant. These types include the cedar, cyprus and redwood. Problems with pest infestation is the result of a wood with soil contact. Treated wood made of composite materials is advisable when constructing wooden decks or porches or anything that may come in contact with soil. There are
lumbers that are pressure-treated and are very much resistant to termites, other insects and rotting. They are processed with a sequence of pressure cycles forcing the wood preservative deep into the pores of the wood, therefore developing a chemical barricade against insects and decay.There is available treated wood that has been observed to be successful with its performance. Its durability depends on its location and its use. The use of treated wood is determined by the retention of the wood, or the quantity of wood preservative placed. The lowest retention property (0.15 plus water repellant) mostly are used for gazebos, fence boards, hand rails, trellises, and decks. Retention property of 0.25 is used for trim and fascia, framing, flooring and sill plates. A retention property of 0.40 is mostly used with deck fence posts, deck support posts, and landscaping. Lastly, retention property of 0.60 is used for making permanent wood foundation and building poles. Click here to see this now Click here to see this now
Build A Simple Planter Box Build A Simple Planter Box Love flowers, but don't have the space -- or the desire -- to plant a garden? You may want to try making your own flower box, which can be just about any size you wish. This planter box is built with a top and a bottom exterior frame; then you affix cedar panels to the frame and add bottom panels. After that, just add plants for a touch of spring anywhere you want to put it! Expert tip: Always draw a diagram before you build anything. Remember: If you can't draw it, you can't build it! You don't have to be Leonardo Divinci, just that YOU can read it!! Your diagram will be useful in helping you determine the size of your project and the amount of lumber you'll need. Simply take the finished diagram with you when you go shopping, and you'll be sure to get everything your project requires. Materials: Four Lengths of 26 Inch 1x2 Cedar Four Lengths of 13 Inch 1x2 Cedar Twelve Side & End Panels 5 ½ Inches x 12 ¼ Two Base Panels 1 Inch x 6 Inches x 24 Inches Wood glue
Galvanized nails Hammer Stainless-steel or Ceramic Coated Screws Drill driver and bits Speed square Note: All our sections were precut, so they just need assembly. If you can't or don't wish to cut your own lumber, home-supply stores will generally cut it for you for a small fee. Expert tip: Before you begin hammering, use sandpaper to rough up the striking surface of your hammer. Then it's less likely to slip while you're working. Building the Frames Build the top and bottom frames out of the 1x2 cedar strips. You'll be butting the ends together, so no mitering will be necessary. Fasten two 26" strips to two 13" strips to form each rectangular frame. (You'll need to ensure that the length remains 26"; to do this, butt the ends of the shorter strip against the longer strips. The thickness of the two longer strips will add an inch to each end of the shorter strips, increasing their length to 16". Do this at each end of the longer strips to form a rectangular frame 26" long and 16" wide.)
2. Apply a bead of wood glue to the junctions of the strips; then nail together with a single nail in each junction in preparation for inserting screws to hold them more securely. 3. Predrill the ends prior to screwing them together; this helps keep the ends from splitting. Then insert a screw in each corner. Attaching the Side Panels 1. Stand the two frames on their sides and apply a bead of wood glue to the inside face of the bottom side frames (the long sides). 2. Attach four side panels to each long side, smooth sides out, and nail from the inside to hold them in place. Make sure the frames are flush with the panel ends on at least one side, or the bottom panels won't fit properly. If the panels are jagged on the other side, you can always smooth them with a trim saw later. Tip: Because you're nailing from the inside, you may have to drive the nails at a slight angle. The advantage of this is that it conceals the nailheads from the exterior face of the window box. 3. Repeat step 2 on the other side of the box. Attaching the End Panels 1. Stand the half-completed box on its end and apply a bead of wood glue to the inside face of the bottom end frames.
2. Attach two panels to each end in the same manner that you used to attach the side panels, once again ensuring that the ends are flush on the bottom. 3. Repeat the process on the opposite end. Attaching the Bottom Panels 1. Check and if necessary adjust your box for square. 2. Attach three bottom panels to form the base of the planter box, using wood glue and screws. The base will reinforce and brace the box. 3. Drill several holes in the panels so that water can escape, or simply leave a gap between the panels. Finishing Lightly sand any rough edges and corners to smooth out splinters. Now it's time to feel, smell, kiss and hug your new planter box, because it looks so good - and you did it yourself! Homework!If you wish, you can stain, seal or prime and paint your planter to suit your home's decor. Because you used cedar, however, it can stay unfinished: cedar is one of the best lumbers you can use for exterior applications. This planter is a good size for potted plants, but you may wish to add a plastic liner and fill it with soil (add a layer of gravel first). If you do, don't forget to cut holes in the liner to line up with the drainage holes in the bottom of the planter. Enjoy planting!
Click here to see this now Click here to see this now
How to Build a House in Ten Steps How to Build a House in Ten Steps Ever wonder how your house was built? In this article, I am going to explain how a one story house is built in ten steps. These steps are not including all of the details that go into a house, but it will give you a general knowledge of how your house is built. 1.Excavation The very first thing that is done, is excavation. This includes making sure the lot is free of debris, and digging a hole in the ground for the basement of the house. To dig the right sized hole the workers use a site plan which is included with the house blueprints. Once they have laid out the size and shape of the house, a back-hoe digs a hole big enough to pour the concrete footings and foundation. 2.Concrete Footings The footings are the main support for the house and they help distribute the weight of the house into the soil. The size of a footing can vary depending on soil conditions and the size of house. The footings are typically made out of poured concrete. Wood is used to create a mold so the desired size of footing can be made. Lumber on its side is normally laid out according to a foundation plan which is provided with the house blueprints. Once the mold is ready, the concrete is poured into it, and then leveled off off on the top. By making the top smooth, it gives a solid area for the foundation to be poured.
3. Concrete Foundation The foundation walls are what provide alternate support for the house. They are also made out of poured concrete which is created by using formwork. Formwork are sections which are normally made out of metal and wood which can be put in place to create the desired shape of concrete. A foundation is the concrete walls you can see in an unfinished basement. Once the foundation walls are poured and dried, they fill extra space outside of the walls with backfill. The floor system is now ready to be built. 4. Floor System A floor system is made out of wood, unlike the concrete footings and concrete foundation. The lumber used is normally a 2x12 or a 2x10. The lumber is put on it's side and run across the foundation walls parallel to each other. These are called floor joists. They are spaced out a certain distance from each other to provide even floor support. To keep them in place they are nailed to a header which is the same sized lumber but put perpendicular on the outside edges. If the basement is too large then posts and beams are put in to help support the floor. 5.Floor Sheathing The floor system provides good support but the only problem is all the holes in between the lumber. This is where the floor sheathing comes in. It is made out of sheets of wood which are drilled into the floor joist to keep it secure. They are installed perpendicular to the joists so they can support more weight. When the house is complete, the owners
floor of choice will be installed on top of the floor sheathing. Now the workers are ready to install the walls. 6.Walls When talking about the location of walls in a house there are two types; exterior walls and interior walls. The exterior walls run along the outside of the house and are normally thicker to resist wind and allow more insulation to be installed. The interior walls are on the inside and are not required to be as thick. When talking about the structural strength of walls there again two types. Load-bearing walls and Non- load-bearing walls. Load bearing walls are reinforced because they have to hold up anything above the wall whether it is a roof or another floor (in this case it is a roof). Non-load-bearing wall provide no structural support for the house because they are typically just used to separate walls. When they install the walls, they look at the house blueprints and layout where the walls are going to be placed. To build the walls they first construct them on the ground. They have lumber which is spaced apart (these are called wall studs) and then drilled into a top and bottom plate. The top and bottom plate could be compared to the headers on a floor system. They both help keep the lumber in place and provide strength for the wall. Once they are built, the workers then lift the walls into place and it is drilled into the floor system. The wall cavities then have to be stuffed with insulation and covered with a vapor barrier to keep out moisture. But, the insulation can not be installed until the wall sheathing is applied.
7. Wall Sheathing Wall sheathing is similar to floor sheathing and roof sheathing (which you will see later). The same material is typically used for wall sheathing and floor sheathing. Sometimes the sheathing is put on before the wall is erected, and sometimes it is put on after. They only difference is that lifting a wall with sheathing on it is a lot heavier and can sometimes require a crane. When they put on the sheathing, it has to be installed perpendicular to the wall studs. The sheathing provides some shelter from the wind, but it also has to be covered with an air barrier. When the air barrier on the wall sheathing and the vapor barrier on the walls are combined, it provides shelter from both wind and rain. 8. Roof Trusses The next step in construction is the roof. Most houses that are built, have roofs that are pre-manufactured in a warehouse and are shipped to the building site. When they order a roof, the project manager will send in the house plans to a roof truss company and they will build all the parts needed. Depending on the style of the roof, there are many different shaped trusses that could arrive on site. To install the roof they follow a roof plan which is provided by the company and install each truss over the exterior walls. The plans have a specific distance to space the trusses to provide a level roof. Roofs can also be constructed on site from lumber. The only difference is that the trusses have to be constructed by hand, and this is less time effective. Now we have a skeleton of a roof, so what is next?
9. Roof Sheathing The roof sheathing is installed the same way as all of the other sheathing. The only difference between any sheathing is that a different type of wood might be used for different conditions. If a house is built in an area with lots of snow fall, then the strength and thickness would have to be increased. The roof sheathing is the last structural element of a house. All that is left now is to add some curb appeal. 10. Aesthetics If you can picture what the house looks like right now, it looks like one big plywood house. There are more details that have to be added. One of those are the roof shingles. These are not only for looks but they protect the house from water and help direct it away. There are many different types of shingle available but the most common are made from asphalt. The walls also have to decorated. The most cost effective way of doing this is with plastic siding or wood siding. A more expensive way is to use brick. To save money, houses in the suburbs normally have brick on the front, and have plastic siding on the other sides. The exterior of the house is now complete and all that is left to do it decorate the interior. If you have an unfinished basement, you should be able to see some of the structural elements on your house such as the foundation walls, the floor system, beams, and posts. I hope this helps you understand how your house is put together and how the house blueprints help the house come alive.
Content cerdits : Article Source: http://EzineArticles.com/5800849 Article Source: http://EzineArticles.com/9692622 Article Source: http://EzineArticles.com/4240185 Article Source: http://EzineArticles.com/328980 Article Source: http://EzineArticles.com/30902 Article Source: http://EzineArticles.com/3822740