Download
1 / 84
840 likes | 1.04k Vues
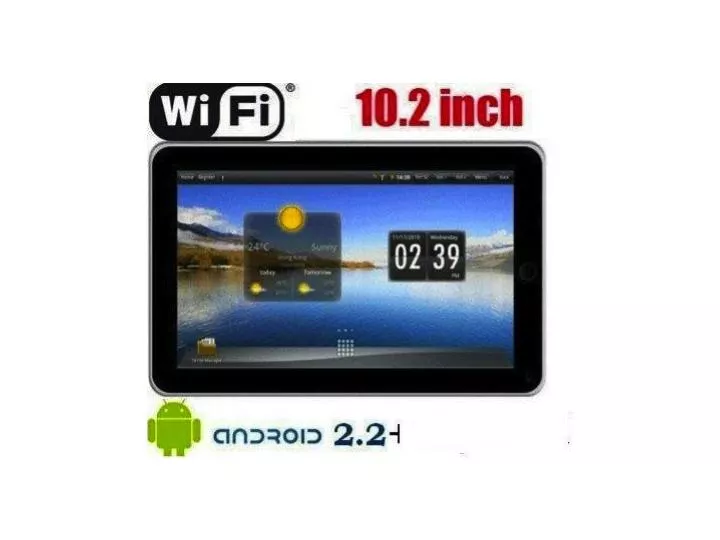
Generic Tablet Android 2.2.1 User’s Guide April 30 2011 Android Tablet Technology . To wake up the Tablet If you don’t use the Tablet for a while, the Home screen or other screen you are viewing, is replaced with the lock screen and then the screen darkens, to conserve the battery.

E N D
Generic Tablet Android 2.2.1 User’s Guide April 30 2011 Android Tablet Technology
To wake up the Tablet If you don’t use the Tablet for a while, the Home screen or other screen you are viewing, is replaced with the lock screen and then the screen darkens, to conserve the battery. 1 Press the Power button. If you’ve locked your screen, you must draw an unlock pattern or enter a PIN or password to unlock it. If you haven’t locked your screen, this lock screen appears. 2 Drag the lock icon to the right. The last screen you were working on opens
To view other parts of the Home screen Slide your finger left or right across the Home screen. These extensions to the Home screen provide more space for widgets, shortcuts, and other items. Small dots at the lower left and right indicate which screen you’re viewing. Touch & hold the small dots on the lower left or right of the screen to view thumbnails of the Home screen and its extensions, which you can touch to open
Using the touchscreen The main way to control Android features is by using your finger to manipulate icons, buttons, menu items, the onscreen keyboard, and other items on the touchscreen. You can also change the screen’s orientation. Touch To act on items on the screen, such as application and settings icons, to type letters and symbols using the onscreen keyboard, or to press onscreen buttons, you simply touch them with your finger. Touch & hold Touch & hold an item on the screen by touching it and not lifting your finger until an action occurs. For example, to open a menu for customizing the Home screen, you touch an empty area on the Home screen until the menu opens. Drag Touch & hold an item for a moment and then, without lifting your finger, move your finger on the screen until you reach the target position. You drag items on the Home screen to reposition them.
Swipe or slide To swipe or slide, you quickly move your finger across the surface of the screen, without pausing when you first touch it (so you don’t drag an item instead). For example, you slide the screen up or down to scroll a list, and in some Calendar views you swipe quickly across the screen to change the range of time visible. Double-tap Tap quickly twice on a webpage, map, or other screen to zoom. For example, you double-tap a section of a webpage in Browser to zoom that section to fit the width of the screen. You can also double-tap to control the Camera zoom, in Maps, and in other applications. Double-tapping after pinching to zoom in some applications, such as Browser, reflows a column of text to fit the width of the screen. Pinch In some applications (such as Maps, Browser, and Gallery), you can zoom in and out by placing two fingers on the screen at once and pinching them together (to zoom out) or spreading them apart (to zoom in). Rotate the screen On most screens, the orientation of the screen rotates with the Tablet as you turn it from upright to its side and back again. You can turn this feature on and off,
Working with menus There are two kinds of Android menus: options menus and context menus. Options menus Options menus contain tools that apply to the activities of the current screen or application, not to any specific item on the screen. You open options menus by pressing the Menu button . Not all screens have options menus; if you press Menu on a screen that has no options menu, nothing happens. Some screens have more options menu items than can fit in the main menu; you touch More to open a menu of additional items.
To open the Notifications panel Drag the Status bar down from the top of the screen. On the Home screen, you can also press Menu and touch NOTIFICATIONS. The Notifications panel displays your wireless provider and a list of your current notifications. Notifications about ongoing activities are listed first, followed by Notifications about events, such as new mail notifications or Calendar reminders.
Using the onscreen keyboard You enter text using the onscreen keyboard. Some applications open the keyboard automatically. In others, you touch a text field where you want to enter text to open the keyboard. Touch a suggestion to enter it. Press space or a punctuation mark to enter the red suggestion Touch once to capitalize the next letter you type. Touch & hold for all caps.
To enter text 1 Touch a text field. The onscreen keyboard opens. You can also use the Trackball to select a text field and then press the Trackball to open the onscreen keyboard. 2 Touch the keys on the keyboard to type. The characters you’ve entered appear in a strip above the keyboard, with suggestions for the word you are typing to the right. Press the left or right arrow in the strip to view more suggestions. 3 Press space or a punctuation mark to enter the red suggested word. If you touch the space key, the suggestion strip offers a series of punctation marks you can touch, to replace the space with. Or touch another suggested word to enter it. Or touch & hold the leftmost word to add it to your dictionary. If you touch a word that is not in your dictionary, it’s entered and you’re prompted to touch the word again if you want to add it to your dictionary. You can view, edit, or delete the words that you add to the dictionary. 4 Use the Delete key to erase characters to the left of the cursor. 5 When you’re finished typing, press Back to close the keyboard.
To enter numbers, symbols, and other characters Press the Symbols key to switch to the numbers and symbols keyboard. Press the Alt key on the symbols keyboard to view additional symbols; press it again to switch back. Touch & hold a vowel or the C, N, or S key to open a small window where you can touch an accented vowel or other alternate letter. Touch & hold the Period key ( . ) to open a small window with a set of common symbols. Touch & hold a number or symbol key to open a window of additional symbols. When you touch a key, a larger version displays briefly over the keyboard. Keys with alternate characters display an ellipsis ( ... ) below the character. Slide your finger smoothly up from the main keyboard to open an extension keyboard, with numbers and symbols; to enter a number or symbol from that keyboard, slide your finger onto it and then lift your finger.
To change the keyboard orientation s Turn the Tablet sideways or upright. The keyboard is redrawn to take best advantage of the new Tablet orientation. Many people find the larger horizontal onscreen keyboard easier to use. You can control whether the screen changes orientation automatically when you turn the Tablet
Touch an application to open it Slide the Launcher up or down to bring more icons into view Touch to close the Launcher.
Opening and switching applications The Launcher, which you open from the Home screen, holds icons for all of the applications on your Tablet, including any applications that you downloaded and installed from Android Market or other sources. When you open an application, the other applications you’ve been using don’t stop; they keep on running: playing music, opening webpages, and so on. You can quickly switch among your applications, to work with several at once. The Android operating system and applications work together to ensure that applications you aren’t using don’t consume resources unnecessarily, stopping and starting them as needed. For this reason, there’s no need or facility for quitting applications. To open and close the Launcher On the Home screen, touch the Launcher icon to open it. If you have more applications than can fit on the Launcher in one view, you can slide the Launcher up or down to view more. You can add an application icon to the Home screen by touching & holding it on the Launcher until it vibrates and then dragging it to a location on the Home screen.
Touch the Home icon on the Launcher or the Home button to close the Launcher. The Launcher closes automatically if you touch an icon to open its application or if you move an icon from the Launcher to the Home screen. To open an application Touch an application's icon on the Launcher. OR Touch an application’s icon on the Home screen. To switch to a recently used application 1 Press & hold the Home button . A small window opens, with icons of applications that you’ve used recently. 2 Touch an icon to open its application. Or press Back to return to the current application. Touch an icon to open an application you’ve used recently
To add an item to the Home screen 1 Open the Home screen where you want to add the item.,. 2 Press Menu and touch Add. Or just touch & hold an empty location on the Home screen. If there are no empty spots on the Home screen, Add is dimmed; you must delete or move an item before you can add another item, or switch to another Home screen. 3 In the menu that opens, touch the type of item to add. You can add the following types of items to the Home screen. Shortcuts Add shortcuts to applications, a bookmarked webpage, a favorite contact, a destination in Maps, a Gmail label, a music playlist, and many other items. The shortcuts available depend on the applications you have installed. Widgets Add any of a variety of miniature applications (widgets) to your Home screen, including a clock, a music player, a picture frame, the Google search bar, a power manager, a calendar that shows upcoming appointments, and a News & Weather widget. You can also download widgets from Android Market. Folders Add a folder where you can organize Home screen items, or folders that contain all your contacts, contacts with Tablet numbers, or starred contacts. Your folders’ contents are kept up to date automatically.
To move an item on the Home screen 1 Touch & hold the item you want to move, until it vibrates. Don’t lift your finger. 2 Drag the item to a new location on the screen. Pause at the edge of the screen to drag the item onto another Home screen pane. 3 When the item is where you want it, lift your finger To remove an item from the Home screen 1 Touch & hold the item you want to remove, until it vibrates. Don’t lift your finger. The Launcher icon changes to a Trash Can icon. 2 Drag the item to the Trash Can icon. 3 When the icon turns red, lift your finger. To change the Home screen wallpaper 1 Press Menu and touch Wallpapers. You can also touch & hold an empty area of the Home screen and in the menu that opens, touch Wallpapers. .
To open Browser Touch the Browser application icon in the Launcher or on the Home screen.. Browser also opens when you touch a web link—for example, in an email or text message. When you open Browser, the last webpage you were viewing is displayed. If you have not used Browser recently, your home page opens. The web address (URL) of the current page is displayed at the top of the window, unless a mobile site scrolls the URL bar off the top of the screen (if so, just drag the page down to bring the URL bar into view). The address (URL) of the current page.Some sites scroll the URL bar off the top of the screen, but you can drag the page down or press MENU to see it again.
To change the Home screen wallpaper (continued) 2 Touch Gallery, Live wallpapers, or Wallpapers. Touch Gallery to use a picture that you have captured using the camera or copied to your Tablet. You can crop the picture before setting it as a wallpaper.. Touch Live wallpapers to open a scrolling list of animated wallpapers installed on your Tablet. Some live wallpapers change according to the time of day, in response to touching the screen, tell the time, or offer other information. Some live wallpapers have a Settings button. Touch Wallpapers to open a screen where you can sample the wallpaper images that come with the Tablet. Slide the miniature images left and right to view the samples. Touch a sample to view a larger version. 3 Touch Save or Set wallpaper. To rename a folder 1 Touch the folder to open it. 2 Touch & hold the folder window’s title bar. 3 Enter a new name in the dialog that appears. 4 Touch OK.
THE BATTERY To extend the life of your battery Turn off radios that you aren’t using. If you aren’t using Wi-Fi, Bluetooth, or GPS, use the Settings application to turn them off.. (The GPS receiver is only turned on when you’re using an application that makes use of it.) Turn down screen brightness and set a shorter screen timeout.. If you don’t need them, turn off automatic syncing for Gmail, Calendar, Contacts, and other applications. Use the Power Control widget to check and control the status of radios, the display brightness, and syncing.. To check the battery charge level On the Home screen, press Menu and touch SETTINGS > ABOUT Tablet > STATUS. The battery status (charging, discharging) and level (as a percentage of fully charged) are displayed at the top of the screen.
To monitor and control what uses the battery The Battery Use screen shows which applications consume the most battery power. You can also use it to turn off applications that you’ve downloaded, if they are consuming too much power. On the Home screen, press Menu and touch SETTINGS > ABOUT Tablet > BATTERY USE. The Battery Use screen lists the applications that have been using the battery, from greatest to least battery use. The top of the screen displays the time since you were last connected to a charger or, if you’re currently connected to one, how long you were running on battery power before you connected to a charger. Then each application or service that used battery power during that time is displayed, in order of the amount of power they used. Touch an application in the Battery Use screen to learn details about its power consumption. Different applications offer different kinds of information. Some applications include buttons that open screens with settings to adjust power use.
Connecting to mobile networks When you assemble your Tablet with a SIM card from your wireless service provider, your Tablet is configured to use your provider’s mobile networks for voice calls and for transmitting data. (Refer to your Tablet’s owner’s guide and your carrier for more information.) Your Tablet is configured to work with many mobile carriers’ networks. If your Tablet does not connect to a network when you insert a SIM card and turn it on, contact your carrier to obtain the details of its access point name. Different locations may have different mobile networks available. Initially, your Tablet is configured to use the fastest mobile network available for data. But you can configure your Tablet to use only a slower 2G network for data, to extend the life of your battery between charges. You can also configure your Tablet to access a different set of networks entirely, or to behave in special ways when roaming. The icons in the Status bar indicate which kind of data network you’re connected to and the voice and data network signal strength.
To edit or create a new access point If you and your wireless service provider determine that you need to change the settings of your current access point name (APN) or to create a new one, you must obtain the APN and detailed settings from your provider. 1 Press Home , press Menu , and touch Settings to open the Settings application. 2 Touch Wireless & networks > Mobile networks > Access Point Names. 3 Touch an existing APN to edit it. Or press Menu and touch New APN. Enter the APN settings that you obtained from your wireless service provider by touching each setting that you need to edit. 4 When you’re finished, press Menu and touch Save. 5 If you created a new APN, touch it in the APNs screen to start using it.
Connecting to Wi-Fi networks Wi-Fi is a wireless networking technology that can provide Internet access at distances of up to 100 meters, depending on the Wi-Fi router and your surroundings. To use Wi-Fi on your Tablet, you access a wireless access point, or “hotspot.” Some hotspots are open and you can simply connect to them. Others are hidden or implement other security features, so you must configure your Tablet so it can connect to them. There are numerous systems for securing Wi-Fi connections, including some that rely on secure certificates or other schemes to ensure that only authorized users can connect. Turn off Wi-Fi when you’re not using it, to extend the life of your battery. The Status bar displays icons that indicate Wi-Fi status. When you connect to a Wi-Fi network, the Tablet obtains a network address and other information it needs from the network, using the DHCP protocol
To turn Wi-Fi on and connect to a Wi-Fi network If you’re adding a Wi-Fi network when first setting up your Tablet, Wi-Fi is turned on automatically, so you can skip to step 4. 1 Press Home , press Menu , and touch Settings. 2 Touch Wireless & networks > Wi-Fi settings. 3 Check Wi-Fi to turn it on. The Tablet scans for available Wi-Fi networks and displays the names of those it finds. Secured networks are indicated with a Lock icon. If the Tablet finds a network that you connected to previously, it connects to it. 4 Touch a network to connect to it. If the network is open, you are prompted to confirm that you want to connect to that network by touching Connect. If the network is secured, you’re prompted to enter a password or other credentials. (Ask your network administrator for details.) When you’re connected to a network, you can touch its name in the Wi-Fi settings screen for details about the speed, security, address, and related settings
Receive notifications when open networks are in range By default, when Wi-Fi is on, you receive notifications in the Status bar when your Tablet detects an open Wi-Fi network. 1 Turn on Wi-Fi, if it’s not already on. 2 In the Wi-Fi settings screen, check Network notification. You can uncheck this option to stop receiving notifications. To add a Wi-Fi network You can add a Wi-Fi network so the Tablet will remember it, along with any security credentials, and connect to it automatically when it is in range. You must also add a Wi-Fi network to connect to it, if it does not broadcast its name (SSID), or to add a Wi- Fi network when you are out of range of it. To join a secured network, you need to contact the network’s administrator to learn what security scheme is deployed on it and to obtain the password or other required security credentials1 Turn on Wi-Fi, if it’s not already on. If you’re adding a Wi-Fi network when first setting up your Tablet, Wi-Fi is turned on automatically.
2 In the Wi-Fi settings screen, touch Add Wi-Fi network (at the bottom of the list of discovered networks). 3 Enter the SSID (name) of the network. If the network is secured, touch the Security menu and then touch the type of security deployed on the network. 4 Enter any required security credentials. 5 Touch Save. The Tablet connects to the wireless network. Any credentials that you entered are saved, so you are connected automatically the next time you come within range of this network. To add a Wi-Fi network (continued) To forget a Wi-Fi network You can make the Tablet forget about the details of a Wi-Fi network that you added— for example, if you don’t want the Tablet to connect to it automatically or if it is a network that you no longer use. 1 Turn on Wi-Fi, if it’s not already on. 2 In the Wi-Fi settings screen, touch & hold the name of the network. 3 Touch Forget network in the dialog that opens.
Connecting to Bluetooth devices Bluetooth is a short-range wireless communications technology that devices can use to exchange information over a distance of about 8 meters. The most common Bluetooth devices are headTablets for making calls or listening to music, hands-free kits for cars, and other portable devices, including laptops and cell Tablets. There are several Bluetooth profiles that define the features and communications standards for Bluetooth devices. For a list of the profiles supported by your Tablet, refer to your Tablet’s owner’s guide. To connect to a Bluetooth device, you must turn on your Tablet’s Bluetooth radio. The first time you use a new device with your Tablet, you must “pair” them, so that they know how to connect securely to each other. After that, you can simply connect to a paired device. Turn off Bluetooth when you’re not using it, to extend the life of your battery between charges. You may also be required to turn Bluetooth off in some locations. Bluetooth is turned off in Airplane mode. The Status bar displays icons that indicate Bluetooth status.
To turn Bluetooth on or off 1 Press Home , press Menu , and touch Settings to open the Settings application. 2 Touch Wireless & networks. 3 Check or uncheck Bluetooth to turn it on or off. Bluetooth ON Bluetooth OFF To connect to a Bluetooth device Once paired, you can connect to a Bluetooth device—for example, to switch devices or to reconnect after the Tablet and the device come back into range. 1 Press Home , press Menu , and touch Settings to open the Settings application. 2 Touch Wireless & networks > Bluetooth settings. 3 If Bluetooth isn’t turned on, check Bluetooth to turn it on. 4 In the list of devices, touch a paired but unconnected device in the list. If the device you expected isn’t displayed, touch Scan for devices. When the Tablet and the device are connected, the device is displayed as connected in the list.
Connecting to a computer via USB You can connect your Tablet to a computer with a USB cable, to transfer music, pictures, and other files between your Tablet’s SD card and the computer. Warning! When connecting your Tablet to a computer and mounting its SD card, you must follow your computer’s instructions for connecting and disconnecting USB devices, to avoid damaging or corrupting the files on your SD card. You can’t share your Tablet’s data connection and SD card via USB at the same time. If you are using USB tethering, you must turn that off first To connect your Tablet to a computer via USB 1 Use the USB cable that came with your Tablet to connect the Tablet to a USB port on your computer. You receive a notification that the USB is connected. 2 Open the Notifications panel and touch USB connected. .
Connecting to a computer via USB (continued) 3 Touch Turn on USB storage in the screen that opens to confirm that you want to transfer files. When the Tablet is connected as USB storage, the screen indicates that USB storage is in use and you receive a notification. Your Tablet’s SD card is mounted as a drive on your computer. You can now copy files to and from the SD card. For more information, see the documentation for your computer. During this time, you can’t access the SD card from your Tablet, so you can’t use applications that rely on the SD card, such as Camera, Gallery, and Music. You also can’t share your Tablet’s data connection with your computer via USB.
To disconnect your Tablet from the computer Warning! Carefully follow your computer’s instructions to unmount the SD card and disconnect USB devices correctly, to avoid losing information on the card. 1 Unmount the SD card on your computer. 2 Open the Notifications panel and touch Turn off USB storage. 3 Touch Turn off USB storage in the screen that opens To safely remove the SD card from your Tablet You can safely remove the SD card from your Tablet any time the Tablet is turned off, as described in your Tablet’s owner’s guide. If you need to remove the SD card while the Tablet is on, you must unmount the storage card form the Tablet first, to prevent corrupting or damaging the storage card. 1 Press Home , press Menu , and touch Settings, to open the Settings application. 2 Touch SD card & Tablet storage. 3 Touch Unmount SD card. You can now safely remove the SD card from the Tablet.
To format an SD card If you purchase a new SD card, you may need to format it before you can use it with your Tablet. You can also format an SD card to erase its contents. 1 Press Home , press Menu , and touch Settings, to open the Settings application. 2 Touch SD card & Tablet storage. 3 If necessary, touch Unmount SD card. You can format an SD card only when it is unmounted. 4 Touch Format SD card. On the screen that warns you that formatting the SD card will erase its contents, touch Format SD card.
ACCOUNTS You can sync contacts, email, calendar events, and other information with your Tablet from multiple Google Accounts, Microsoft Exchange ActiveSync accounts, or other kinds of accounts, depending on the applications installed on your Tablet. For example, you could start by adding your personal Google Account, so your personal email, contacts, and calendar are always available. Then you could add an Exchange ActiveSync account from work, so you can read your work email and have your work contacts handy. You configure how your account interacts with the applications on your Tablet using the Account & Sync settings and the setting in Gmail, Calendar, Email, and other applications. Use a web browser to change your password and other general account settings.
To add an account To add some accounts, you may need to obtain details from an IT support representative about the service to which the account connects. For example, you may need to know the account’s domain or server address. 1 Open the Accounts & Sync Settings screen. You can do this in Contacts by pressing Menu and touching Accounts, or directly in the Settings application. The Accounts & Sync Settings screen displays your current sync settings and a list of your current accounts. 2 Add account 3. Kind of Account Touch Add account.
4 Follow the onscreen steps to enter the required and optional information about the account. Most accounts require a username and password, but the details depend on the kind of account and the configuration of the service you’re connecting to. 5 Configure the account. Depending on the kind of account, you may be asked to configure what kinds of data you want to sync to the Tablet, name the account, and other details. When you’re finished, the account is added to the list in the Accounts & Sync Settings screen. Depending on how you configured the account, email, contacts, and other information start syncing to your Tablet.
To remove an account You can remove an account to delete it and all information associated with it from your Tablet, including email, contacts, settings, and so on. You can’t remove the first Google Account you signed into on the Tablet, except by deleting all personal information from your Tablet. to learn now to do that. 1 Open the Accounts & Sync Settings screen. You can do this in Contacts by pressing Menu and touching Accounts, or directly in the Settings application. The Accounts & Sync Settings screen displays your current sync settings and a list of your current accounts. 2 Touch the account to delete. 3 Touch Remove account. 4 Confirm that you want to remove the account.
Gmail is different Gmail is web-based Your messages are stored on Google servers, but you read, write, and organize messages with the Gmail application on your Tablet or in a web browser. Because your mail is stored on Google servers, you can search your entire message history, backed by the speed and power of Google search. Actions that you take in one place are reflected everywhere. For example, if you read a message in Gmail on your Tablet, it’s marked as read in a web browser. And a message that you send using a browser, or even a draft of a message, is visible in Gmail on the Tablet. Gmail is conversation-based Each message and all replies to it are grouped in your Inbox as a single conversation. In other email applications, replies to messages are spread across your Inbox, typically by date received, so a message and the replies to it are separated by other messages. Gmail makes it easy to follow the thread of a conversation.
Gmail (continued) Gmail is organized by labels, not by folders By tagging messages with labels, you can organize your conversations in many different ways. In other email applications, each message can live in only one folder. For example, with Gmail you can label a conversation with your mother about your brother’s birthday present with both “Mom” and “Dave.” Later, you can look for the message under either label. Using folders, you’d have to store the message in the “Mom” folder or the “Dave” folder, not both. Gmail for the Tablet is optimized for mobile: for advanced tasks, use a web browser The best place to organize and learn about Gmail and your Google Account is the web. For example, you can’t use the Gmail application on the Tablet to create the labels and filters that you use to organize your messages, but you can label a message on the Tablet. Gmail on the web offers complete information about the service, so it’s the best place to learn about all of the features of Gmail. Gmail is for Gmail Of course you can use Gmail to send email to any email address, and anyone can send email to you at your Gmail address. But if you want to read messages from another email service provider (using your AOL, Yahoo!, or other email account), you use the Email application
To open Gmail s Touch the Gmail icon on the Home screen or in the Launcher.. Your Inbox displays those conversations with the newest messages at the top. All of your conversations are displayed in your Inbox unless you delete, archive, or filter them. The current Google Account is displayed at the top right of the Inbox. If you have more than one account, you touch the current account to switch accounts. Adding and working with accounts Conversations with new messages have bold subject lines. To read a message in a conversation, touch its subject.
To go to a webpage or search the web 1 Touch the URL box at the top of the Browser screen. If the URL box isn’t visible, press Menu or just drag the page down until the URL box comes into view. 2 Enter the address (URL) of a webpage. Or enter terms you want to search for. As you enter text, your web search engine makes suggestions of webpages and queries. You can also touch the MicroTablet icon to search by voice (see “Using Voice Actions” on page 86). You can set the web search engine you want to use The MicroTablet icon is only available if you are using the Google search engine. Other search engines may also not provide search suggestions. 3 Touch a suggestion or enter an address and touch the arrow icon . If you touch a suggested page or enter an address and touch the arrow icon , that webpage opens. If you touch a suggested query, your web search engine opens with the results.
To refresh the current page Press Menu and touch REFRESH. The webpage is reopened, updating any content that has changed. To stop opening a page If a webpage is taking a long time to open, or if you change your mind, you can stop it from opening. Touch the Cancel icon to the right of the URL. OR Press Menu and touch STOP. To get more information about the current page Press Menu and touch MORE . PAGE INFO. A dialog opens with the page’s title and full address (URL). To set your home page Your home page opens when you open a new Browser window, and when you start Browser after restarting your Tablet or after not using it for a while. 1 Browse to the page you want to set as your home page. 2 Press Menu and touch More > Settings > Set home page. 3 Touch Use current page. Or enter a different page’s address (URL). 4 Touch OK If you prefer to open new Browser windows without opening a webpage by default, leave this field blank. This can make new Browser windows open more quickly.
Opening Maps and viewing your location You must turn on location services to use information about your location when navigating and searching in Maps. Then open Maps to view your location. To use location services with Maps You must have location services turned on to view your location in Maps and to use your location to find local resources. 1 Press Home , press Menu , and touch Settings > Location & security. 2 Check the My Location options that you want to use. Check Use wireless networks to allow the Tablet to determine your approximate location by using Wi-Fi and mobile networks. Check Use GPS satellites to allow your Tablet to determine your location to street-level accuracy. (GPS works best when you have a clear view of the sky.) 3 Press Home , press Menu ,and touch Settings > Privacy. Check Share with Google to use your location when you search. To open Maps and view your location 1 Touch the Maps icon in the Launcher or on the Home screen. Or touch the Navigation icon to open Maps’ navigation feature directly. See “Opening and switching applications” on page 38 to learn more about opening and switching applications. 2 Press Menu and touch My location. The map centers on a blue dot that indicates your location. A blue circle around the dot indicates that your actual location is within the circle
Drag the map to move in any direction Your location . Zoom in or out
To move the map Drag the map with your finger. To zoom in and out of a map Touch the plus or minus side of the fflOOM control . OR Double-tap a location on the map with one finger to zoom in to that location; double-tap with two fingers to zoom out. OR Touch an area with two fingers at once and spread them apart to zoom in; pinch them together to zoom out. Not all magnification levels are available for all locations. To clear the map After you get directions or search on a map, you can clear the markers that such activities draw. While viewing a map, press Menu and touch MORE > CLEAR MAP.
Obtaining details about a location You can obtain the address and other information about an area on a map. The amount of information depends on the location. To get the address and additional details about a location s Touch & hold a location, star, or labeled feature on the map. A balloon opens over the location, with the address and a thumbnail from Street View, if available Touch & hold a location or other feature to open a balloon with its address. Touch the balloon to open a screen with tools for learning more about the location.
Getting directions Maps can provide directions for travel by foot, public transportation, bicycle, or car. You can add a shortcut to a destination to your Home screen, so that you can simply touch the shortcut to get directions to that location from wherever you are. For example, a shortcut to your home or work makes it easy to get directions there from wherever you travel. For details about adding shortcuts to the Home screen, To get directions 1 While viewing a map, press Menu and touch Directions. Enter a starting point in the first text box and your destination in the second text box. Or touch to open a Menu with options for selecting an address from your Contacts or a point that you touch on a map. To reverse directions, press Menu and touch Reverse start & end. 2 Touch the icon for car, public transit, bicycling, or walking directions. 3 Touch Go. The directions to your destination appear in a list. Enter starting and ending locations. Select a mode of transport. Touch Go
Touch to preview your pictures or videos in Gallery. Drag up to shoot videos; drag down to take photos. Touch to take a picture or shoot a video Touch settings to change them. Opening Camera and taking pictures You take pictures and shoot videos with Camera.. Important Be sure to clean the protective lens cover with a microfiber cloth before taking pictures. A lens cover with smudges from fingers can cause blurry pictures with a “halo” effect. To open Camera Touch the Camera icon in the Launcher or on the Home screen.. Camera opens in Landscape mode, ready to take a picture or shoot a video
To take a picture 1 If necessary, drag the control to the Camera position. 2 Adjust your exposure, flash, and other settings if you wish. Or leave them on Automatic.. 3 Frame your subject on screen. You can zoom in or out by touching the Zoom icon 1x and then touching a zoom level. 4 Touch the Shutter icon on screen or press the Trackball. The camera brings the image into focus. When the image is in focus, the focus indicators in each corner turn green and the camera takes a picture. OR Touch & hold the Shutter icon or press & hold the Trackball to focus first, before taking a picture; then lift your finger to take a focused picture more quickly. Slide your finger off the Shutter icon or roll the Trackball and release your finger to cancel taking the picture. The picture you just took is displayed for a moment, and then is displayed as a thumbnail at the top right. 5 Touch the thumbnail to view, share, and work with your pictures in Gallery