Download
1 / 26
270 likes | 400 Vues
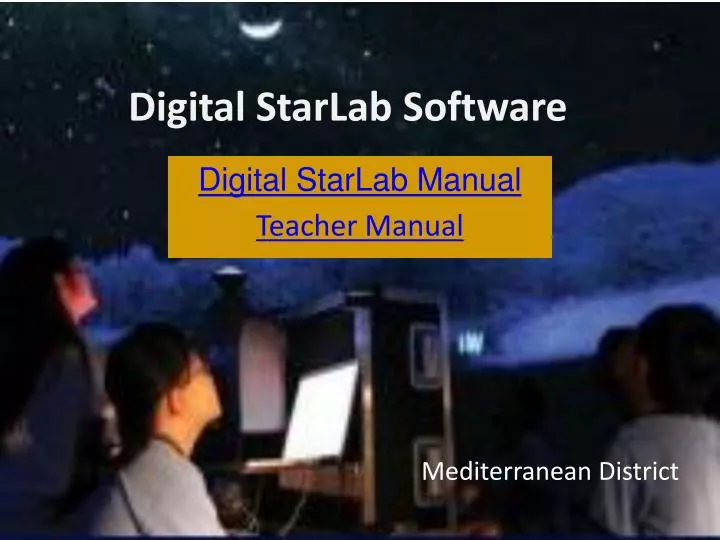
Digital StarLab Software. Digital StarLab Manual Teacher Manual. Mediterranean District. Controls. The controls in Starry Night are grouped in three areas of the screen: • Toolbar • Side Pane ~ SkyGuide Pane • Application Menu .

E N D
Digital StarLab Software Digital StarLab Manual Teacher Manual Mediterranean District
Controls • The controls in Starry Night are grouped in three areas of the screen: • Toolbar • Side Pane ~ SkyGuide Pane • Application Menu Ursa Major or the Big Dipper
Toolbar The toolbar has the following set of basic controls: • Time and Date • Time Flow Rate • Viewing Location • Gaze • Zoom Orion the Hunter
Side Panes Side Panes along the left side of the screen can be viewed as the following options: • Favorites • SkyGuide • Options • Media • Find, info Selecting an option from the dropdown menu causes that pane to open, revealing a set of controls. However, by clicking along the right edge of the pane and dragging the mouse, you can make the pane narrower or wider. Within a pane, you can expand or collapse various layers by using these buttons: • Expand layer. • Collapse layer. Cassiopeia – the big ‘W’
SkyGuide Pane • The SkyGuide pane is different from the other panes. It functions a lot like a web browser and contains it own set of buttons to help you navigate through the pages. • The navigation controls are located at the top of the SkyGuide Pane Page Path • To help you remember the way you came, each page includes a menu to show you where you are in SkyGuide(bread crumb trail). Star forming ‘ Elephant Trunks’
Application Menu • The menu runs across the top of the screen, above the toolbar. Clicking an item in the menu reveals additional options. • Changing Your Viewing Direction • By default, Starry Night always opens with your view facing south, looking slightly above the horizon. You can adjust this view to look in any direction. • The default cursor icon in Starry Night is a hand. When you hold the mouse button down, the hand closes, as if it’s grabbing part of the sky. If you hold the mouse button down and drag the mouse, your view shifts in the direction that you moved the mouse. The Milky Way – Our Galaxy
Zenith and Nadir Markers If you adjust your view to look high above the horizon, you might see a red marker. This marker identifies the zenith, the point in the sky that is directly above your head. If your view is from a point in space, you can also look straight down to see a marker for the nadir, the point directly beneath your feet. If your view is from a spot on Earth or another planet, you can look only slightly below the horizon, and cannot see the nadir. Saturn as seen from Cassini
Gaze Control • The gaze display in the status bar shows the direction you’re looking. • Altitude (Alt) measures the angle above the horizon in degrees. An altitude of zero degree means you’re looking straight ahead; 90 degrees means you’re looking straight up. • Azimuth (Az) indicates the direction you’re facing: zero degrees is north, 90 degrees is east, 180 degrees is south, and 270 degrees is west. You can also use the compass points marked along the horizon to determine your viewing direction. Surface of Mars
Location Scroller • The location scroller is another way of changing your location when your view is from high above an object. The location-scroller cursor looks like a compass with arrows radiating from four sides. If you click and drag the cursor, you can move all around an object. This offers fantastic views of the planets and solar system. For instance, if you’re high above the surface of Saturn, use the location scroller to turn the planet and see the rings from every angle. • The location scroller appears automatically when appropriate. In these cases, you can click and drag the cursor to change your perspective. To change the hand tool to the location scroller tool, hold down the Shift key and drag the cursor, or select it from the cursor drag-down menu. Earth with cloud cover
Changing Date and Time • When you open Starry Night, you see a view of what you would see if you stepped outside at the current time and looked south. • The date and time are in the upper left hand corner of the toolbar. • To change the date or time, click it. The date and time lights up and you can type in a new value. • To change the month use the up and down keys on your keyboard or the wheel on your mouse. • You can click the small sun icon to the left of time to turn Daylight Savings Time on and off. Galaxy Clusters
Customizing Time Flow • By default, time in Starry Night advances at the same rate as real time. • You can speed up or slow down time to get the best possible view of an astronomical event. • The rate of time’s flow is shown in the Time Flow Rate section of the toolbar. Clicking the black area to the left of the rate opens a menu that displays a list of possible time steps. • The steps are in two categories: multiples of real time and discrete time steps. 3-D Space Clock
Multiples of Real Time • Time steps are multiples of real-time advance time in Starry Night; For example, a time-step of 30x would cause the time in Starry Night to advance at 30 times the real rate. Discrete Time Steps • Discrete time steps moves the time by a specific increment every time Starry Night updates the display. For example, if you wanted to see how Jupiter’s position in the sky changes over the next few months, you could set the time to sometime in the evening (for example, 9:00 P.M.) and then set the time step to one day. Starry Night would run time forward, showing the sky at 9:00 P.M. each night. • If you chose multiples of real time, you would see alternating day and night . Orion Nebulae
Discrete Time Steps • Some of the discrete time steps listed in the menu might be unfamiliar: • Sidereal day: This is the time it takes for Earth to rotate once on its axis. It is four minutes shorter that the day we are familiar with, the solar day. Sidereal and solar days differ in length because of the revolution of Earth around the Sun. • Lunar month: This is the time between two full moons, as seen from Earth. It is about 29 days. • Customizing: If you click the numerical part of the current time step, it lights up and you can type a numerical value. This will let you change the time step from one day to seven days, for example.
Chart for Controlling Time Flow • Click Single Step Backward to move the time backward by one time step and then freeze it. • Click Backward to run time backward continuously. Each time the screen is updated, the time moves backward one time step. • Click Stop to freeze time at the current value. • Click Forward (Play) to run time forward continuously. Each time the screen is updated, time moves forward one time step. This is the default time flow mode. • Click Single Step Forward to move the time forward by one time step and then freeze it. . = key stops time / = routine forward , = runs time backwards. Planets
Changing Your Home Location The first time Starry Night opens, a dialog box opens that asks you to set your home location. To change your home location, follow these steps: • Choose Starry Night Small Dome Edition > Set Home Location. This displays a list of cities throughout the world. • If your home city is listed, click on its name to highlight this city, and click Save As Home Location. • If your home is not on the list, click the latitude/Longitude tab. Enter your latitude and longitude. You can enter values in degrees; degrees and minutes; or degrees, minutes and seconds. This opens a window where you can enter your city, province or state, and country. Click add Location. The moons of Jupiter
Viewing Location The viewing location display tells you from where in space you are viewing. If you are viewing from the Earth, your city name will show up in the display. If you are observing from another planet, the display shows this information.
Identifying Objects in the Sky If you point your cursor at any object shown onscreen, information about the object appears. This is Starry Night’s Heads-Up Display (HUD). Labeling Objects The best way to quickly identify all the bright objects on the screen is to select Labels-Show all labels from the application menu. To remove the labels, select Labels-Hide all labels. Venus
Displaying Constellation Figures • In the entire sky there are 88 constellations. To locate objects it is advisable to know their location within a constellation. • To turn on the stick figures for the constellations press the K key on the keyboard. Press K again to toggle them off. More constellation display options are located in the Constellations layer of the Options Pane. Draco
Finding Objects • If you are interested in finding a specific object, such as a planet or a bright new comet, select the Find side pane. Click in the text box at the top of this pane and type in the first few letters of the object you are looking for. As you type, Starry Night displays a list of objects that match your name. • Once the object that you are looking for appears in the list, double-click on its name, and Starry Night will centre on the object. • The object you are searching for may be hidden beneath the horizon. If this is the case, Starry Night will offer you the option of hiding the horizon or advancing the time forward to a time when the object will be above the horizon. When you use the FIND pane, Starry Night searches all object databases, if you prefer one database, click the magnifying glass symbol and choose from the database list. Jupiter
Solar System Object List • If you clear the text box at the top of the Find pane, the list of items found is replaced by a list of solar system objects. • Click the symbol to the left of an object’s name to expand the list to include all other objects that orbit this object. For example, clicking on this symbol for Jupiter will expand the list to include Jupiter’s moons and clicking again will collapse the list. The Solar System
Selecting and Centering Objects • You can open a contextual menu in Starry Night by pointing the cursor at any object in the sky and right-clicking or control-clicking. • Select/deselect: This selects or deselects the object. • Center: This adjusts your view so the object is at the center of the screen and remains locked there as time passes. This is handy if you want to watch a planet’s motion against the background stars.; however, as long as not obscured by the horizon. • Magnify: This zooms in on the object so that you get a close-up view. Objects within our solar system and many deep-space objects have detailed images. To select more than one object, hold down the Shift key while selecting the next object. This is a handy feature, allowing you to label only the objects you want on the screen. For example, you might only want to display the constellation Orion, label the star Rigel and the deepsky object M42. Uranus
Zooming in On Objects • You’ve learned that you can zoom in on an object by opening its contextual menu and choosing Magnify. Another way to get spectacular close up views of objects such as Saturn or the Andromeda Galaxy is to use the buttons next to the zoom display. • The default zoom gives the largest view of the sky, which is 190 degrees. You can zoom in up to 300,000 times! Pluto
DeterminingDistances Between Objects and Changing Horizon • To determine the distance between two objects as seen from your current viewing position, use the angular separation tool. To use this tool, hold your hand cursor over an object until it turns into an arrow. Then click on that object and drag to another. • to change your horizon to something else, perhaps a photorealistic horizon of your backyard that you created yourself. • To change the horizon options, in the Options Pane select Local View > Local Horizon from the application menu. Under Earth horizon you will find a list of different horizons you can try. Mercury
Changing Your Elevation • You might want to place yourself at some distance above a planet’s surface. You can change your elevation above an object’s surface in Starry Night with the elevation buttons in the Viewing Location Display of the toolbar. Saturn
Teacher Resources The Teacher Manual for StarLab (link on slide #1) contains 12 imbedded lessons and instructions. It is advisable that teachers become familiar with the instructional choices after they familiarize themselves with the set-up of the dome and program. Training, and a policy for usage is recommended with a designated POC. Black Hole
References • All information taken directly from the StarLabUser’s Manual, and adjusted for formatting. L. Pruitt, ISS