Download

1 / 47
470 likes | 611 Vues
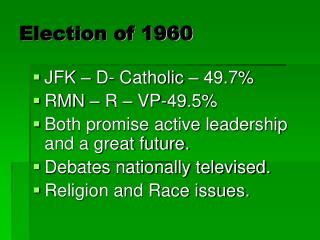
Do you want to make info graphics for the US Election? Do you want your work to be covered by the BBC? Brilliant for your portfolio and CV! Contact aluce@bournemouth.ac.uk. Dreamweaver CS6. Using CSS3 and HTML5 to make our web-page dynamic. Applications.

E N D
Do you want to make info graphics for the US Election? Do you want your work to be covered by the BBC? Brilliant for your portfolio and CV! Contact aluce@bournemouth.ac.uk
Dreamweaver CS6 Using CSS3 and HTML5 tomakeour web-page dynamic.
Applications We will be using the following applications: Adobe Dreamweaver CS6
Source Files MyBU -> Production-> Unit Materials -> HTML/CSS Workshops -> HTML/CSS Lesson 4 Files
Workshop Overview • Today, we will be covering: • Creating Multiple Pages • Building a Navigation Bar • What CSS3 is • Adding custom fonts • Adding a fade transition
Setting up the Site Open up the .zip file you just downloaded. Inside will have a site directory. Copy and paste it to your ‘temporary work’ folder (or ‘documents’). This is a premade web-page that we will be using for today.
Setting up the Site Open up Dreamweaver. Site-> New Site Name the site as ‘HTML5 and CSS3 Lesson 4’. Set the ‘local root’ folder as the ‘site’ folder that you just moved into your documents.
Inserting an Image The header is missing a logo, so lets insert one! I have already made a 130px by 130px logo to add (in the ‘images’ folder) so confirm that.
Removing the Background-Color The logo’s division area will now have a background color, behind the image. Remove the CSS line of: Because the image is a .png, its transparent parts (The outside of the circle) will have the content of the division ‘behind it’ display through.
BackgroundImage When designing a website, we sometimes won’t want to stick to using standard background colors. We can use CSS to insert an image, and tile it repeatedly across an entire section of a page.
BackgroundImage In the CSS for the <header>, remove this line: And type in this:
BackgroundImage Select ‘grey-pattern.jpg’ and you should have a complete line of code of this: However, insert a background image will only place 1, and not repeat if the user has a bigger screen. Add this:
CSS3 Fonts With HTML5 and CSS3 we can add our own fonts, which we can download from online. However, these fonts are only viewable in certain browsers. Internet Explorer does not support ‘Web-Fonts’ yet and will display a default alternative instead.
CSS3 Fonts www.dafont.com Choose a font. Preview what your text will look like. Download and save it into the ‘fonts’ folder of your website.
CSS3 Fonts www.dafont.com Choose a font. Preview what your text will look like. Download and save it into the ‘fonts’ folder of your website.
CSS3 Fonts To create a custom font reference: Type the name of your font. This can be custom. Source link to your saved font.
CSS3 Fonts To apply this custom font to your headers and text:
<h2> Now that we have used <h1> for the title of the website, we now need to specify a <h2> for the content of each web-page. It is good, and ideal, practice to state what each page is, for the user.
LoremIpsum www.lipsum.com
Hyperlinks Building a website with all the content on 1 page is quite boring and cluttered. So, we need to use a Hyperlink to allow our users to navigate to other pages/external websites.
The <a> Tag To establish a hyperlink, we need to use the <a> tag property. Important: You MUST close this tag. Anything inside it WILL link the user to the target page.
Opening the link on a New Window A standard <a> tag will directly take the user to a new URL. Apply this to open the URL in a New Window when clicked:
Stylising our <a> Tag As with any tag in HTML, you can style it using CSS. One particular CSS rule I like to use is this: This removes the default underline style.
Navigation Bar • This should be the main method your user should take in navigating through your website pages. • This should be located either in the header of the page, or in the sidebar. • A smaller, more simplified, version should appear in the footer as well.
Navigation Bar • The navigation bar can be displayed horizontally or vertically. • Normally, use a horizontal list for the top of the page and a vertical list for a sidebar.
Lists Inside the <nav> tags, type in this:
Lists Everything in between this tag is part of an ‘unordered’ list. Use a <ol> tag for an ‘ordered’ (Numbered) list. Use the <li> tag for each ‘bullet point’ or ‘list item’ in the list.
List Styles This looks horrible! So lets use CSS to style it.
List Styles Some web-pages will have lost of lists of hyperlinks, so lets give our navigation list an id: And in our CSS:
List Styles Those bulletpoints make our navigation menu look dated… Use this to get rid of them: We now have a vertical menu! However, we want to create a horizontal menu for this site.
List Styles Changing our menu from vertical to horizontal is very easy! Add this:
List Styles The <nav> division has a horrible background color on it. Remove this to make it transparent:
List Styles • <ul> for properties of the list area. • <li> for properties for each item in a list. • <a> for properties of the hyperlinks.
Experiment! • Try applying custom font styles to the <a> hyperlinks in the list. • You will probably want to: • Change the color. • Play around with the margin between each object. • Push the entire list down so it is inline with the ‘Digital Media Design’ text.
Hovering over a Hyperlink. Users like to have some form of ‘response’ or visual feedback when they hover something they can interact with. So, we want to apply a style that is applied to a Hyperlink, when the user hovers their mouse over it. This way, it indicates that the link can be clicked.
Hovering over a Hyperlink. Add this: Any style inside this style bracket will be applied to a list’s <a> tag when the user hovers over it with the mouse. Experiment!
Hovering over a Hyperlink. Add this: Any style inside this style bracket will be applied to a list’s <a> tag when the user hovers over it with the mouse.
Experiment! • My Suggestions: • Alternate the text color and background color: • Add an underline: • Add italics:
Warning! Using too many styles or decorations could make the link look horrible. Try sticking to perhaps 1 or 2 styles. This will be just enough to let the user know that they have hovered their mouse over something that can be interacted.
CSS3 We can also apply CSS3 effects to our Hyperlinks. CSS3 Styles such as Drop Shadow, Gradients and Custom Fonts. However, these will only happen on certain browsers. Internet Explorer is being a pain-in-the-butt again…
Multiple Web pages When building a website, you want to keep your layout/styles, for each page, almost exactly the same. However, we don’t want to have to retype ALL of the code again! So, here is a quick way to recreate our web-page…
Multiple Web pages Open up your index.html page. File -> Save As Rename it to your desired page (about.html, work.html etc) and save it into your ‘site’ folder. Edit content on the page!
Multiple Web pages • Your CSS sheet will apply to ALL of the sections of your HTML pages. • Before editing content, make sure you check which page you currently have open. • Double-check Hyperlinks to make sure they work!
Current Page A personal preference is to leave the user some sort of indicator of the page they are currently on, in the navigation bar. The method I use is this:
Span A span tag allows you to apply styles to parts of text.
Useful Web Design Links • Kuler – Color Scheme Generator • Lorem Ipsum – Text Generator • CSS3 Generator – Preview CSS3 Styles • CSS3 Browser Support
Post Workshop Activity Add a <footer> division to each of the pages. Build a simpler version of your navigation bar that will appear on each page. Create a VERTICAL menu on the ‘Contact’ page with links to your Facebook, Twitter, LinkedIn, Blog etc.