Download

1 / 32
320 likes | 440 Vues
How to begin. Step 1. Create a free account with weebly by logging in with F acebook, or using an email and password you choose. Step 2. You will arrive at the ‘dashboard’ where you see a list of your sites. You have none yet, so click ‘Add Site’. Step 3.

E N D
Step 1 Create a free account with weebly by logging in with Facebook, or using an email and password you choose.
Step 2 You will arrive at the ‘dashboard’ where you see a list of your sites. You have none yet, so click ‘Add Site’
Step 3 You can select a theme from the hundreds of templates. Many of which you can change the colours of. Have a look around and select one – you can change it later but..
Step 3 cntd You should pay attention to the menu and decide early on if you want a top menu or side menu.
Step 4 Choose a name for your website. It will be hosted by weebly, as a subdomain. Or you can pay to have it hosted on your own domain. You can also change this later.
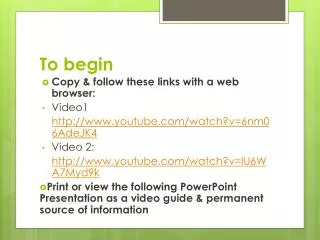
Step 5 Watch the video introduction. It goes for around one minute.
Step 6 You can choose to step straight into building your site, or do some more planning with some help from weebly. Recommended is the ‘Laying Out Pages’ video tutorial.
Good to know BUILD is where you create and edit your pages DESIGN is where you choose colours, fonts and themed templates PAGES is where you order the navigation
Good to know You can click on the DESIGN tab and change your design theme, colour or fonts at any time.
Step 7 Click on the PAGES tab to start adding pages to your site. Click Add Page.
Step 8 The option will appear to add a Standard Page, Blog or External Link to an existing site or page. Choose Standard.
Step 9 Type the name of your page in the box that appears on the right (where I have typed Unit 1). A new page appears on the left navigation.
Good to know At this point you can also choose to have a header image, no header image etc. I like no headers for a clean, easy to navigate site. It’s up to you and you can always change it later.
Step 10 To create subpages (that appear under other pages on the menu) drag the page to where you want it to appear and to the right slightly – like I have for Outcome 1.
Step 11 When you have made your first few pages click Save & Edit at the bottom of the page.
Step 12 You will then be back to the BUILD section where you can see your pages in the menu now.
Editing Tools All the tools you need are on the left hand side of the BUILD mode – basic, structure, media, commerce (for business) and more.
Basic tools Basic tools are titles, text, images, galleries and slideshows, maps and contact forms.
Structure tools Structure tools include elements that allow you to format layout such as dividers and columns.
Media tools Media tools are video, audio, flash and other files including documents such as Word or even PowerPoint.
But wait…there’s more! You can also insert a formatted quote, embed html code from other sources (such as flashcards made in Quizlet), include a poll or survey and link up your social media sites.
Step 13 Start by dragging elements onto your page. A title is a good place to start.
Step 14 When you drag an element onto your page it appears with a blue border and will prompt you to ‘Click here to edit’ or ‘Click here to upload’ etc
Good to know To remove an element simply hover over the element until the cross appears on the right hand side and click on it.
Good to know If you do click on the cross you will be prompted to make sure you want to delete! No accidently deleting text you’ve worked on for hours. Oh and weebly automatically saves as you work.
Images When you drag an image to your page you need to click on the icon that says ‘Upload Image’
Images cntd You will then be able to upload an image from your computer, choose one from a URL or search weebly’s free and pay for image banks.
Slideshow Inserting a slideshow will require you to choose what style you would like before uploading your images. You can always add more or remove images later.
YouTube Drag the YouTube video icon onto your page. A video is automatically loaded. Click in the top bar of the video and this box will appear, paste the YouTube URL into the box. Centre, right and left justification of the video are available here too.
YouTube cntd Click on Advanced to control the size of the video. Again, you can change this later if you change your mind.