Download
1 / 36
641 likes | 1.16k Vues
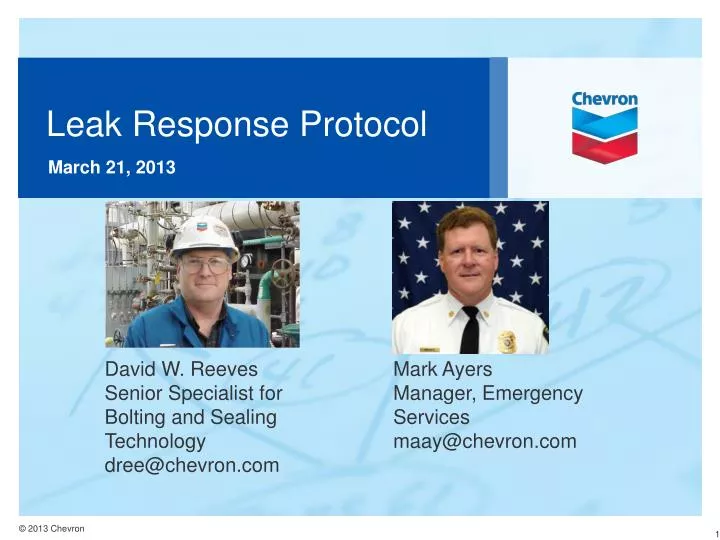
Leak Response Protocol. March 21, 2013. David W. Reeves Senior Specialist for Bolting and Sealing Technology dree@chevron.com. Mark Ayers Manager, Emergency Services maay@chevron.com. Sealing Applications. The expectation at Chevron is ZERO leaks:

E N D
Leak Response Protocol March 21, 2013 David W. Reeves Senior Specialist for Bolting and Sealing Technology dree@chevron.com Mark Ayers Manager, Emergency Services maay@chevron.com
The expectation at Chevron is ZERO leaks: Zero Leaks regardless of the number of startups and shutdowns Zero Leaks during plant upsets Before and After
LDAR Data Top 10% with the lowest leak rates.
Leak Response Timeline The Leak Response Protocol guides decisions: Anyone can use Stop Work Authority in response to a leak, including upon discovery and at any point during mitigation or response efforts. Leak Discovered 15 Min 1 Hour Protocol Guides Dialog Mitigation or Emergency Shutdown and Response • If Mitigation (Operations in control) • Single meeting to go over checklist, develop an action plan and evaluate risks. • Op’s to review isolation options and emergency shutdown procedures. • Before putting people close to the leak, consider using the Gas Find Infrared (VOC) camera to get a visual on the size of the vapor cloud, and/or use LEL detectors when approaching the leak source. • Implement the primary plan, and the backup plan if needed. • If Emergency Shutdown and Response (ERT in control of Response) • Implement emergency shutdown procedures. • Deploy refinery ICS system. • Activate evacuation or shelter in place notifications. • Request mutual aid if needed. • Community notifications as needed or required. Immediate Actions ERT deploys for leak response or standby coverage. Site cleared of non-essential employees. Gather available resources (Op’s, ERT, Management, Inspection, Engineering, Materials, Maintenance, Safety, etc. as needed and if available) and establish a safelocation to meet. Notifications of internal and external parties as appropriate.
Any ONE of the questions is enough to justify a unit S/D. Leak Response Protocol Step 1: Limit site access around the leak to essential personnel only. Step 2: Identify the leaking material. . . . - Steam, Water, Hydrocarbon, Toxic or Hazardous Chemical - Size / Location / Accessibility - TemperatureStep 3: (1) Does it pose an immediate danger to safety, health or the environment? Consider acute toxicity, vapor cloud forming, potential exits, above auto Ignition temperature and personnel exposure.(2) Can the leak be safely isolated or safely mitigated? Remote isolation valves/equipment is available to secure leak without exposing personnel to unacceptable risk, even if the leak gets worse.(3) Can unit continue to operate with leak/system isolated? Consider if bypasses or alternative routings/mitigations are available.(4) Is the worst case failure mechanism understood (pin hole vs. generalized thinning)?(5) Are you in doubt that we can safely continue to operate the unit or safely secure the leak? Shutdown Unit WARNING: Do not remove insulation if source of leak and failure mechanism are not well understood. YES NO NO NO YES
Emergency Response Checklist Use the below checklist to organize emergency responses to leaks. (Double click this link while in the “Normal View” mode to access just the checklist.) For any plan put in place, evaluate the most likely worst-case outcomes, the possibility of them happening, and then make sure there is a Plan B in place to deal with them. If there is no workable Plan B to stop the incident from escalating, and there is a very real possibility the initial plan could fail, shut the plant down. For instance, Plan B might be using proper PPE and having charged hose lines to protect people and equipment while studs are tightened, or while someone is standing by to operate manual isolation valves. However if an operation is likely to cause a sudden uncontrollable release, it should not be attempted and the plant should be shutdown. (Double click this link while in the “Normal View” mode to access a single page that contains both the checklist and protocol. If you print it “double sided”, it will also contain slides 28 and 29.)
Leak Response Protocol March 21, 2013
Supporting Information • Definition of a Leak • Current Situation • Leak Response Overview • Emergency Response Checklist • Facility Implementation • Training Objectives and Examples • Potential High Consequence Materials and Services • Reference Materials
Definition of a Leak: • A “leak” is defined as an unexpected loss of primary containment which has a potential to have a negative impact on operations, the safety of employees, and/or the environment. • Incidental releases of hazardous substances where the substance can be absorbed, neutralized, or otherwise controlled at the time of release by employees in the immediate release area, or by maintenance personnel, are not included. Examples include exceeding LDAR and AQMD fugitive emission limits. But if mitigation involves working on live equipment, the Leak Response Protocol should be considered.
Current Situation Many refineries in Manufacturing and throughout industry have defined policies for how to mechanically repair leaks. These policies focus more on clamps and injections, rather than on the decision-making process as to whether a given plan of action is the best and safest course to follow. These existing written instructions do not contain specific criteria to be considered for deciding whether or not the unit should be shut down, or whether the repair can safely be made with the unit in operation. This Leak Response Protocol attempts to mitigate risk in responding to leaks by providing additional guidance to Operations and bringing standardization to leak response decision-making.
Leak Response Overview If there is any doubt about what to do, shut down the plant or move it to a safe condition. If there is no time to review options, shut down the plant or move it to a safe condition. In some cases it may not be immediately clear what action should be taken to best protect people, the plant and the environment. If there is time to review options, get all available parties together in a meeting so all issues and concerns can be considered. After all the inputs have been gathered, develop an action plan, make sure it is clearly communicated to everyone involved, and then move forward to implement it. Utilize the Leak Response Protocol and Emergency Response checklist to guide the decision-making.
Emergency Response Checklist To assist with decision-making when responding to a leak, we have created a single page checklist. Operations can initiate its use for any leak, or it can be brought to the incident by the ERT and filled out jointly with Operations.
Training Objectives and Examples When Responding To Leaks –Ask “What is The Right Thing To Do?” • Keep in mind our Tenants and objectives: • Do it safely or not at all! • There’s always time to do it right! • We do not want to put people in harm’s way to try and evaluate active leaks that may pose a risk to responders. • All leaks will be immediately addressed and managed safely, or the equipment will be shut down. • When in doubt use your Stop Work Authority and shut it down!
Facility Implementation To implement this Leak Response Protocol, each facility must: • Turn the important information in this PowerPoint deck into a Refinery Instruction (RI) or include it in an existing instruction (i.e., an Emergency Response instruction). • If the Protocol is locally considered a “Safe Work Practice” or Procedure, it must be reviewed and updated (if needed) every 3 years. If it is a Policy or Guideline, it must be reviewed and updated (if needed) every 5 years. • Training on the RI must be provided to everyone that might respond to process leaks, including HO’s, Shift Supervisors, RSL’s, ERT members, Maintenance Supervisors, Head Mechanics and all contractors engaged in leak mitigation and response. After initial training, refresher training must be provided at least every 3 years.
Training Objectives and Examples Learning Objective: Practice using the tools by reading through the Emergency Response Checklist and Protocol, and then consider how you might respond to the following leak examples. If they would require the use of the checklist, try filling one out.
Training Objectives and Examples Scenario 1 • You notice this steam leak during rounds on this 300 lb steam system. • Some fittings are non-seal-welded screwed piping that has been in service for years and rarely used/operated. • The upstream isolation valves won’t close. • The leak is located at grade in a non-congested area. • What should you do?
Training Objectives and Examples Our advice: • Steam is dangerous and screwed piping increases risk. • Many burn injuries have been from steam and condensate, so personnel exposure is a concern. • Barricade the area with caution tape so no one is accidentally exposed. • Inform operations in the event they need to shut down. • Have a safety review as needed with inspection, safety and engineering, and complete a job safety analysis (JSA) to mitigate the leak. • If the problem is not potentially catastrophic, and if the insulation can be removed safely, then prepare a specific plan to safely remove the insulation. Otherwise, do not remove insulation and proceed with isolating / depressurizing the line (or shut down the equipment / unit) until the hazard is abated. • Probably would not require the use of the checklist as these leaks tend to develop and escalate slowly, there is not much risk of fire and steam is not a hazardous material.
Training Objectives and Examples Scenario 2 • You notice oil-soaked insulation on an exchanger. • The exchanger contains crude oil at approximately 125F and 150 psi. • 10 lineal feet of insulation is stained and there is an occasional drip. • There are no block valve(s) to isolate this line. • What should you do?
Training Objectives and Examples Our advice: • Barricade area to prevent accidental contact. • Since the crude is below the auto-ignition and flash-point temperature, and at a low pressure, the risk of fire is reduced. • Review the situation with inspection, maintenance and technical and determine if the insulation can be removed safely. In this case the leak is likely from a flange, so the insulation blankets can be easily removed and are very unlikely to contain any pressure. • Develop a safety plan, lockout source(s) of energy/pressure if needed, wear proper PPE, and remove the insulation per the safety plan. If the insulation can’t be removed, isolate and shut down the equipment. • The oil in oil-soaked insulation can oxidize over time and spontaneously combust, so leaks like this must be resolved and the insulation changed. • Probably would not require the use of the checklist as these leaks tend to develop and escalate slowly and there is not much risk of fire.
Training Objectives and Examples Scenario 3 • Naphtha is dripping from this oil-soaked insulation at the rate of about 1 drop every 4 seconds. • The process temperature is approximately 550F at 100 psi. • The leak is about 20 feet above ground and there are no isolation valves upstream between the leak and the column. • Inspection has been monitoring the pipe wall thickness on sections of this line but so far it is above the minimum required thickness. • What should you do?
Training Objectives and Examples Our advice: • Isolate, barricade and evacuate the area. • Shut down the equipment, unit or vessel as fast as you can safely. • Do not remove the insulation! Why? • The leaking material – naphtha – is flammable/combustible. • The process temperature is above the auto-ignition temperature. • There is no way to isolate with block valves. • Addressing the leak will put people in harm’s way with limited egress due to the elevation and lack of accessibility. • The leak rate should not be a consideration. Recent industry experience with “1 drop every 5 seconds” showed that this small leak rate was actually masking a section of pipe that had corroded below it minimum required thickness. • The pipe section will need to be shut down, depressured, isolated, assessed to find the root cause and repaired. • An ERT response and the use of the checklist would both be required.
Training Objectives and Examples Scenario 4 • You notice a bolted connection leak on a re-boiler. • The line contains a jet side cut above its auto-ignition temperature of 600F, and operates at 40 psi. • A vapor cloud is already present upon arrival. • The leak is about 30 feet up the column. • There are no known corrosion issues. • There are no block valve(s) to isolate this line. • What should you do?
Training Objectives and Examples Our advice: • Isolate, barricade and evacuate the area. • Shut the plant down. All this vapor cloud needs is an ignition source and it will ignite. If the vapor cloud becomes large enough to cause a detonation, greater damage to the plant could result. If the vapor cloud ignites, flame impingement on other equipment can escalate the incident quickly. Sending people up to try and stop the leak puts them at risk with poor egress options. • An ERT response and the use of the checklist would both be required.
Training Objectives and Examples Scenario 5 • You notice a bolted connection leak. • The line contains crude or other heavy material that is below its auto-ignition temperature. • The leak is a dripping leak. • The leak is about 15 feet above the ground. • There are block valves that can isolate the equipment, but closing them would cause the plant to shut down. • What should you do?
Training Objectives and Examples Our advice: • Call engineering and maintenance to assess the leak and decide on a plan. This might include tightening the studs, clamping the connection, leak seal / injecting the connection, or shutting down the plant so the equipment can be opened. • Tape off the area as needed, and if there is concern that the leak could suddenly worsen or flash, consider setting up fire monitors or having ERT standby. • Generally, bolted connections do not catastrophically fail. In most cases, increasing gasket stress will resolve the leak. While the risk of making the leak worse by tightening the studs is very small, a JSA should be done before work starts. • Probably would not require the use of the checklist as these leaks tend to develop and escalate slowly and there is not much risk of fire. Would require its use if there was an active leaker, or chance the leak could get worse, or if ERT is called out to standby.
Training Objectives and Examples Scenario 6 • You notice a valve bonnet leak on a block valve. • The line contains crude or other heavy material that is below its auto-ignition temperature. • The leak is a very slow dripping leak. • The leak is up on a platform. • There are no block valves that can isolate the equipment. • What should you do?
Training Objectives and Examples Our advice: • Call engineering and/or maintenance to assess the leak and decide on a plan, which will probably involve injecting the connection. We have also built clamps that can go around the entire valve. Generally these leaks do not pose much risk unless the valve or stem is chattering. If this is the case, aggressive action should be taken to either stop the chattering (like changing the valve position), or the valve should be isolated, or in the worst case consider shutting down. Valve stem chatter can cause the packing to break apart, fail and blow out of the valve. • Tape off the area as needed, and if there is concern that the leak could suddenly worsen or flash, consider setting up fire monitors or having ERT standby. • Probably would not require the use of the checklist for just a packing leak, but would require its use if it was an active leaker, there was a chance the leak could get worse or if ERT is called out to standby.
Training Objectives and Examples Scenario 7 • You notice a flange leak. • The line contains crude or other heavy material that is below its auto-ignition temperature. • The leak is a very slow dripping leak, flange is 200F at 200 psi. • The leak is coming from a nozzle on top of a heat exchanger. • There are no block valves that can isolate the equipment. • What should you do?
Training Objectives and Examples Our advice: • Call engineering and maintenance to assess the leak and decide on a plan. This might include tightening the studs, clamping the connection, or leak seal / injecting the connection. • Sometimes nuts have to be removed to install injection fittings. This is often called “hot bolting” and can increase the risk of the leak suddenly getting worse. Refer to GEN-5209 (Sealing and Bolting CES standard) for further guidance. • Tape off the area if needed, and if there is concern that the leak could suddenly worsen or flash, consider setting up fire monitors or having ERT standby. • Generally, bolted connections do not catastrophically fail. In most cases, increasing gasket stress will resolve the leak. While the risk of making the leak worse by tightening the studs is very small, a JSA should be done before work starts. • Probably would not require the use of the checklist as these leaks tend to develop and escalate slowly and there is not much risk of fire. Would require its use if it was an active leaker, or there was a chance the leak could get worse, or if ERT is called out to standby.
Potential High Consequence Materials and Services Equipment in rapid vaporization / auto-ignition service can have much higher consequence than most other services • Focus on 3 Process Areas • Rapid vaporization (LPG) / auto-ignition process streams • Gases: Anhydrous Ammonia / HF Acid / H2S>3% in a gaseous stream • Crude and Gasoline Storage Tanks Rapid Vaporization LPG Explosion in Japanese Refinery
Rapid Vaporization/Auto-Ignition Systems - Potential High Consequence Sections of Units • Why?Rapid vaporization and auto-ignition are attributed to the vast majority of major incidents. • Rapid Vaporization Characteristics • -250 to 1 expansion ratio • Heavier than air • Low explosive limit (as low as 2%) 1. FCC, Crude and Coker Distillation bottoms Relief Valves Overhead Liquid Recovery Relief Valves Side Cuts to first exchanger EBV’s Crude Column Vacuum Column Heater SIS Heater SIS HGO/Reflux Pumps HGO Exchangers EBV’s Crude Heater Vacuum Heater Bottoms Pumps Vacuum Bottoms/ Reflux Pumps Vac Bottoms Exchangers and Filters Expected Units Coker/ SDA FCC Alky Crude TKC and Isomax Reactors Isomax Distillation/Gas Recovery Butamer Yard DIB Hydrotreaters Hydrocrackers Other LPG Spheres/ Loading Crude and Gasoline Tanks Anhydrous Ammonia Fire/Foam/ Deluge Systems Flares 2. Hydrotreaters, Crackers, Reformers from Heater to Low Pressure Separator Relief Valves Finfan Coolers and Exchangers SIS Reactor(s) Heater Feed/Effluent Exchangers High and Low Pressure Separators 3. Crude, FCC, Coker, Alky and Treater Gas Recovery Units Gas Condensers Absorber/ Stripper Depropanizer Debutanizer 34
Reference Materials • Hazardous Waste Operations and Emergency Response standard (HAZWOPER, 29 CFR 1910.120) • Excerpt from API 574, Inspection Practices for Piping System Components, 2009: • 9.3 Investigation of Leaks • On-stream piping leaks in process units can occur for various reasons. Those who investigate the leak may be particularly at risk to the consequence associated with release of the process fluid. A site may want to create a general safety procedure to be followed during a piping leak investigation. A further precaution is to hold a safety review before any leak investigation. The review would consider the state of a piping system in terms of pressure, temperature, remaining inventory of process fluids, potential damage mechanisms and similar factors. The safety review team should define: • a “hot zone” around the leak site, and establish PPE and additional firefighting equipment requirements to perform work inside this zone; • b) decontamination requirements upon exit from the hot zone and other requirements necessary to protect personnel and the environment. • The safety review team must be careful making assumptions about the leak’s cause. Incidents have occurred where investigative personnel assumed they knew the cause of a small leak on an operating line and were caught unprepared when the leak suddenly became quite large.
Conclusion: • You can never go wrong by implementing and using the protocol and checklist for any leak. • Decisions have to be made at every leak event. This protocol provides some structure and process for driving good decisions. • Already used at 6 of 7 facilities with good reviews.