Download
1 / 27
300 likes | 424 Vues
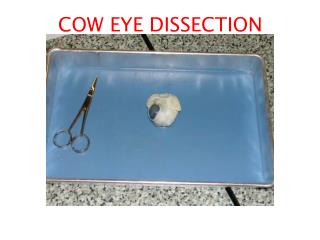
Cow Eye Dissection. Objectives. By the end of this lesson, students will be able to: Demonstrate proper dissection safety techniques. Explore and identify the external anatomy of the cow eye. Explore and identify the internal anatomy of the cow eye.

E N D
Objectives By the end of this lesson, students will be able to: • Demonstrate proper dissection safety techniques. • Explore and identify the external anatomy of the cow eye. • Explore and identify the internal anatomy of the cow eye. • Compare and contrast human and cow eye anatomy • Evaluate how the structure of the parts of an eyeball relate to its function.
Why Dissect? Dissection allows students to: • Practice safety procedures • Construct science process skills • Organize the hierarchal relationships of tissues, organs, organ systems and organisms • Compare similarities and differences among organisms • Connect organism complexity to its diversity
Materials • Cow eye specimen • Dissection tray or Styrofoam meat tray • Dissection kit with scissors, pins, scalpels, tweezers and probes • Gloves • Goggles • Plastic aprons • Student worksheets
General Safety Rules • The classroom should be well ventilated • Work space should be flat and free of unnecessary materials • All equipment should be clean and unbroken • ABSOLUTELY no eating, drinking or gum chewing during dissection activities
Sharp Instrument Safety • Prepare a container for disposal of broken instruments or glassware • Dispose of the container intact and replace with a new one to prevent others from being cut • Inventory all sharp items to ensure all objects remain in the classroom • Ensure that students use sharp instruments properly. • Remind students they should always cut away from themselves and others
Before we proceed While dissecting, be respectful of your lab partners and of the specimen you are about to explore, observe and learn from. Take extra care with your dissection tools. Your scissors are your most important tool, but be sure to handle them carefully and always double check before cutting. If you have any questions, please ask.
Attire • Wear Gloves • Wear Aprons • Wear Goggles (ANSI Z87.1) Always!! No Exceptions!!!!
Interesting Facts Look all around without moving your head. Look up, look down, look side to side and all around. You have six muscles surrounding your eye that allows you to look in different directions. However, cows only have four muscles. Therefore, they can only look up, down, left and right. They are not able to roll their eyes like you can.
Interesting Facts Muscle • Reach up and feel around your eye. Can you feel the bone of your skull? Fat surrounds your eyeball to keep it from bumping against the bone and getting bruised. • The fat and muscle surrounding the cow eye is cut away when dissecting in order to see the eyeball. Fat Optic Nerve
External Anatomy • Obtain a cow eye, place it in your dissecting pan and rinse with water. • Observe the white part of the eye. This is the sclera. The sclera is the outer covering of the eyeball. Sclera Sclera Fat
External Anatomy Eyelid • Locate the eyelids. • Observe the blue portion of the eye. This is the cornea. The cornea starts out clear but becomes cloudy after death. • Look through the cornea and locate the iris. The iris is a round black tissue. • Locate the pupil. The pupil is the round opening in the center of the eye. Cornea Pupil Iris
External Anatomy • On the opposite side of the cornea, locate the optic nerve. The optic nerve is a white cord on the back of the eye about 3 mm thick. • The following video will review what we’ve learned about the external anatomy of the eye. Optic Nerve
Incision 1 Sclera • Now remove the fat and muscle surrounding the eye using caution not to remove the optic nerve. • Place the eye in the dissecting pan so it is again facing you. Using your scalpel, pierce the white part of the eye (sclera) just behind the edge of the cornea. Make a hole large enough for your scissors.
Incision 2 • Using your scissors, carefully cut around the eye using the edge of the cornea as a guide. Lift the eye and turn it as needed to make the cut and be careful not to squeeze the liquid out of the eye.
Internal Anatomy • If a fluid should ooze out, it is called the aqueous humor. This fluid is clear and made of protein and water. The aqueous humor helps give the eye its shape. Aqueous Humor
Internal Anatomy • After completing the cut, carefully remove the front of the eye and lay it in your dissecting tray. • Place the back part of the eye in the pan with the inner part facing upward.
Internal Anatomy • Observe the tough tissue of the removed cornea. Cut across the cornea with your scalpel to note its thickness. • Observe the iris. The iris is the black tissue of the eye that contains curved muscle fibers • Locate the ciliary body. It is located on the back of the iris that has muscle fibers to change the shape of the lens. Ciliary Body Pupil Iris
Internal Anatomy Retina • Locate the lens. It can be found by looking through the pupil. • Using your scalpel and dissecting needle, carefully lift and work around the edges of the lens to remove it. • The gel the lens is suspended it is called the vitreous humor. Lens Vitreous Humor
Internal Anatomy • Observe the back of the eye after the lens has been removed. It should be shaped like a bowl. On the inside of the bowl is a thin film with red blood vessels running through it. This is the retina. • The retina is attached to the back of the eye at just one spot. It is called your blind spot. Use forceps to separate the retina from the back of the eye to see the layer beneath it. Retina Blind Spot
Internal Anatomy • The layer beneath the retina is called the tapetum. It is a shiny, blue-green layer designed to assist night vision by reflecting light back through the retina. Humans do not have a tapetum. This structure is responsible for the shining of animals eyes at night. Tapetum
Clean Up • Place all dissecting specimens and parts into approved container provided by the instructor. • Wash dissecting equipment and trays in dilute bleach solution provided by the instructor. • Dry equipment thoroughly to prevent rusting. • Clean table tops with dilute bleach solution provided by the instructor. • Wash hands thoroughly before leaving the classroom.
Resources Cow Eyeball Dissection: http://www.exploratorium.edu/learning_studio/cow_eye Cow Eye Dissection, worksheet, lab: http://www.dishs.org/webpages/dalpoggettom/PhisicalScience/coweyedissection.htm Cow Eye Dissection: http://www.cas.vanderbiltedu/bsci111b/eye/cow-eye/cow-eye-dissection.htm Dissection Narrative: http://www.seq.org/-ca_science/Silva/HumanBio/Units/Nervous/eyedissection.doc