Download
1 / 21
210 likes | 222 Vues
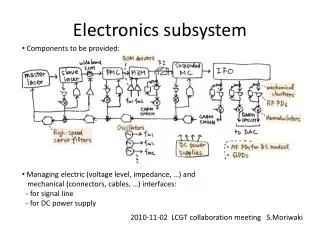
IO Subsystem. IV Ports and peripherals. IO Subsystem (1). All devices connected to the system buses, other than memory and CPU Input and output ports (I/O): interface CPU with external world directly Input port Output port Input/Output port

E N D
IO Subsystem IV Ports and peripherals
IO Subsystem (1) • All devices connected to the system buses, other than memory and CPU • Input and output ports (I/O): interface CPU with external world directly • Input port • Output port • Input/Output port • Peripherals: May be only internal to system or may have also external connection
IO Subsystem (2) • Input transaction: Information toward CPU • Output transaction: Information from CPU • Important (not exhaustive) peripherals: • Timers: Uses such as measuring time intervals between two events, generate interrupts at specified and many others. • Watchdog Timer (WDT): Safety device and/or timer • ADC and DAC: to deal with analog inputs/outputs.
IO Structure • Data Registers: • Input and Output • Control Registers: • Used for I/O and peripheral configuration • Status registers: • Show information about information transfer or configuration status • Control registers may contain status bits.
IO Mapped vs. Memory Mapped IO Mapped IO - Different sets of addresses - Different instructions for transfers Memory Mapped IO - Same system of addresses - Same instructions for transfers
IO Mapped vs Memory Mapped (2) • IO mapped I/O has different sets of addresses for memory and for I/O subsystem • CPU distinguishes address with type of instruction • Example: 8086 uses MOV for transfers to/from memory, OUT to transfer to Output port, and IN from port. • Routing of address bus is done by control bus according to instruction. • Memory mapped I/O does not distinguish between types • User must know memory map (or “names”).
IO Ports: Remarks • Input port • Buffered: Readable only at a given moment • Latched: Readable on demand • Must not be left floating • Interruptible or non interruptible • Output port • “Always” Latched
Important Remark for Input Do not leave an input floating: If necessary use pull up or pulldown resistors Pulldown Resistor Pullup Resistor
General Purpose I/O (8 bits) • Named P0 to P10 • Number of ports and available bits depends on model • P1 and P2 have interrupt capability • Bit independently programmable • Edge selectable interrupt capability • Some series have individually programmable pulldown/pull-up resistors • Depending on model, pins can be configured for special I/O
Simplified Hardware configuration: 1. Non interruptible port Data Registers Control Registers
Basic I/O Registers (1/3) • Function Selection Register (PxSEL): Selects the connection for the pin, either to the port or to other peripheral(s) • 0: Connected to port (default) • 1: Connected to other module(s) • To connect pin 1.2 to port (if necessary, since it is connected by default), clear bit 2 of (P1SEL) [bic.b #BIT2, &P1SEL] • To connect pin 1.2 to module , set bit 2 of (P1SEL) [bis.b #BIT2, &P1SEL] • Direction Register (PxDIR): Selects in or out direction function for pin • 1: Output direction • 0: Input direction (default) • Example: mov.b #0xF0, &P1DIR configures pins 4 to7 as outputs
Basic I/O Registers (2/3) • Output Register (PxOUT): to write signal to output • To output the word 0x2A to port 2: • (P2OT) #2Ah [mov.b #0x2A,&P2OUT] • Input Register (PxIN): Read only register • Example: mov.b &P1IN, R6 transfers input to R6 • Avoid writing to this register (power consumption and does nothing)
Multiple peripherals pins: (3/3) • Several Function Select Registers (PxSEL y PxSEL2 for 2xx family): For exemple , in ‘2xx family • PxSEL -- PxSEL2: • 00: I/O pin • 01: Primary peripheral module • 10: Reserved (device specific) • 11: Secondary peripheral module • Consult data sheets and user guides for specific information.
More Examples: • To put pins 0, 1 and 6 of Port 3 in output mode and all the others as input: • (P3DIR) # 01000011b [ mov.b #0x43,&P3RID] • To put pins 0, 1 and 6 of Port 3 in output mode leaving the others unchanged: • (P3DIR) # 0x43 OR (P3DIR) [ bis.b #0x43,&P3RID] • To see if the input at pin 3 of input port 2 is high: • Test bit 3 of port 2 [bit.b #BIT3,&P2IN]
Interruptible I/O ports (P1 and P2) • Each pin has individual interrupt capability which can be enabled or disabled independently of other pins. • Has the same registers as non interruptible I/O ports, plus three additional registers (all read and write registers) • Interrupt capability is lost when pin is selected for peripheral
Simplified Hardware Configuration: Interruptible port Control Registers Status Register
Interruptible Port Registers • Interrupt Enable Register (PxIE): enables interrupt capability • 1 enabled, 0 disabled • Interrupt requests from I/O ports are maskable • Interrupt capability is lost if pin is used for other module. • Interupt Edge Select Register (PxIES): • 1: high to low, 0 low to high • Interrupt Flags (PxIFG) • Automatically set when interrupt is generated • Writable, so interrupt may be generated by software • ATTENTION: I/O IFG Reset only by software • 0: no interrupt pending, 1: interrupt pending
I/O Ports with Pull-up Pull-down Resistor (Example from MSP430g2211 data sheet. Consult specific information for other models. Diagram is not complete) PSEL PDIR Pout PREn Condition 0 0 x 0 IN, no R 0 0 0 1 In, R pull down 0 0 1 1 IN, pull up R 0 1 - 0 Out 0 1 x 1 Illegal 1 ----------------Use with module
Remarks • In your launchpad: Check if R-pull up is connected at P1.3 if using push-button (see next slide) • If not, connect with software: • bic.b #BIT3,&P1DIR ; verify input status • bis.b #BIT3,&P1REN ; connect resistor and • bis.b #BIT3,&P1OUT ; set it as pull up • Make an habit to set unused port pins as outputs.