Download
1 / 55
600 likes | 1.09k Vues
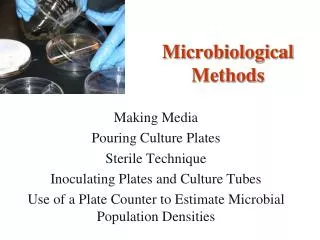
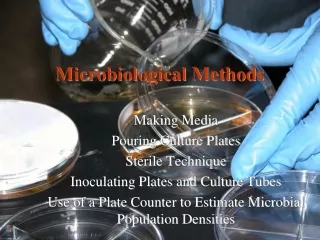
Microbiological Methods. Why grow organisms in the lab when they are present in nature?. Large quantity needed for detailed studies To generate strains of interest Recombinant protein expression Industrial applications. Culturing Microorganisms.

E N D
Why grow organisms in the lab when they are present in nature? • Large quantity needed for detailed studies • To generate strains of interest • Recombinant protein expression • Industrial applications
Culturing Microorganisms • To grow microorganism of choice in the laboratory • There are two basic culture techniques used in microbiology: • Liquid culture: bacteria, algae, and some fungi can be reared in culture tubes (test tubes) in a liquid medium. • Liquid medium is best when you want to rapidly increase the concentration of the organism or when you want to grow motile cells.
Culturing Microorganisms • There are two basic culture techniques used in microbiology: • Culture Plates: Liquid medium is solidified using agar (agarose) and poured as a thin layer in the bottom of a culture dish (also sometimes called petri plate) • Culture plates are used when you want to test (1) antibiotic sensitivity, (2) estimate culture concentrations from environmental samples, or (3) isolate individual colonies from environmental samples. Colony– macroscopically visible collection of millions of bacteria originating from a single bacterial cell.
A pure culture is one in which all organisms are descendants of the same organism. Medium(media, plural): a nutrient blend used to support microbial growth. • A sterile medium is one which is free of all life forms. It is usually sterilized by heating it to a temperature at which all contaminating microorganisms are destroyed. • Colony: is the smallest bacterial unit that can be seen with the naked eye. • Culture: Is part of specimen grown in cultural media. • Culture media: is a medium(liquid or solid) that contains nutrients to grow bacteria in vitro. Because sometimes we cannot identify with microscopical examination directly, and sometimes we do culture for antibiotics sensitivity testing. • Prosperities of Media: • Media has to support the growth of bacteria, should be nutritive(contains the required amount of nutrients). • With suitable pH (neutral to slightly alkaline 7.3-7.4). • Suitable temperature. • Suitable atmosphere (bacteria grow at 37c).
Forms Of Culture Media • Broth tube: are tubes containing a liquid medium. A typical nutrient containing broth medium such as Trypticase Soy broth , nutrient broth. After incubation, growth (development of many cells from a few cells) may be observed as one or a combination of three forms: • Pellicle: A mass of organisms is floating on top of the broth. • Turbidity: The organisms appear as a general cloudiness throughout the broth . • Sediment: A mass of organisms appears as a deposit at the bottom of the tube.
Slant tubes:are tubes containing a nutrient medium plus a solidifying agent, agar-agar. The medium has been allowed to solidify at an angle in order to get a flat inoculating surface. • Stab tubes (deeps):are tubes of hardened agar medium which are inoculated by "stabbing" the inoculum into the agar. • Agar plates: are sterile petri plates that are aseptically filled with a melted sterile agar medium and allowed to solidify. Plates are much less confining than slants and stabs and are commonly used in the culturing, separating, and counting of microorganisms.
General protocol for growing bacteria • Pouring media “plates” • “Streaking” bacteria on media plates • “Picking” a “colony” from the plate • “Inoculating” a liquid culture Everything needs to be done under sterile conditions!!
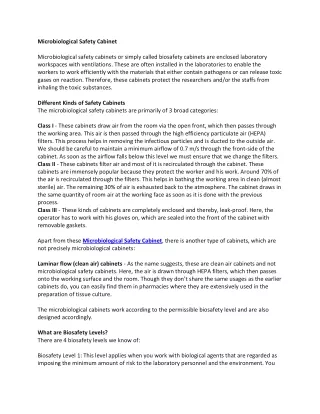
Sterile Technique • When culturing bacteria or other microorganisms, it is important to keep your work area as clean as possible. • This prevents the introduction of other microorganisms from the environment into your culture. • The techniques used to prevent contamination are referred to as sterile techniques.
Sterile Technique • Start by washing your down your work or lab benches with a surface disinfectant. The most commonly used disinfectants for lab use are: • 10% bleach (recommended by the CDC) • 85% ethanol
Sterile Technique • Turn off any forced air heating or air conditioning units that create strong air current in your work area. • A small room or closet that can be closed off is worth the effort to set-up if you will be doing a lot of microbial culturing. • You can install a UV bulb in a fluorescent light fixture to surface sterilize your work bench if you have an enclosed area. Remember to leave the area when you turn on the UV light source!
Sterile Technique • All glassware should be cleaned and sterilized before you begin. • All pipettes, spatulas, and test tube (culture) racks should also be sterilized. • You can purchase sterile, disposable culture tubes, petri dishes, and pipettes to minimize the quantity of glassware that you have to sterilize.
Sterile Technique • Don’t forget to wash you hands after you finish cleaning and put on a pair of sterile disposable gloves before you begin. • Once your work area is clean, your hands are clean, and your glassware is clean and sterile, don’t contaminate the work area by placing “dirty items” such as pencils, pens, notes, or books in the sterile work area.
Microbiological Media • The type of growth medium that you use is a function of the organisms that you want to culture. Use a reference book (there are many) to determine the type of medium that is best suited for your organism of interest. • Common media include Luria Broth (LB), Nutrient Agar, Potato-Dextrose Agar (PDA), Bold’s Basal Medium (BBM)….
Liquid Medium 10 g Bacto-Tryptone 5 g Bacto-yeast extract 5 g NaCl Distilled H2O to 1 l volume Adjust pH to 7.0 Sterilize for 45 minutes using autoclave or pressure cooker Plate Medium 10 g Bacto-Tryptone 5 g Bacto-yeast extract 5 g NaCl Distilled H2O to 1 l volume 2 g Agar Adjust pH to 7.0 Sterilize for 45 minutes using autoclave or pressure cooker Luria Broth
Accurately weigh each of the dry ingredients in your culture media.
Add each dry culture medium ingredient to the culture flask.
Add distilled (or deionized) water to make the correct volume. Heat AND stir (agar will burn if it is not stirred) until all of the ingredients go into solution. When the media boils, it is ready for sterilization.
Media Sterilization • There are two reliable methods used to sterilize microbial culture media: • autoclave • pressure cooker • When using an autoclave, use the “wet” setting for sterilizing liquids (flasks, bottles, culture tubes, etc), and use the “dry” setting when sterilizing empty containers, stoppers, etc.
Media Sterilization (2) • All liquid media should be sterilized for a minimum for 45 minutes at high temperature and pressure. Autoclaves will cycle automatically, but if you use a pressure cooker, set a timer. • Remember not to tighten the cap or seal on any container; it will explode under high pressure and temperature!
Sterilize for 45 minutes using the wet cycle (autoclave) or at maximum pressure in a pressure cooker. Remember to cover the top of the flask or jar with aluminum foil to prevent contamination when as the media cools.
When using a pressure cooker, don’t over fill the cooker, and remember to weight your containers so they don’t fall over!
Sterilize at high temperature and pressure for 45 minutes before turning off the heat. Remember to allow enough time for the pot to heat up!
Plate Pouring Tips • Line empty plates along the edge of the work bench. • Open the petri dish lid at about a 30-45° angle to allow the hot liquid to cover the bottom of the dish. The thermal current created by the hot media prevents bacteria and fungal spores from landing in your clean dish.
Line your sterile petri plates along the edge of the table. Transfer hot media to a small sterile container and pour 15-20 ml of the plate media into each petri plate. The petri plate lid should be open slightly, but not completely open as this increases contamination.
Plate Pouring Tips • As the plates are poured, move the filled plates to the back of the table until the plates cool and congeal. • Once the plates have cooled and the media is firm, store the plates media side-up (bottom) with the lid securely taped or the plates restacked in the manufacturer’s plastic sleeve. • To increase the shelf-life of the plates, store in a cool, dry environment until they are used (refrigerator).
Inoculation of Culture Plates and Tubes • Use either disposable inoculation loops or a metal loop that can be heat sterilized to inoculate plates, slants, and liquid culture tubes. • If using a metal loop, be sure to cool the loop by touching the sterile cooled liquid media or the sterile culture plate before the placing the loop in your live culture. Failure to cool the loop will kill your active microbial cultures!
Inoculation of Liquid and Solid (Slant) Culture Tubes Step 1: Remove the culture tube stopper or cap with one (do not set it down) and flame the mouth of the tube to surface sterilize the mouth. The heated tube surface will generate a thermal current that prevents contamination of the culture.
Inoculation of Liquid and Solid (Slant) Culture Tubes Step 2: Without setting any of the culture materials on the bench, place the sterile inoculation loop in the culture. Step 3: Replace cap on the culture tube with the active microbes and put it in the test tube rack. Step 4: Without setting the loop down, pick-up a sterile fresh culture tube with media with one hand, and remove the cap with the other hand.
Inoculation of Liquid and Solid (Slant) Culture Tubes Step 5: Flame the mouth of the clean culture tube. Step 6: Place the inoculation loop containing the microbes in the fresh media and swirl the loop in the loop in the media to ensure even dispersal in the media. Step 7: If using a solid media slant tube, follow steps 1-5 and then zig-zag the inoculation loop across the slanted surface of the solid media in the tube.
Inoculation of Liquid and Solid (Slant) Culture Tubes Step 8: Flame the mouth of the newly inoculated culture tube and replace the cap. Step 9: Place the culture tube in test tube rack. Step 10: Repeat until all of the sterile tubes have been inoculated. Use a fresh disposable culture loop for each tube or flame the metal loop after each tube has been inoculated.
Inoculation of Liquid and Solid (Slant) Culture Tubes Step 11: Incubate the culture at the recommended temperature (check with your supplier for growth requirements). If using environmental samples, incubation at room temperature will avoid the accidental culture of human pathogens. Step 12: Dispose of all culture materials in a biohazard bag and sterilize all old cultures before pouring out cultures and washing culture tubes. Disposable culture dishes should be melted in an autoclave or pressure cooker prior to disposal.
Inoculating Petri Plates Step 1:Remove the culture tube stopper or cap with one (do not set it down) and flame the mouth of the tube to surface sterilize the mouth. The heated tube surface will generate a thermal current that prevents contamination of the culture. Step 2: Without setting any of the culture materials on the bench, place the sterile inoculation loop in the culture. Step 3: Replace cap on the culture tube with the active microbes and put it in the test tube rack.
Inoculating Petri Plates Step 4: Holding the petri dish lid at an 30-45° angle, work the inoculating loop from the outside of the plate toward the center in a zig-zag pattern that covers approximately 25% of the plate surface (think pie or pizza slice!).
Streaking” bacteria on media plates Streaking loop
Picking a colony and inoculating liquid culture Put the picked colony in liquid media to grow bacteria Picking a colony
Inoculating Petri Plates Step 5: Turn the petri plate 90° to the right, dragging the inoculation loop through the last section of the plate, moving from the outside to the inside in a zig-zag motion. Step 6: Repeat this process twice more until the entire plate surface is covered. NOTE: If you are trying to isolate individual colonies, each turn of the dish will give you fewer microbes so that you can distinguish individual colonies.
Serial Dilution of Environmental Samples or Commercial Cultures • Serial dilution techniques should be used in the estimation of microbial population sizes. • Serial dilution involves the use of a known amount (in ml or μl) in a known volume of liquid media. • A one in ten dilution is made in a new liquid culture tube, and this process is usually repeated several times. The resulting cultures are dilutions of 1/10, 1/100, 1/1000, 1/10,000, for example, of the original sample. • These cultures are plated on petri plates and incubated at the recommended temperature.
Estimating Microbial Population Size • After the inoculated plates are incubated for the appropriate time period, the number of colonies per plate are counted. • Population estimates are obtained by multiplying the dilution factor by the number of colonies per plate. The resulting number is a rate (function) of the initial weight or initial volume used from the environmental sample or culture (per gram soil, per ml or μl of culture).