Download
1 / 29
290 likes | 443 Vues
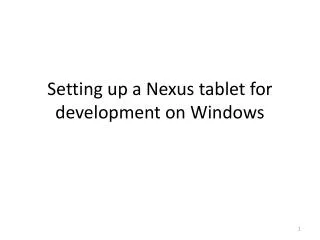
Setting Up and Using a Nexus 7. Step-by-Step Guide. Prepared by the Computer Lab Montgomery County-Norristown Public Library. May 2013. The following screenshots were made using a Google Nexus 7 running the Jellybean version of the OS. Your tablet may differ. This is meant as a general guide.

E N D
Setting Up and Using a Nexus 7 Step-by-Step Guide Prepared by the Computer Lab Montgomery County-Norristown Public Library May 2013
The following screenshots were made using a Google Nexus 7 running the Jellybean version of the OS. Your tablet may differ. This is meant as a general guide.
Setting Up Your Nexus 7 • When you turn on your Nexus 7 for the first time, you are greeted with this Welcome screen. • Choose your language and tap the arrowbutton to get to the screen where you will connect to a Wi-Fi network
Setting Up Your Nexus 7 • Depending on which network you connect to, you may need to enter a password, or accept an agreement on a browser. The device will also guide you through these steps if this is necessary.
Setting Up Your Nexus 7 • After you select a network the device will attempt to connect
Setting Up Your Nexus 7 • Once connected, the device will ask for you to enter your Gmail account credentials if you already have one, or create a new one, or enter a different account such as Yahoo. It is advantageous to register with a Google account because everything you do on your device also syncs with your Gmail account. For example, if you create a task in your calendar, that event will automatically show up if you log into your calendar on a PC.
Setting Up Your Nexus 7 • This is where we enter the account credentials. You see here the on-screen keyboard at the bottom. Type in your email username. Tap the “next” button on the keyboard to go to the next line to enter your password, or simply tap on the “password” line
Setting Up Your Nexus 7 • Once your information is entered, tap on the “Done” key in the keyboard
Setting Up Your Nexus 7 • You will need to accept the agreement with Google. You may read over these agreements by tapping on the blue links. You will also see a checkmark next to “Keep me up to date…”. You can remove this checkmark if you wish. Tap “Ok”
Setting Up Your Nexus 7 • A prompt may appear asking you want to join Google+. Google+ is similar to Facebook, where you can share photos and posts with other Gmail users that you add to your group. Doing this is simply a preference. You can join Google+ later if you wish. • We chose to skip this, so we tapped “Not Now”.
Setting Up Your Nexus 7 • The next screen asks if you wish to import and backup your Gmail account to the device. This is advantageous as it will import all information from your Gmail account you already have (i.e. it syncs your emails, calendar tasks, music library connect to Google, etc.), and it will also backup everything you do on the device in case something happens to it and you need to restore to a certain point. An example would be automatically reinstalling all of the apps you downloaded, rather than searching for them and installing them individually. After you checkmark what you want, tap the arrow button
Setting Up Your Nexus 7 • The next screen asks for your location based on the GPS in the device. This is also a preference and entirely up to you. Some people do not like that fact that Google will know exactly where you are whenever the device is on, and you can turn this feature off if you wish. It is beneficial in case you do lots of searches for places near you, and you don’t want to have to enter your exact location every time. After choosing your options, tap the arrow button
Setting Up Your Nexus 7 • Your device will say that the setup is complete and you can continue to use your device. Tap the arrow key
General Features of Your Nexus 7 • This is the first screen you see. As you use the device, you will notice several notifications that pop up, explaining how to use the device. You can tap “ok” to close the notification
General Features of Your Nexus 7 • This is your central homescreen. Right now it just has your library, but you can move it, resize it, or completely remove it if you wish and replace it with other icons and widgets later. Besides your “central homescreen” there are also four other “homescreens”. You can switch back and forth between these by swiping left or right on the middle of the screen. The middle of these 5 homescreens is your central homescreen. There are three buttons at the bottom. These are your softkeys. From left to right, they are the “back” button, the “home” button, and the “recent apps” button. The back button is used to go back one screen from wherever you are, similar to how a back button works on a web browser. The home button always brings you back to this screen, no matter where you are. The recent apps button brings up a list of any apps that you have opened since powering on the device. You can use this to quickly switch between apps like switching between windows on a computer. Above your softkeys is your favorites tray. This tray appears on every one of your homescreens so you can quickly access these apps. You can remove and add icons from this row to have apps you use the most. The button in the middle that looks like six squares within a circle is your apps button. You use this button to bring up a directory of all of the apps that are installed on your device. Tap this button now.
General Features of Your Nexus 7 • Instead of searching through your apps directory every time you want to open a specific app, you can tap and hold onto an icon and…
General Features of Your Nexus 7 • Drop it onto one of your homescreens so you can quickly access it in the future. • Now look in your favorites tray, you will notice an icon on the far left. It is an apps folder icon. Tap this icon.
General Features of Your Nexus 7 This is an apps folder. It basically groups your icons to compress them into one space. You can create many new folders by just dropping a new icon on top of another icon, just like you would the homescreens (tap and hold). After closing the notification, go back to your central homescreen by tapping the home softkey.
General Features of Your Nexus 7 • You can see some small icons in the upper right of your screen within a thin black bar. These are your system notifications. They show the time, volume level, and battery charge level. As you enable other settings you will see more icons like Wi-Fi strength, Bluetooth connectivity, or alarms. You can see more options by tapping and pulling down on the right side of this bar
General Features of Your Nexus 7 • This is a list of system options that you can easily change. There is also a “Settings” button that you can use to change various options of the device such as the text size, the storage space, how the screen displays, accessibility options, and many more. Now let’s say you want to connect to a Wi-Fi hotspot so you can connect to the internet and use the OMC app we will install later. Tap on the Wi-Fibutton
General Features of Your Nexus 7 • Similar to the screen when you first setup the device, you will see a list of available Wi-Fi connections. We are going to use our library’s Wi-Fi network as an example so you can see how to connect to it if you ever visit our location. Tap on either NPLCom or NPLmain, whichever has a stronger signal (more bars).
General Features of Your Nexus 7 • The device will say you are now connected, which may be true with most Wi-Fi hotspots you connect to, but ours requires you to login as well through a browser. To do this, tap the home button…
General Features of Your Nexus 7 Tap the icon folder in your favorites tray to open the folder
General Features of Your Nexus 7 Tap on the upper left icon in the “folder” labeled Chrome. This is an internet browser similar to Internet Explorer or Firefox.
General Features of Your Nexus 7 • The Chrome browser is now open. To log into our library’s Wi-Fi network, just type any address in the address bar, such as yahoo.com, or amazon.com. You will automatically be redirected…
General Features of Your Nexus 7 • This is our library’s Wi-Fi login page. Read through our internet usage policy. Scroll down the screen to get to the login fields
General Features of Your Nexus 7 • You can pinch out to zoom in to get a larger view of the fields
General Features of Your Nexus 7 • Tap within the fields and enter your barcode and pin number. Tap the “Go” button on the keyboard of the “Submit” button on the webpage
General Features of Your Nexus 7 • You will be brought to our website’s homepage.