Download

1 / 15
150 likes | 291 Vues
Professor Ralph Westfall April 2011. Visual Basic.NET Data Entry. Create a SQL Server Database. Can download database files to C:cis338, then skip to Create Visual Basic Project slide: Nations.mdf , Nations_log.ldf

E N D
Professor Ralph Westfall April 2011 Visual Basic.NET Data Entry
Create a SQL Server Database Can download database files to C:\cis338, then skip to Create Visual Basic Project slide: Nations.mdf, Nations_log.ldf Start>All Programs>Microsoft SQL Server 2008>SQL Server Management Studio>OK Be sure Windows Authentication is being used, write down the Server name:>click Connect Expand server name in Object Explorer window on lower left right-click Databases>New Database>type Nations as Database name:>OK
Import Data Data file for creating database: nations.csv See Saving Changes Not Permitted if have problems saving the file Right-click Nations (database name)> Tasks>Import Data>Next> select Flat File Source>Browse and select Files of type: CSV files (*.csv) to get nations.csv>select Format: Delimited>Next> use Excel to fix bad data and then restart import Next (Use Windows authentication)>Next>Next> Next>Finish> Close
Add ID Field • Expand Databases, Nations, Tables, nations in Object Explorer • Right-click dbo.nations>Design>right-click Column Name in top row>Insert Column • Right-click the new column>Set Primary Key • Go down to Column Properties tab, expand Identity Specification, set (Is Identity) to Yes, set Identity Seed to a value that will not require extra digits to handle all expected growth • i.e., if there never will be more than 898 records, set the initial seed be 101 (1001 for < 8998, etc.)
Modify Fields Change field names and properties: New top row should be named ID with datatype of int (don't allow missing values; must have!) Next row should be named Country with Data Type of varchar(20) Next three rows should be Gold, Silver, Bronze, each with Data Type of int Next row should be Pop, with Data Type of decimal(7, 2) Next two rows should be Capital and Currency (can leave fields at 50 characters wide) File>Save Nations>Yes (ignore warnings)
Detach Database Right-click database name (not table name) in Object Explorer>Facets>select and copy PrimaryFilePath>OK Open File Explorer and paste that path into address box Close the Design window on the right of Management studio Right-click Nations>Tasks>Detach>check Drop Connections>OK Close Management Studio
Move SQL Server Database • Select and Cut nations.mdf and nations_log.ldf files in Windows Explorer • Paste the files into a directory named C:\cis338
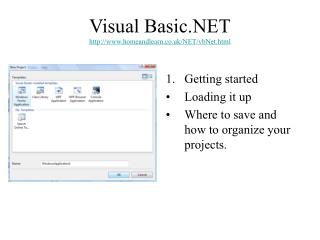
Create Visual Basic.NET Project • Go into SQL Server Management Studio and Attach database at new location • Start>All Programs>Microsoft Visual Studio 2008 (or 2010) • Click Project link after Create: on left side • Expand Visual Basic>click Windows>Windows Forms Application>rename as DataEntry> OK • Right-click Form1 in designer window> Properties • Change (Name) to frmDataEntry • Change Text to Data Entry
Data Connection File> Save All > browse to Desktop (or somewhere else you can find it) >Save Data > Add New Datasource > Database > Next>New Connection > Microsoft SQL Server > paste (local)\SQLEXPRESS > Continue > Attach a Database file > Browse>(select Nations.mdf) > Test Connection > OK > OK > Next > No (don't save connection string) > Next > expand Tables and select nations > Finish (if skip, may not work) If fails after Test Connection, start over on this or start new VB project and try again (waiting helps?)
Add Database – Multiple Server • If working with more than one database, use the following sequence • Data>Add New Datasource>Database> Next>New Connection>, select server name)>Select or enter etc.>Browse to/select (file name)>click Test ConnectionOpen>OK>Next>No (don't move)>Next>expand Tables and select nations>Finish
Add Controls (in VS) Data>Show Data Sources>expand NationsDataSet>click nations>click drop down>select Details>drag nations onto form Unselect other TextBoxes, set Enabled Property of ID TextBox to False Enabled Property of CountryTextBox should be True, set Multiline=True Expand so it can show two lines WordWrap should be True also Move Labels and Textboxes to adjust layout Enlarge form, move items as necessary Make textbox widths correspond to number of characters they will hold (narrower for few)
Add BindingNavigator Button Click the ListBox on the NationsBindingNavigator and select Separator Click it again and select Button Change the DisplayStyle property to Text Set the Text Property to Exit Double-click it and type close in the new Sub
Modify the Query • Need to modify because data isn't sorted, making it difficult to edit • In tray below form, right-click NationsTableAdapter>Edit Queries in DataSet Designer • Right-click Fill,GetData() at bottom of nations window>Configure • Add ORDER BY Country to bottom of query (or use Query Builder to set sorting)>Finish • Run code to verify that there are no syntax errors and data is sorted
Add a "Pick List" • Add a ComboBox to the form with the (Name) of cboCurrency, and a Label that says Alternate Currency • In the Properties for the ComboBox, click to the right of (Collection) in the Items line and type Dollar, Euro, Other, Pound, Yen on separate lines • Set the Sorted Property as True • Click inside the ComboBox to create a Sub • Put the following line of code in the SubCurrencyTextBox.Text = cboCurrency.SelectedItem.ToString
Testing • Run the Project • Use the ComboBox to change currency values • Add values with the + sign button, delete with the red X, save by clicking the diskette icon • Click Exit to stop the project and then start it again and verify the changes • Will crash if you didn't put a primary key on the database table!/ • Will crash if data is too wide for database fields e.g., input a Country with more than 25 characters