Download
1 / 12
130 likes | 271 Vues
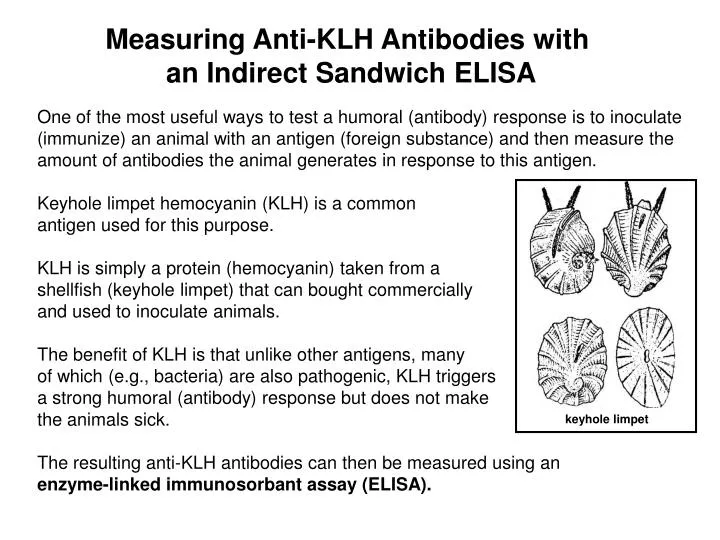
Measuring Anti-KLH Antibodies with an Indirect Sandwich ELISA. One of the most useful ways to test a humoral (antibody) response is to inoculate (immunize) an animal with an antigen (foreign substance) and then measure the

E N D
Measuring Anti-KLH Antibodies with an Indirect Sandwich ELISA One of the most useful ways to test a humoral (antibody) response is to inoculate (immunize) an animal with an antigen (foreign substance) and then measure the amount of antibodies the animal generates in response to this antigen. Keyhole limpet hemocyanin (KLH) is a common antigen used for this purpose. KLH is simply a protein (hemocyanin) taken from a shellfish (keyhole limpet) that can bought commercially and used to inoculate animals. The benefit of KLH is that unlike other antigens, many of which (e.g., bacteria) are also pathogenic, KLH triggers a strong humoral (antibody) response but does not make the animals sick. The resulting anti-KLH antibodies can then be measured using an enzyme-linked immunosorbant assay (ELISA). keyhole limpet
Immunizations and Sample Collection 1. Immunologically naïve hamsters that have never been exposed to keyhole limpet hemocyanin (KLH) are used, because these animals should not have any anti-KLH antibodies.
2. Inject hamsters with KLH dissolved in saline. This will expose animals to KLH and allow them to generate antibodies against KLH (anti-KLH antibodies)
3. Draw blood samples from hamsters, usually 5, 10 and 15 days after inoculation with KLH. These samples should have high levels of anti-KLH antibodies. • There are many types of antibodies in blood. One of the most abundant and commonly measured, however, is immunolglobulin G (IgG). Y Y Y Y blood samples containing antibodies (Y)
Spin blood on a centrifuge blood to separate serum (fluid portion of blood which contains antibodies), from red blood cells. Remove serum and store in -80°C freezer until you are ready to perform ELISA.
ELISA Step 1. 96-well microtiter plates are coated with KLH. In order to do this, a purified “slurry” of KLH (KLH protein suspended in a preservative solution) must be washed to remove the preservatives, diluted in a saline buffer, and added to each well of the plate. This is the KLH coating buffer. The coated plate then sits overnight in the refrigerator to allow the KLH protein to stick to the bottom of the plate. Due to the chemical properties of the plastic microplates, the bottom of these plates are “sticky” and proteins and antibodies easily bind to the surface. The next day, the plate is washed to remove the liquid and any unbound KLH. KLH 96-well microtiter plate Single well
Step 2. Plates must be blocked with a milk-blocking buffer to reduce non-specific binding. Although the KLH binds to most of the surface of the bottom of each well in the microtiter plate, there are still some small gaps (due to the relatively large size of the protein). If left uncoated, these gaps provide a place for antibodies used during the ELISA to bind to the plates (antibodies, like proteins, can easily stick to the plate). Because this binding is not specific to where the KLH is, it is called non-specific binding and will add error to the assay. To control for this, the remaining gaps are filled with milk proteins from dry milk dissolved in buffer. These proteins of varying sizes can fill the gaps and because the antibodies used in the assay are specific to KLH, they will not bind to these milk proteins.
Step 3. Plates must be coated with your serum samples. Plates are washed to remove any unbound proteins from the milk-blocking buffer Serum samples (from experimental animals previously injected with KLH) are added to the plates. These samples should have anti-KLH IgG antibodies that you are trying to measure; these antibodies will bind to the KLH that is attached to the bottom of the plate, just as they would attack a foreign protein in the body of the animal. Two controls are also used, a plate positivecontrol is a sample taken from pooled from inoculated animals that were previously shown to generate a large amount of anti-KLH antibodies. In addition, a plate negative control is used. This sample is taken from pooled serum from naïve animals never inoculated with KLH. Anti-KLH antibodies Y Y negative control No anti-KLH antibodies Y Y Y Y Y Y Y Y Y
Y Y Y Y Y Y Step 4. A secondary antibody is added to the plates. Plates are again washed to remove the remaining serum. At this point, the anti-KLH antibodies that were in the serum samples should be bound to the KLH that is stuck to the bottom of the microtiter plate. Because serum from the negative control animal did not have any anti-KLH antibodies to start with, nothing should bind to the plate for these wells. A commercially available secondary antibody is then added to the plates. This antibody is an anti-IgG antibody that has the enzyme alkaline phosphatase (AP) attached (conjugated) to it (this enzyme will be important later). Because the anti-KLH antibodies now sticking to the plate are anti-KLH IgG, the secondary anti-IgG antibody will now stick to the anti-KLH antibodies, so that the anti-KLH antibodies are now sandwiched between the KLH on the plate and the secondary antibody. Anti-IgG 2ndary antibody (conjugated to AP) Y Y Y Y Y Y Anti-KLH IgG in blood samples Y Y Y KLH
Y Y Y Step 5. Substrate buffer is added to trigger a chemical reaction. Plates are again washed to remove any access unbound secondary antibody. To recap, the plate now has KLH stuck the bottom, anti-KLH IgG antibodies in the serum samples stuck to the KLH, and anti-IgG antibodies conjugated to alkaline phosphatase bound to the anti-KLH IgG. A substrate buffer is now added to the plates. The buffer contains a chemical that triggers a chemical color reaction in the presence of the enzyme alkaline phosphatase. Color Y Y Y Because the secondary antibody is conjugated to AP, wherever the secondary antibody is bound on the plate the chemical reaction will occur. Further, because the 2ndary antibody is only bound where anti-KLH was, the reaction Will only occur in wells with anti-KLH antibodies; the extent of the reaction and thus the amount of color coming off the plates) depends on how much antibody there is.
Step 6. Mircotiter plates are read to determine the extent of the reaction. The plates are added to a plate reader, which is basically a spectrophotometer that can read all 96 wells of the plate at one time. The plate reader determines the absorbance of the color reaction coming off of each well. The raw absorbances for each well, including the plate positive and plate negative control wells, are saved.
Step 7. Determining the antibody titer in serum samples. Now that the ELISA is finished and you have absorbance values, antibody titers can be calculated. The important calculation is call the percent plate positive value. Usually, each serum sample and the plate positive control, are assayed in duplicate on a microtiter plate. The first step is to calculate the mean of these two values for all of the samples and the plate positive controls. The mean of the two plate positive control wells serves as the plate positive value for that plate (note: because of variability between plates, plate positive controls are run on each plate, so each plate has its own plate positive value) To calculate the % Plate Positive value for a given sample, divide the mean of that sample by the mean of the plate positive value and multiply by 100 If the positive control has absorbance of .510 and .490 (mean= .500), and sample 1 has absorbances of .260 and .240 (mean= .250) then the % plate positive is: (.250/.500)* 100= a % plate positive of 50%. These are the values used in statistical calculations in an experiment.