Download
1 / 37
390 likes | 524 Vues
Introduction to Prezi Basics. Lane Medical Library. Sandee Brekke M.L.I.S., M.S.Ed. Prezi.com > Learn and Support http://prezi.com/support / How to Use Prezi http :// www.youtube.com/watch?v=tolWEl7oBQg http://href.prezi.com/diy-transitions http://lynda.stanford.edu. Tutorials.

E N D
Introduction to Prezi Basics Lane Medical Library Sandee Brekke M.L.I.S., M.S.Ed.
Prezi.com > Learn and Support • http://prezi.com/support/ • How to Use Prezi • http://www.youtube.com/watch?v=tolWEl7oBQg • http://href.prezi.com/diy-transitions • http://lynda.stanford.edu Tutorials
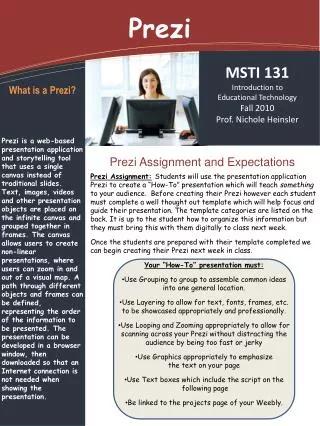
Prezi is a presentation tool that uses motion and metaphor to express critical ideas through a visualization of information. Prezi makes use of one large canvas that allows you to pan and zoom to various parts of the canvas and emphasize the ideas presented there. Prezi is Web-based. It typically saves your files “in the cloud” and can provide 24/7 anywhere access for you and your collaborators. What is Prezi?
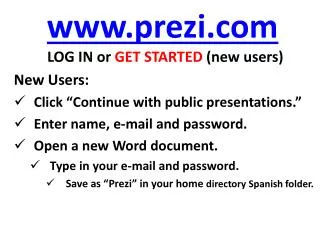
Sign up at http://prezi.com • Choose a “Public” License OR “Student & Teacher” License If your email has an EDU extension. • Provide email address, create password • Benefits: • 500MB FREE storage space • PRIVATE level of presentation • Use you own logo Create An Account
To create a new Prezi, Click on the blue “New Prezi” button. Prezi saves automatically, but you should provide a meaningful name at some point. Create a New Prezi
File Options • You will be given these options each time you create or open a Prezi.
Select background color Default fonts Shape colors Add logo Templates
Choose A Template You can choose to use either a theme or a blank canvas
New Blank Prezi Top Menu Bar Top Menu • Left Sidebar • All white space is the Zoomable Prezi Canvas
Preziallows you to choose and customize: • Default background color • Color and fonts of the text • Color of shapes • Color of the frames • AFTER selecting a template, click on the Themes icon: • Then > Customize Current Theme Themes
Double-click anywhere on the Prezi canvas and start typing. Text color can be formatted on the fly Fonts are limited to the selected template. Add Text
Elements are the objects that make up your presentation. They can be: • Graphics • Words • Audio or video files • PDFs, Flash files (.SWF) Elements
Elements should be grouped to visually represent similarities. When you present, Prezi pans to the various elements to highlight them. Organize Elements
Frames & Arrows [Top Menu Bar] • After adding a frame to your Prezi, you can click on it once to bring up the Transformation Tool and move, scale, or rotate everything inside.
Draw a Frame • Enclose text within a frame • A path point is added when you draw a frame.
Draw a frame around a group of elements so that they will show as a single element. These groups appear in the left navigation bar as a Prezi “slide”. Grouping elements helps to prevent excessive panning (and audience motion sickness!) Add Frames
If you have multiple elements in a frame (e.g., a picture and a legend), the frame must be highlighted when you click to create a path. Otherwise, Prezi will zoom to the picture and not show the legend. Frame Tip
Transformation Tool • After you add anything to your canvas, click on it once to bring up the Transformation Tool. • You can move, size/scale, and rotate your content any way you like.
The farther objects are placed from each, the more abrupt the transisiton. For smooth transitions, create path points that are close together. Transitions [Proximity]
Big rotations (90-180 degrees) result in extreme spinning (and possible nausea). To create smooth rotations, keep transitions under 90 degrees . Transitions [Rotation]
Keep objects close together Keep zooming relevant to the content Scaling objects to different sizes provides context Transitions [Zoom & Scale]
Add “paths” to your Prezi to designate the order in which elements are displayed. To add a path, click on the Pathmenu > select “Add”. Or, click on “Edit Path”. Click to add a path point. Continue until you have clicked on all the elements of your presentation. Add/Edit Paths
Copy the URL from YouTube • Click insert > YouTube Video • Paste the URL into the dialogue box: • https://www.youtube.com/watch?v=Cb8gVst1dbI • Do the same thing for music and .SWF files Insert a YouTube Video
Click the blue “Present” box on the upper-left of the Top Menu bar. The keyboard spacebar toggles between “Edit” and “Show” modes. Use the right and left arrow keys Presenting
Download and Share • Select the Share menu (upper-right corner) to see download options:
Portable Prezi is an exported or downloaded version of your Prezi, which works without Internet access, a Prezi account, or Prezi Desktop. • Click Share > “Download as a Portable Prezi” to create a file that you can present offline. Presenting Offline
Prezi allows up to 10 people to work on the same Prezi at one time. • In Edit mode: • Click the Share button on the upper-right top menu • Select “Share Prezi”. • Prezi creates a link to share with others (expires after one week). Collaboration
Select the path point on the left toolbar • Voice-Over: • Insert menu > Add Voice-Over to Path Step # • Add background music to the entire Prezi: • Insert menu > Add Background Music • Music will pause for a voice-over, then resume Adding Music and Voice-Over
YouTube Videos • Copy the URL link of the YouTube video • Insert menu > select YouTube Video > paste the URL in the box. Video plays from the link. • OR Embed video file into Prezi • Adding a path point to it will automatically start the video when you reach that point. Inserting Videos
Zoom in with the transformation tool to nest graphics, music, and videos. Use a bracketed frame Add each element to the path in the order you want to present it. Nesting Objects and Images
Placing your objects in a frame will group them and allow you to move, size, and rotate them as one. • Click the Frames & Arrows icon, choose the frame type, and drag it to surround the objects. • To remove an object from a frame, drag the object out of the frame at any time. Group Objects Using Frames
Hold the ALT key while dragging or clicking on a frame to move, scale, or rotate it separately. The contents of the frame will all change together. Double-clicking on a frame will show four control points. Use these to change the size of the frame by clicking and dragging. Move, Scale, Rotate Frames
Open a blank Prezi • Insert menu > PowerPoint • Choose individually selected slides or insert all slides simultaneously. BONUS: The latter option automatically adds paths to the inserted slides. • Edit the slides after you have arranged them on your canvas. Import PowerPoint Slides
Printing is of limited valuebecause Prezi is intended to be interactive. Click Share > “Download as PDF” to create a PDF file that corresponds with each “slide” in the Prezi. This works best for printing handouts. Printing