Download
1 / 19
240 likes | 545 Vues
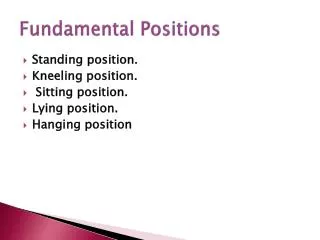
Firing Positions. The purpose of any good shooting position is to support the two basic principles of marksmanship. Sight Alignment. Trigger Control. Three elements of a Steady position :. Support (Artificial & Bone) Muscular Relaxation Natural Point of Aim. Support.

E N D
The purpose of any good shooting position is to support the two basic principles of marksmanship Sight Alignment Trigger Control
Three elements of a Steady position: Support (Artificial & Bone) Muscular Relaxation Natural Point of Aim
Support What is the most stable platform? The Ground Transfer the stability of the ground into your position through the use of artificial and bone support
Muscular Relaxation • If you have good support, your muscles will be relaxed • Less muscle tension means less movement • Comfort equals relaxed
Natural Point of Aim • Where your position is naturally pointing • Your position must be adjusted so that your natural point of aim (NPA) is aligned with the target
5 Factors of a Solid Position • Non-Firing Hand • Rifle Butt • Firing Hand • Stock Weld • Elbows
Hasty Sling 1 2 3 4 5
Putting the sling on • Turn sling 1/4 turn to left (for RH shooter) • Put arm through loop • - high as possible (above tricep) • Tighten sling • Bring hand around outside of sling and place under handguard
Prone • FIRING HAND • Placed high on the pistol grip • Firm handshake grip • Trigger finger should be placed naturally on the trigger • Proper placement of the firing hand on the pistol grip allows the trigger finger to be moved straight to the rear without disturbing sight alignment. • NON FIRING HAND • Handguards rest in the “V” formed between forefinger • Wrist remains straight • Weight of rifle rests on heel of hand • Fingers curled naturally around handguards • Only enough grip pressure to maintain control of rifle • STOCKWELD • This is where your face contacts the stock • Head should be vertical and upright • Consistent from shot to shot • Purpose is to achieve proper achieve eye-sight alignment • Look for excess skin forming a roll • RIFLE BUTT • Place the rifle butt firmly into the pocket formed in the shoulder. • Bring the rifle up to your head, not your head down to the rifle. • The higher the position, the higher the butt is in the shoulder. • ELBOWS • The non-firing elbow should still be positioned as close to directly underneath the rifle as possible to create bone support • The firing elbow should be allowed to rest where it naturally falls after the rest of the position is acquired Natural Point of Aim (NPA)
Prone Leg Positions Bent Knee Spread Leg
Kneeling • FIRING HAND • Placed high on the pistol grip • Firm handshake grip • Trigger finger should be placed naturally on the trigger • Proper placement of the firing hand on the pistol grip allows the trigger finger to be moved straight to the rear without disturbing sight alignment. • STOCKWELD • This is where your face contacts the stock • Head should be vertical and upright • Consistent from shot to shot • Purpose is to achieve proper eye-sight alignment • Look for excess skin forming a roll • NON FIRING HAND • Handguards rest in the “V” formed between forefinger • Wrist remains straight • Weight of rifle rests on heel of hand • Fingers curled naturally around handguards • Only enough grip pressure to maintain control of rifle • ELBOWS • The non-firing elbow should still be positioned as close to directly underneath the rifle as possible to create bone support • Place the elbow either forward of or behind the kneecap, but not on top • The firing elbow should hang as naturally as possible • FEET • Forward foot approx. 45 degrees to target and directly under knee • Rear foot: toe on ground or whole foot flat on ground • RIFLE BUTT • Place the rifle butt firmly into the pocket formed in the shoulder. • Bring the rifle up to your head, not your head down to the rifle. • The higher the position, the higher the butt is in the shoulder. • Left arm and left upper leg form a generally straight line • This allows the weight of the rifle to push straight to the base of the position Natural Point of Aim (NPA)
Non-Firing Hand • Rifle Butt • Firing Hand • Stock Weld • Elbows
Sitting • NON FIRING HAND • Handguards rest in the “V” formed between forefinger • Wrist remains straight • Weight of rifle rests on heel of hand • Fingers curled naturally around handguards • Only enough grip pressure to maintain control of rifle • FEET • Cross your feet left over right. This is for right handed shooters, left handed shooters reverse the feet • The feet can be pulled close together for more elevation or pushed farther apart for less elevation • FIRING HAND • Placed high on the pistol grip • Firm handshake grip • Trigger finger should be placed naturally on the trigger • Proper placement of the firing hand on the pistol grip allows the trigger finger to be moved straight to the rear without disturbing sight alignment. • RIFLE BUTT • Place the rifle butt firmly into the pocket formed in the shoulder. • Bring the rifle up to your head, not your head down to the rifle. • The higher the position, the higher the butt is in the shoulder. • ELBOWS • The elbows should be placed either on the meaty portion in the bend of the leg, or in front of the kneecap • Be careful not to place the points of the elbows on top of the knees • STOCKWELD • This is where your face contacts the stock • Head should be vertical and upright • Consistent from shot to shot • Purpose is to achieve proper eye-sight alignment • Look for excess skin forming a roll Natural Point of Aim (NPA)
Standing • NON-FIRING HAND AND ARM • Handguard rests on heel of hand between thumb and forefinger • Non-firing arm as vertical as possible underneath the rifle • Elbow close to the body to incorporate as much bone support as possible • STOCKWELD • This is where your face contacts the stock • Head should be vertical and upright • Consistent from shot to shot • Purpose is to achieve proper eye-sight alignment • Look for excess skin forming a roll • RIFLE BUTT • Placement dependent on body type and equipment worn • Bring the rifle up to your head, not your head down to the rifle. • The higher the position, the higher the butt is in the shoulder. • FIRING HAND • Placed high on the pistol grip • Firm handshake grip • Trigger finger should be placed naturally on the trigger • Proper placement of the firing hand on the pistol grip allows the trigger finger to be moved straight to the rear without disturbing sight alignment. • FEET • Approximately shoulder width apart • Equal weight distribution • Oriented perpendicular to target Natural Point of Aim (NPA)
Non-Firing Hand • Rifle Butt • Firing Hand • Stock Weld • Elbows
The purpose of any good shooting position is to support the two basic principles of marksmanship Sight Alignment Trigger Control


![Pre[POSITIONS]!](https://cdn1.slideserve.com/3478190/pre-positions-dt.jpg)