Download
1 / 9
120 likes | 327 Vues
Nauticus 3D-Beam. 3D-Beam work environment Modelling techniques Efficient input generating and verification Analysis Efficient result presentation. From the toolbar you have access to all 3D-Beam functions. The status bar display the XYZ position of the pointer. 3D-Beam work environment.

E N D
Nauticus 3D-Beam • 3D-Beam work environment • Modelling techniques • Efficient input generating and verification • Analysis • Efficient result presentation
From the toolbar you have access to all 3D-Beam functions. The status bar display the XYZ position of the pointer 3D-Beam work environment Define all input values, such as loads, supports, profiles etc. in the input property grid. In the model window you can create your model. In the output/result window the results from the analysis are presented.
Input of Nodes and Beams • 1. By drawing • 2. By Beam wizard • 3. Adjust node co-ordinates in the property window
Give and view input values in the properties window How to give input • 1. Select elements or nodes • 2. Apply input values to selection • 3. Visual verification of inputs
Copy / Mirror / Transform • 1. Define elements with properties • 2. Select elements to be copied • 3. Apply the Copy and Transform function • 4. Define number of copies, mirror plane, translation/copy distance
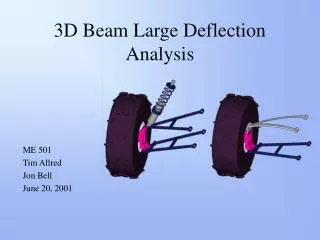
View active plane Working in 3D • 1. Select four views • 2. Set working plane in any 2D window (right click mouse) • 3. Use Tab button on keyboard to move to next plane
1. Select beams to be viewed in solid mode Verification - Solid view • 2. Apply solid view • 3. Rotate, pan, zoom, print the solid view
From the toolbar you may select the results to be presented in the active model window, i.e. deflections, moments, forces or stresses. Result presentation In the model window you may select the appropriate views and elements for your result presentation. In the result window all the results are displayed numerically. The tables may be sorted by clicking the right mouse button in the table. If you select Beam details the result values may be obtained at any position along the beam element.
Reporting “What you see” reporting: Click the right mouse button in the result window that you want to report. Select Report or Copy model plot. MS Word generates the report.