Download
1 / 9
90 likes | 98 Vues
Contraceptive Implants Session IV B: One-Rod Implant Removal. Implanon Removal: Required Equipment. An examination table Sterile surgical drapes and gloves Antiseptic solution Local anesthetic, needles, and syringe Sterile scalpel, forceps (straight and curved mosquito)

E N D
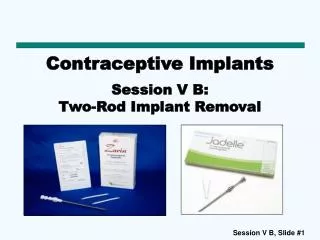
Contraceptive Implants Session IV B: One-Rod Implant Removal
Implanon Removal: Required Equipment • An examination table • Sterile surgical drapes and gloves • Antiseptic solution • Local anesthetic, needles, and syringe • Sterile scalpel, forceps (straight and curved mosquito) • Skin closure, sterile gauze and compresses
Implanon/ImplanonNXT Removal: Step 1 • Have the client lie on her back with her arm flexed at the elbow. • Locate the implant by palpitation and mark the distal end (end closest to the elbow. • Wash the area and apply a disinfectant.
Implanon/Implanon NXT Removal: Step 2 • Anesthetize the arm with 0.5-1 ml of lidocaine (1%) at the site of the incision, which is just below the distal end of the implant.
Implanon/Implanon NXT Removal: Step 3 • Push down the proximal tip of the implant; a bulge may appear indicating the distal end of the implant. • Starting at the distal tip of the implant, make a longitudinal (along the implant) incision of 2 mm towards the elbow
Implanon/Implanon NXT Removal: Step 4 A • Gently push the implant toward the incision until the tip is visible. • Grasp the implant with mosquito forceps and remove it (see image A) • If the implant is encapsulated, make an incision into the tissue sheath and then remove the implant with the forceps (see images B & C) B C
Implanon/Implanon NXT Removal: Step 5 A • If the tip of the implant is still not visible, gently insert a forceps into the incision and grasp the implant (see image A). • Flip the forceps over with your other hand and gently pull out the distal part of the implant (see image B). • If needed, carefully dissect fibrotic tissue around the implant and grasp the implant with a second pair of forceps (see image C). With a second forceps, carefully dissect the tissue around the implant. • The implant can then be removed. B C
Implanon/Implanon NXT Removal: Step 6 • Close the incision with a skin closure. • Apply a sterile gauze and wrap the arm with a pressure bandage. • Before the client is discharged, observe her for a few minutes for signs of bleeding from the insertion site. • Review post-removal instructions and other key messages. • Clean or dispose of the instruments properly.
Post-removal Options • If the woman decided to keep using this method and is still eligible, insert a new implant through the same incision, or if the client prefers, use the other arm. • If the woman decided to discontinue using the implant and does not want to become pregnant, counsel her about other contraceptive options.