Download
1 / 6
60 likes | 74 Vues
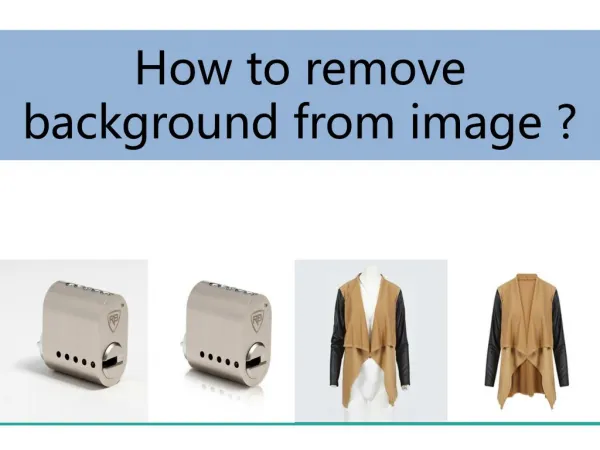
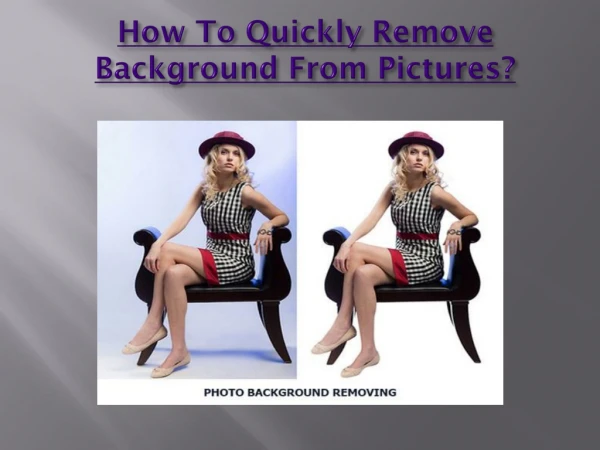
Remove background is one of the most desired services nowadays. There are many alternatives but background eraser tool is the prime option.

E N D
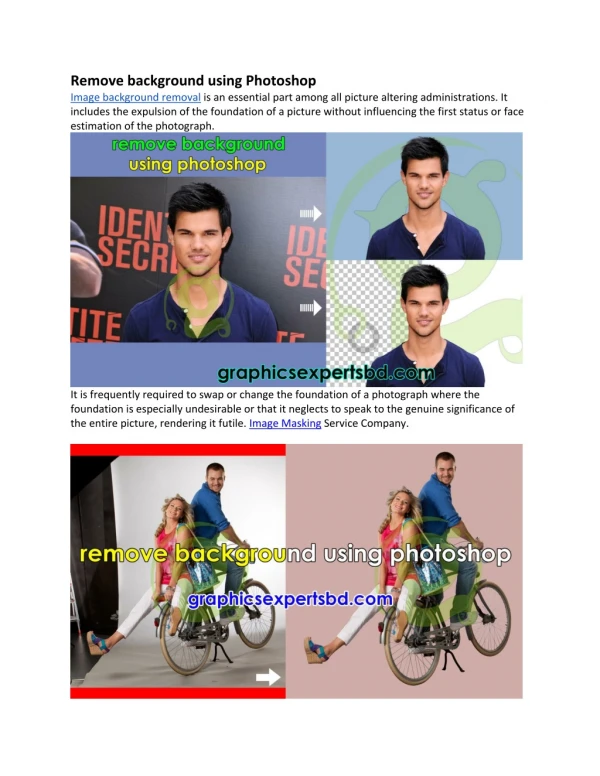
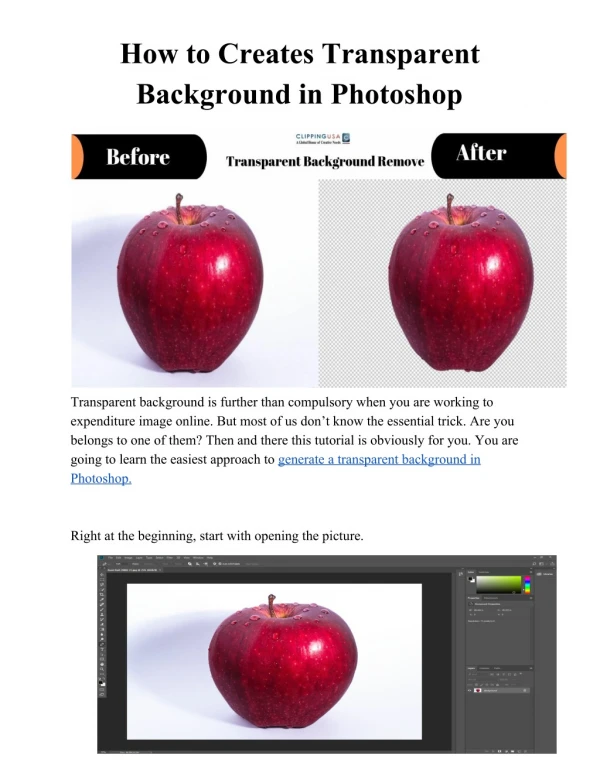
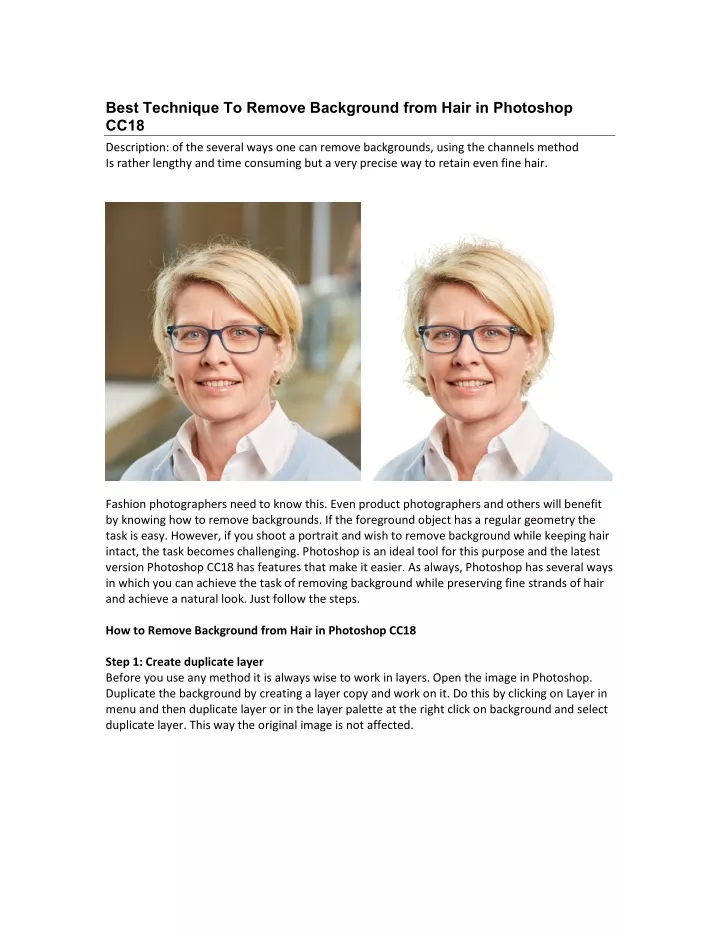
Best Technique To Remove Background from Hair in Photoshop CC18 Description: of the several ways one can remove backgrounds, using the channels method Is rather lengthy and time consuming but a very precise way to retain even fine hair. Fashion photographers need to know this. Even product photographers and others will benefit by knowing how to remove backgrounds. If the foreground object has a regular geometry the task is easy. However, if you shoot a portrait and wish to remove background while keeping hair intact, the task becomes challenging. Photoshop is an ideal tool for this purpose and the latest version Photoshop CC18 has features that make it easier. As always, Photoshop has several ways in which you can achieve the task of removing background while preserving fine strands of hair and achieve a natural look. Just follow the steps. How to Remove Background from Hair in Photoshop CC18 Step 1: Create duplicate layer Before you use any method it is always wise to work in layers. Open the image in Photoshop. Duplicate the background by creating a layer copy and work on it. Do this by clicking on Layer in menu and then duplicate layer or in the layer palette at the right click on background and select duplicate layer. This way the original image is not affected.
Step 2: Hide background Hide background by clicking on eye icon. Select the working layer. Step 3: Selet color range From file go to select and then color range and, in the dialogue box pick left eye dropper tool and click on background color in image. Adjust fuzziness slider and range sliders. If the background has several colors you can click on eyedropper tool with plus sign next to it to select additional colors. A window will show selection. Adjust sliders. You may need to switch back and
forth for this process according to the image and the colors in it. Step 3: Create alpha channel Go to the right panel and click on channels tab and then click on the small down arrow at the right which shows a flyout of selections from which you choose new channel. Save the channel as alpha channel 1. Step 4: Work in alpha channel
Press Control+D to deselect and click on alpha 1 in channels palette and the main window turns black and white. White is for areas that you wish to remove. Step 5: Fine tune adjustments using levels Fine tune by going to adjustments-levels and dragging black point slider to the right until intermediate areas turn black and drag white slider to left until whites are clean. Step 6: Brush mask Next, pick brush tool from toolbar on the left. Adjust size of brush from context toolbar at the top as well as other parameters such as opacity and flow and keep blending option at normal. Use black color and paint over areas in the image area. Vary size according to detail in image to retain. Use white color on areas that need to be erased.
Step 7: Make background visible Next, go to layers palette and click on eye icon for the background layer and you will see a red masked image so you know effect of your operations. Step 8: See image in color Press control+C on alpha thumbnail in channels palette and then click on RGB to see image in color and then open layers palette.
Step 9 : Add layer mask Add layer mask. You see the background now clear and transparent. You can invert selection and copy paste selection to a new image with a solid background or on any other image. Keep in mind: You will need to experiment a lot with various options such as tolerance, fuzziness, brush size and other variables to get it right. Newbies please note that you cannot expect to get it right on the first attempt. You will need to go back and forth until you get it right and you will then get a feel for what each variable does. Also images vary and each image will need different settings according to hair color and background colors.