Download

1 / 13
130 likes | 375 Vues
SAM9260-EK WinCE DEMO. AT91 SAM9 Product Group. Version 1.0 October 2006. SAM9260-EK Boot Solutions. Jumper J7 (Boot Mode Select) allows to select the Boot Mode of the AT91SAM9260-EK J7 Opened, the AT91SAM9260 boots from the on-chip Boot ROM

E N D
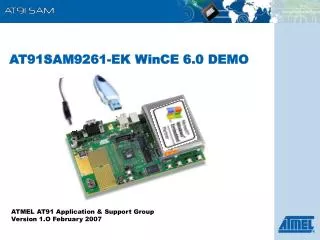
SAM9260-EKWinCE DEMO AT91 SAM9 Product Group. Version 1.0 October 2006
SAM9260-EK Boot Solutions • Jumper J7 (Boot Mode Select) allows to select the Boot Mode of the AT91SAM9260-EK • J7 Opened, the AT91SAM9260 boots from the on-chip Boot ROM • The on-chip Boot ROM Memory integrates different programs permitting download and/or upload into the different memories of the product • First, it initializes the DBGU and the USB Device Port. • Then the DataFlash Boot program is executed. It looks for a sequence of eight valid ARM exception vectors in a DataFlash connected to the SPI. If a valid sequence is found, code is downloaded into the internal SRAM. This is followed by a remap and a jump to the first address of the SRAM. • Then the NANDFlash Boot program is executed. It looks for a sequence of eight valid ARM exception vectors in a NANDFlash. If a valid sequence is found, code is downloaded into the internal SRAM. This is followed by a remap and a jump to the first address of the SRAM. • If no valid ARM vector sequence is found, SAMBA™ Boot is then executed. It waits for transactions either on the USB device, or on the DBGU serial port. Then, user can use SAM-BA GUI to download binary file into the different memories of the product. • J7 Closed, the AT91SAM9260 boots from the off-chip memory connected to NCS0 (No memory is connected on the EK by default)
SAM9260-EK WinCE Demo • Software requirements • Demo WinCE file including: • Binary Files: BootRam.bin, EBOOT.nb0 & NK.nb0 • AT91ISP V1.4(or higher) GUI Application installed on your computer • Hardware requirements • SAM9260-EK Evaluation Kit • Serial Cross Cable (Female-Female) • USB Device Cable • Ethernet Cable
SAM9260-EK SAM-BA Boot • Install AT91ISP v1.4 and reboot your computer • Reset the board • Connect the USB Device Interface (J19) to your PC using the USB Device Cable • Start SAMBA GUI Application • Select theSAM9260-EKand chooseUSB Connection
Download BootRAM.bin in DataFlash with SAM-BA • Select DataFlash AT45DB/DCB tab • Choose Init & Select AT45DCB Dataflash Card on CS1 in scripts rolling menu and press Execute • Choose Send BOOT File in scripts rolling menu and press Execute • Choose file named BootRam.bin and press Open. 1°- Init & Select AT45DCB Dataflash Card on CS1 2°- Send BOOT File
Download EBOOT.nb0 in DataFlash with SAM-BA • Press onSend File Name Browsebutton • Enter “0x4000” inInternal Addresstext field • Choose EBOOT.nb0and pressOpen • PressSend Filebutton EBOOT.nb0 Dataflash internal address 0x5000
Download WinCE Demo (NK.nb0) in NandFlash with SAM-BA • Select NandFlash tab • Choose Init NandFlash in scripts rolling menu and press Execute • Press onSend File Name Browsebutton • Choose file named NK.nb0 and press Open. • PressSend Filebutton (this will take a few moment): WinCE has been stored in NandFlash • Close SAMBA, remove USB cable 2°- Send NK.nb0 1°- Init NandFlash
Configure WinCE Boot: EBOOT • Connect the Serial Debug Port (J17) to your PC using the Serial Cross Cable • Start an hyperterminal session on your PC with settings: • 115200 8-N-1 • Reset the board • Press “Space” key when the message“Initiating image launch in x seconds”is displayed to stop booting, the following Menu is then displayed • Ethernet Boot Loader Configuration:0) MAC address: 02:03:04:05:06:071) IP address: 192.168.100.1282) Subnet mask: 255.255.255.03) Boot delay: 5 seconds4) DHCP: (Enabled)5) Reset to factory default configuration6) Download new image at startup7) Download image to SDRAM8) Frequency settings (core at 200, bus divider 2)A) test RTC:D) Download image nowL) Launch existing flash resident image nowN) Nand Flash menu
Configure WinCE Boot: EBOOT • Select option “1” and enter your own IP address and Subnet Mask The board must be on the same subnet as your PC • The following menu is then displayed: • Ethernet Boot Loader Configuration:0) MAC address: 02:03:04:05:06:07 1) IP address: xxx.yyy.zzz.ttt2) Subnet mask: 255.255.254.03) Boot delay: 5 seconds4) DHCP: (Enabled)5) Reset to factory default configuration6) Download new image at startup7) Download image to SDRAM8) Frequency settings (core at 200, bus divider 2) A) test RTC:D) Download image nowL) Launch existing flash resident image nowN) Nand Flash menu
Configure WinCE Boot: EBOOT • Select option “4” • The following menu is then displayed: • Ethernet Boot Loader Configuration:0) MAC address: 02:03:04:05:06:07 1) IP address: xxx.yyy.zzz.ttt 2) Subnet mask: 255.255.254.03) Boot delay: 5 seconds4) DHCP: (Disabled)5) Reset to factory default configuration6) Download new image at startup7) Download image to SDRAM8) Frequency settings (core at 200, bus divider 2) A) test RTC:D) Download image nowL) Launch existing flash resident image nowN) Nand Flash menu
Configure WinCE Boot: EBOOT • Select option “6” • The following menu is then displayed: • Ethernet Boot Loader Configuration:0) MAC address: 02:03:04:05:06:07 1) IP address: xxx.yyy.zzz.ttt 2) Subnet mask: 255.255.254.03) Boot delay: 5 seconds4) DHCP: (Disabled)5) Reset to factory default configuration6) Launch existing flash resident image at startup7) Download image to SDRAM8) Frequency settings (core at 200, bus divider 2) A) test RTC:D) Download image nowL) Launch existing flash resident image nowN) Nand Flash menu
Configure WinCE Boot: EBOOT • In hyperterminal menu • Select option N, “Nand Flash menu”: • The following menu is then displayed: • Nand Flash Menu :1) Erase all sectors2) Enter manually the image parameters3) Quit... • Select option “2” and set the following settings: • Physical Start Address : (0x80059000) : 0x80067000(Press Return)Starting ip : (0x8005a000) : 0x80068000(Press Return)Total ROM size : (0x75144c) : 0x8b3bfc(Press Return) • Reset the board and wait for a few moment
Browsing the board with your PC • Plug the Ethernet Cable in Ethernet Interface (J14) and on your PC. • Start your favorite browser and enter the board URL : http://xxx.yyy.zzz.ttt • You can browse the demo web site thanks to the webserver. • Your own web site can be added on a USB key. For that : • Type telnet xxx.yyy.zzz.ttt in a windows on your PC. • In this telnet session type WebServerSettings USB \USBDisk\YourSite • enter the board URL : http://xxx.yyy.zzz.ttt/USB/ • You can browse your web site.