Download
1 / 53
621 likes | 1.04k Vues
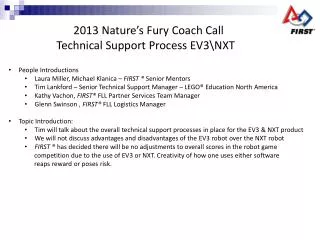
Curriculum Developed by Joe DeRose, Ph.D. Robefest Lead Instructor 10/26/2013 Curriculum Based Off NXT Version Developed by CJ Chung, Ph.D. Professor / Robofest Founder & Director. EV3 Workshop. Lawrence Technological University. Lego NXT robot used – OmniBot. Touch Sensor.

E N D
Curriculum Developed by Joe DeRose, Ph.D. Robefest Lead Instructor 10/26/2013 Curriculum Based Off NXT Version Developed by CJ Chung, Ph.D. Professor / Robofest Founder & Director EV3 Workshop Lawrence Technological University
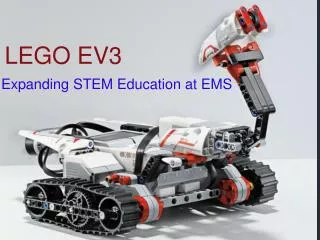
Lego NXT robot used – OmniBot Touch Sensor Right Motor: C NXT Computer Sonar Sensor Sound Sensor Left Motor: B Color Sensor
Remember the connections! • Left Motor connects to B • Right Motor connects to C • Color sensor connects to port no. 1 • Touch sensor connects to port no. 2 • Sound sensor connects to port no. 3 • Sonar sensor connects to port no. 4
EV3 Versions Used • Examples are using EV3 Version 1.0.1 • NXT Firmware version: 1.31 • All example programs in RoboParade.ev3 • Free version from EV3 may be downloaded http://www.lego.com/en-us/mindstorms/downloads/software/ddsoftwaredownload/download-software
Mission 0: Go straight for 2 seconds using different power levels launch LEGO MINDSTORMS Education EV3
Go forward for 2 seconds with power level 40 % EV3 offers two move blocks Move Steering Block: Controls and regulates two motors with a steering input and single power level. (+) steering = right; (-) steering = left Move Tank Block: Controls two motors with a power level to each motor In this course we will sue the Move Steering Block.
Let’s test it • Connect the NXT to the laptop (if this is the first time, then a “Found New Hardware” message will appear) • Click on the ‘Download’ button • It’s recommended to always unplug the cable from the bot before running the program • Navigate through the NXT’s menu: • Turn On > My Files > Software Files • Then select your program and run it!
Let’s measure the distance traveled • How many centimeters when 40% power used? • How many centimeters when 70% power used? How to find out the current battery voltage level?
NXT motors: geared motor with built-in rotation sensor Rotation sensor gives “degrees” turned. (It can also give “rotations,” but the pop-up incorrectly displays “degrees.”) For example, if the value is 360, the motor turned one rotation.
Mission 1: Display the “degrees” when the bot goes forward for 4 seconds
Display the “degrees” turned for going forward for 4 seconds Program: DisplayDegrees
Review • Number of rotations = degrees / 360 • Circumference of a circle = diameter * 3.14 • Travel distance = number of rotations * circumference of the wheel • Speed = distance / time
How to calculate the average speed of robot for that 4 seconds ? • If “degrees” were 1,300, then how many times the wheel was rotated? • If the circumference of the wheel is 17cm, what is the travel distance for 4 sec? • Then what is the averaged speed of the robot for the 4 seconds? • Note: RoboParade has min and max speed limits. 7 ~ 17 cm/sec
Mission 2: Display the “speed” when the bot goes forward for 4 seconds
distance t1 t2 HOW DO YOU CALCULATE SPEED?v = distance / time (cm/second)
Exercise • We can make the program shorter • Instead of multiplying by 17 and then dividing by 360*4=1440, we can just multiply by 17/1440=0.0118 • This uses one math block instead of two
NXT-G Basics Sonar (ultrasonic) sensorEndless loopDecision makingSound sensor
Ultrasonic Sensor • Uses the same scientific principle as bats • Can measure in centimeters or inches • Large objects with hard surfaces return the best readings
Mission 3: Clap -> Move(Program: clapMove1) • Use a Sound Sensor connected to port no. 3 • If sound level is greater than 70, go for 1 rotation • Otherwise, do nothing
Mission 4: Line following using a Color Sensor
NXT Color Sensor • Percent Mode: • 5% = lowest dark • 100% = very bright • Reflected Light Mode: shines a red light • The light can be turned off – detecting ambient light (surrounding light) • We will use EV3 Experiments to test our color sensor
NXT Color Sensor • Create a New Experiment
NXT Color Sensor • Set up the experiment to plot the color sensor reading using “Reflective Light Intensity” • Run the experiment with the light sensor over various objects Run
NXT Color Sensor • Sample results Reflective Tape Test Mat Black Tape
Zigzag Line following Idea Right side following Left side following
Simple Line Following AlgorithmProgram: LineFlowZZ Right side or Left side following?
How and Where to start the robot? C Lost… B
Mission 5: FOLLOW THE PARADE ROUTE AND STOP WHEN AN OBJECT IS SENSED IN FRONT
Parade Program Endless loop { If sonar sensor detects an object Stop!!!!! Otherwise Follow the black line }
How to connect a parallel sequence beam? • Two methods • Spilt sequence beam • Add additional Start Blocks
Mission 6: RoboParade with Speed Display (every 2 seconds) – RoboParadeSD
How to improve your robot and computer program for the Parade • Go to www.robofest.net • Click on Tech Resources button on the left • There will be a PPT with more ideas and tips for Roboparade
Mission 7: Smoother Line following using a Color Sensor
How to improve our line following algorithm • Zig-zag method can cause a bumpy response • We can improve the performance by using a more sophisticated algorithm Line Mat Line Mat Line Mat
3-Level Line Follower • Divide light sensor reading range into three levels • For your robot σ Line Line + σ Mat - σ Mat Turn Right Straight Turn left Line = _____ Mat = _____σ = _____ Line + σ = _____ Mat - σ = _____
Program: LineFollowThreeState Line Line + σ Mat - σ Mat Turn Right Straight Turn Left
Proportional Control Line Follower • Use linear relationship between the light sensor reading and steering (x1,y1) (Black Line, Steer Right) (23, 15) for my robot y = m*x + b Steering Input (y) Light Sensor Reading (x) (x2,y2) (Mat, Steer Left) (44,-15) for my robot
Proportional Control Line Follower • Find the line slope (m) • Find the y-axis intercept (Point slope form) (Rearrange to y=mx+b) (Find expression for b)
Proportional Control Line Follower (x1,y1) = (23, 15) • An example • Find the y-axis intercept (x2,y2) = (44, -15) (Point slope form) (Rearrange to y=mx+b) (Find expression for b)
Proportional Control Line Follower • An example
Creating a Custom My Block • My Blocks allow you to group a number of blocks into a single block • Let’s create P-Control Line Following block • Step 1: Select the P-Control blocks Unconnected/broken data wires will be inputs
Creating a Custom My Block • Step 2: Open Tools -> My Block Builder GUI
Creating a Custom My Block • Step 3: Select Icons, and set up parameters • Step 4: Name the My Block as PControlLineF
Using A Custom My Block • Once the your my block is created, it will be placed in your My Block palette • Now, we can reconstruct the line following using the My Block