Download
1 / 38
390 likes | 695 Vues
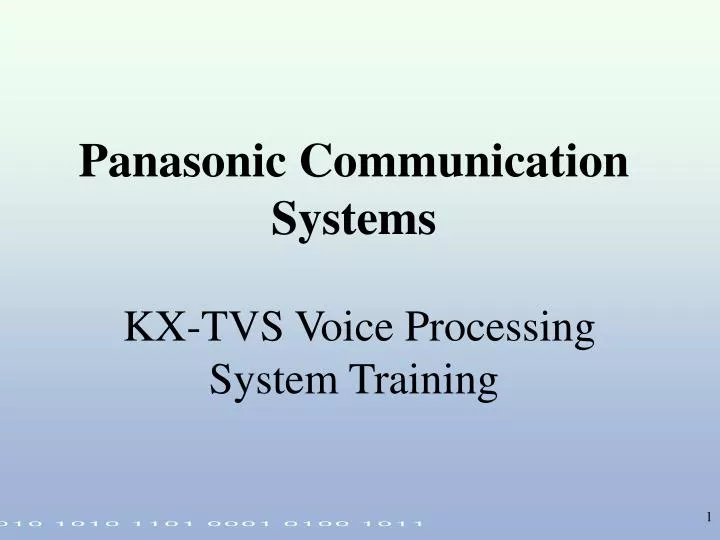
Panasonic Communication Systems KX-TVS Voice Processing System Training. Voice Mail Integration. The purpose of Voice Mail integration is to allow the Voice Processing System and the Super Hybrid System to communicate with each other.

E N D
Panasonic Communication Systems KX-TVS Voice Processing System Training
Voice Mail Integration • The purpose of Voice Mail integration is to allow the Voice Processing System and the Super Hybrid System to communicate with each other. • Three types of integration are available: Digital(Out of Band for KX-TD systems), Analog (In-band integration for all other systems with In-band integration capability), and APITS for the KX-TA624-1
CO Card 1 2 Analog Integration Wiring To Tip and Ring of SLT extension ports
Introducing the KX-TVS50…. • …the newest addition to the KX-TVS line of Voice Processing Systems (VPS) • 2 ports, 2 hours voice storage, expandable to 4 hours of voice storage • The 2 hours of voice storage will be reduced by recording User Prompts • If all System Prompts were to be recorded by the user, voice storage would be reduced by approximately 40 minutes
KX-TVS50 Specifications • Increasing the voice storage from the initial 2 hours up to 4 hours is accomplished by adding an optional KX-TVS52 Flash Memory Expansion card • 30 mailboxes, 2 manager mailboxes, utilizing Flash Memory with 7.2 Kbps voice compression • New features include A-PITS integration with KX-TA624-1, Caller ID Routing, System and Station Caller ID Name Announce, and Personal Greeting for Caller ID
So what is Flash Memory? • Definition-A solid-state mass-storage device that emulates a hard-disk drive • This type of mass-storage device is suitable for portable computers, personal digital assistants (PDA), digital still cameras, MP3 players and other devices requiring high-density non-volatile data storage
What are the advantages? • The advantages of this type of storage device is that it is: • extremely rugged and reliable • compact • fast sustainable read/write capability • much less expensive than hard-disk drives • and has low single-voltage power requirements
KX-TVS50 Specifications • The KX-TVS50 comes with 2 Flash memory chips, one for 2 hours of voice storage, the other for system prompts and programming storage. • The KX-TVS52 Flash Memory Expansion card has one Flash memory chip for an additional 2 hours of voice storage
KX-TVS50 Specifications • The KX-TVS50’s appearance is very similar to the KX-TVS75, with two noticeable differences • A 4 position dip switch is used to determine the system mode rather than a rotary switch • The system upper chassis has a built-in ferrite core used to reduce noise and other spurious oscillations from being introduced into the system through station cabling
Mode Switch Positions • Mode Switch Positions • 0000 Normal operation position • 1000 Initializes RS-232C parameters • 0100 D-PITS Auto Configuration for AA service1 • 1100 D-PITS Auto Configuration for VM service1 • 1010 Initializes VPS. Clears all data and messages • 0110 Flash memory Read/Write test • 0101 A-PITS Auto Configuration for AA service2 • 1101 A-PITS Auto Configuration for VM service2 1 Used for KX-TD D-PITS integration only 2 Used for KX-TA A-PITS integration only
Some New Terminology • To date, two types of Voice Processing System integration were available in the KX-TVS line of VPS’s, In-band and D-PITS • A-PITS - Analog Proprietary Integrated Telephone System • A-PITS Integration - A proprietary 4-wire out of band Voice Processing System integration supported by the KX-TVS50 and KX-TA624-1 NEW
A-PITS • Signaling and control information is transmitted and received between the 624 and 50 across the D1 and D2 pair of an extension port • Voice is provided by the Tip and Ring pair for that extension port • Each A-PITS integrated port supports one VPS port (Unlike D-PITS integration which provides two VPS ports per station ports)
Integration • The KX-TVS50 supports: • In-band with telephone systems providing In-band integration • D-PITS with KX-TD308/816/1232/500 • A-PITS with the KX-TA624-1
System Administration • Programming and administration can be accomplished by using either a dumb terminal program (i.e.. HyperTerminal) or any other communication software (i.e. ProcommPlus) • Programming menus are the same as the other KX-TVS models with additional programming added for the new features - System Caller ID Name Announce & Caller ID Call Routing
System Administration Laptop with a Modem Program such as Hyperterminal, Procomm for Windows Programming RS-232C ` Null Modem Cable If your Laptop has a DB-9 serial connector use: Radio Shack Cable (DB-9 to DB-25) Cat. No. 26-269 Radio Shack Null Modem Adapter (25 pin) Cat. No. 26-1496B or Radio Shack Null Modem Adapter (9 pin) Cat. No. 26-264A
New KX-TVS50 Features • These features are supported by A-PITS or D-PITS integration • System Caller ID Name Announce • Station Caller ID Name Announce • Personnel Greetings for Caller ID • Caller ID Routing • Caller ID card(s) are required for these features to operate KX-TD193 or KX-TA62493
System Caller ID Name Announce • 120 Caller ID Numbers (20 digit max.) can be entered into system programming via programming terminal • System Parameter Setting-System Caller ID Announce • A name can be recorded for each of the 120 Caller ID numbers by the Message Manager in mailbox 998 • *998-5-8 for System Caller ID Name Announce recording
System Caller ID Name Announce • So how does this work? • An incoming Caller ID call arrives at CO port of phone system that is programmed to ring to a VPS port • Caller ID information is transmitted to VPS via A-PITS or D-PITS link. • VPS answers, plays prompts, caller dials digits to transfer call to an extension • When extension answers, the user is given a prompt with states “You have a call from (recorded name). To answer the call press one, otherwise press 2 and hang up.
System Caller ID Name Announce • If no Caller ID is provided, private, out of area, or the number is not registered, the normal transfer sequence occurs without announcement
Station Caller ID Name Announce • Functions in the same way as System Caller ID Name announce • 30 Personal Caller ID Name Announce entries can be entered per mailbox • *MB 5-5 for Station Caller ID Name Announce programming • System Caller ID Name Announce has priority over Station Caller ID Name Announce
Caller ID Personal Greeting • Up to four personalized mailbox greetings can be recorded in addition to the normal busy, no answer, and after-hours greetings • Each of the personalized greetings can have up to eight Caller ID numbers assigned to it • * can be used as a wildcard when entering the Caller ID numbers • *MB 5-1-4 for Caller ID Personal Greeting programming
Caller ID Personal Greeting • When an outside caller with a Caller ID number that has been assigned in the mailbox enters the mailbox, a custom greeting for that caller will be played
Caller ID Routing • Caller ID Routing allows an incoming caller to be routed to a specific location or service based on the Caller ID number provided • Calls can be routed to a mailbox, extension, or Custom Service
Caller ID Routing • Up to 120 Caller ID numbers can be entered into the system • Service Setting - Caller ID Routing • Caller ID number can be up to 20 digits • * can be used as wildcard • O or P can be entered for Out of Area & Private • A route description up to 20 characters can be entered • This feature can operate in conjunction with the System & Personal Caller ID Name Announce features
What else is new in KX-TVS50? • New factory default voice prompts • Faster cadence & less pause time between prompts • Improved Installation Manual provided on CD-ROM • Improved organization • Includes the KX-TA and KX-TD phone system programming related to VPS integration
What else is new in KX-TVS50? • Screened transfer with Call ID is now supported • Company Greetings have been removed • The KX-TVS50 does not support the Two-Way Record and Two-Way Transfer features.
Lab KX-TA 624 Setup • SYSTEM PROGRAMMING • System Program 130 for Jack 07 or 07 & 08 • System Program 131for Jack 15 or 15 & 16 • Use a four conductor line cord to KX-TVS50 for each port (jack 07 to port one of KX-TVS50, etc) • System Program 000 to set the time • System Program 900 to enable CID • System Program 414 for Day Ring • System Program 415 for Night Ring • System Program 416 for Lunch Ring
Lab Cont’d Station Programming • CID Button- Press CO, press 6, Store (CID Transmitted through TVS) • CID Selection- Press CO, press 7, Store • LCS- Press CO, dial 92, Store • LCS Cancel- Press CO, dial 93, Store LCS Password- Intercom 77* _ _ _ _ _ _ # Hands Free- Station Program #11 Store Private- Station Program #12 Store • VTR- Press CO, dial 94: 107, Store • Call Forward ALL Calls- Intercom 711 107# • Call Forward Busy, No Answer- Intercom 712 107# • Call Forward Cancel- Intercom 710#
Lab Cont’d for the KX-TA624-1 / KX-TVS50 • Connect the computer to the KX-TVS50 prior to initializing. • Using Hyperterminal, Procomm Plus for Windows, or any dumb terminal, have the settings at 9600, N, 8, 1and set for VT100 • Connect the KX-TVS50 to the computer with a null modem cable. • Set the Dip Switch on the KX-TVS50 to 1010 • Plug the power cord to the KX-TVS50 and wait for screen to tell you to reset the switched to 0000 • Go through Quick Setup, choosing the “KX-TA” for the Telephone
Lab Cont’d • No Company Greetings • De-Activate the Following Greeting from the Message Manager by calling 107, #6*998, 5,6,1, enter Prompt Number, press 3 • 248 “Good Afternoon” • 249 “Good Evening” • 250 “Good Morning” • 819 “Welcome to the Voice Processing System” • Record the entire Greeting in the Custom Service by dialing #6*998, 5,4,1. Record a greeting that states “ You have reached the Smith residence. For Sue press 1, for Johnny press 2, for mom and dad press 3” • Assign the Port on the Computer to use the corresponding Custom Service for Day and Night Mode. 1,3,1
TVS50 Lab cont. • Program the following into Custom Service • assign 1 to ring at extension 103 • assign 2 to ring at extension 101 • assign 3 to ring at extension 102
VS50 Lab cont. • Setup the following mailboxes and record greetings: • 101 Extension 101 • 102 Extension 102 • 103 Extension 103
Caller ID Routing Program Received caller ID ________number to be directed to mailbox 101 Personal Greetings for CID Four Personal Greeting with 8 telephone numbers each Go into Mailbox, dial 5, 1, 4 to assign Greetings and Numbers Station CID Name Announce Assign up to 30 CID Numbers per Mailbox and record a name for each number. Recorded name is heard when listening to messages or calls have been transferred from the VPS Go into Mailbox, dial 5, 5 record a name with caller ID number
System CID Name Announce • Up to 120 CID numbers with names recorded. These will be played when calls are transferred through the VPS. (CID Screening). Names will also be heard when using the intercom paging features • Enable in the COS • Can be used Call Screening, Intercom Paging in Call Transfer Service or in Incomplete Call Handling • System Administration 1, 5, 6, 1 to enter numbers • Message Manager to record names #6*998, 5, 8
Parameter Save • Save the system programming parameters to your PC’s HDD or floppy disk drive using Procom Plus. • From the System Administration Top menu type 3 for Utility Command • Type SAVE andpress ENTER • Press 2 and ENTER for Parameters • Press ENTER again • Press PAGE DOWN • Press X for XMODEM download protocol • Type the file name (i.e. PARA.BAK or CUSTOMER.PAR) • Wait approximately 6 minutes while data is transferred
Parameter Load • Load the system programming parameters from your PC’s HDD or floppy disk drive using Procom Plus. • From the System Administration Top menu type 3 for Utility Command • Type LOAD andpress ENTER • Press 2 and ENTER for Parameters • Press ENTER again • Wait for “CCC” to appear on PC’s screen • Press PAGE UP • Press X for XMODEM download protocol • Type the file name • Wait approximately 6 minutes while data is transferred