Download
1 / 19
270 likes | 393 Vues
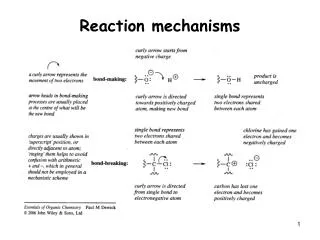
Agglutination Reaction. Classical Ag & Ab Reaction. Lattice Formation. Particulate Ag. +. Corresponding Ab. Introduction of agglutination reaction. Concept :.

E N D
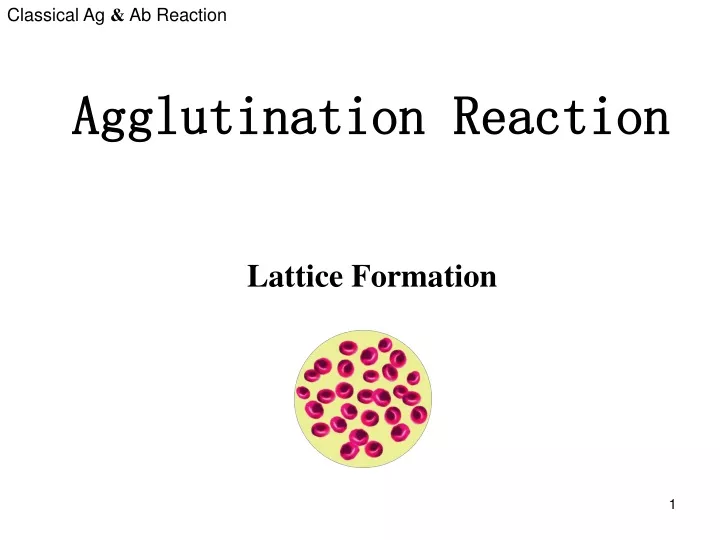
Agglutination Reaction Classical Ag & Ab Reaction Lattice Formation
Particulate Ag + Corresponding Ab Introduction of agglutination reaction • Concept: Granular Ag or Ag attached on granules can bind with corresponding Ab , followed with the formation of agglutinated clots , which is called agglutination reaction. Visible agglomerate • Classification: Direct agglutination reaction: Slide test qualitative Tubetest semi-quantitative Indirect agglutination reaction
Particulate Ag + Corresponding Ab Soluble Ag Visible agglomerate Direct agglutination reaction + Sensitized particulate Corresponding Ab Visible agglomerate Indirect agglutination reaction
Ⅰ. Slide agglutination test This test is designed to observe the direct agglutination reaction of known antibody and unknown particle antigen on slide. The reaction is simple and rapid. Usually it is used to detect qualitatively the antigen or antibody. Such as bacteria identify and ABO blood type assay.
Test 1 Assay of blood type (ABO) • Purpose • Determine the ABO Blood type of individual . Anti-A serum OR Anti-B serum ? +
Test 1 Assay of blood type (ABO) • 2.Material • Blood sample: Human peripheral blood • Standard Sera: • Anti-A serum • Anti-B serum • Slide • Aseptic needle • Cotton stick • Indophor
Test 1 Assay of blood type (ABO) A B a. Slide • Procedure Anti-A Anti-B Disinfect the finger b. Pick blood Stab the finger Take blood with two corners of slide. Mix with anti-A and anti-B respectively c. Reaction Rock the agglutination test slide for one to fiveminutes d. Observation
Test 1 Assay of blood type (ABO) Blood type • Anticipated results A B AB O Positive result(+):clump Negative result(-):turbid
Test 1 Assay of blood type (ABO) • Attentions • Keep the serum fluid separated. • Disinfect finger before taking blood. • Do not confuse the two corners of slide. • Observe result in time. • Discard the slides into the glass can on the bench. • Discard the stick, needle into garbage bin.
Ⅱ Tube agglutination test 1.Principle Tube agglutination test is usually used in the semi-quantitative test. Directly mix known particle Ag with serial dilution of patient’s serum in the tubes. Observe the appeared agglutinates in the tubes after certain time. Determine the level of the Ab in the serum and its titer according to its relative agglutination amount.
Dilute the examinee’s serial dilution serum consecutively. Mix it with antigen suspension of known concentration in test tube. Observe the agglutination phenomenon in certain reaction time. In this experiment, typhoid bacterium of certain quantity acts as antigen. Whether serum contains corresponding antibody or not is up to the agglutination reaction to decide. Furthermore, we could decide the titer of antibody by the agglutination extent in different tubes. We could diagnose and tell patient condition and prognosis by this principle.
II Tube agglutination test 2. Purpose Determine the titer of Anti- S. typhi H -Ab in serum. 3. Reagents & Instruments (1) Ag: 1% S. typhi H antigen solution. (2) Unknown serum : 1:10 diluted anti-H serum (inactivate complements at 56℃ for 30 min). (3) Normal saline. (4) Transfer pipette , incubator, test tube , test tube rack .
IITube agglutination test 4. Procedures 4 persons/group a. Array 7 tubes in the rack , and mark them in turn. b. Add NS 0.5ml in each tube with 1ml pipette. c. Add 0.5ml 1:10 diluted anti-H serum to the 1st tube by 1ml pipette. After sufficient mixing, transfer 0.5ml of this diluted serum to the 2nd tube. Repeat dilution in the same way (serial twofold dilution of serum )until 6th tube, and discard 0.5ml from 6th tube. Leave the 7th tube (control tube) free from serum.
II Tube agglutination test d. Add 0.5ml S.typhi H antigen in each tube(from tube 1 to 7).
II Tube agglutination test e. Mix each tube and incubate at 37℃ for overnight.(observe the results at tomorrow (4.23 12:30)
II Tube agglutination test 5. Anticipated results Supernatant Sediment Degree of agglutination Clear/transparent Large and depositing ++++ Slightly turbid Large and depositing mostly +++ Obviously turbid Small and depositing partly ++ turbid Very small agglutination + turbid (Same as control) No agglutination -
Sediment Agglutination degree The highest dilution ratio Titer of the anti-serum The titer is customarily reported as the reciprocal of the highest dilution that causes an agglutination(++) . The highest dilution of serum causing obvious agglutination of bacteria(++) is defined as the titer of the serum.
II Tube agglutination test 6. Attentions • Mark the tube in turn . • Use the graduated pipette correctly. • Mix thoroughly. • Take the tube gently , in case agglutination would disperse. • Observe the control tube to decide the experiment credibility . Then observe the experiment tubes.