Download

1 / 12
120 likes | 308 Vues
Bathy 2010 TM. CHIRP Sub-bottom Profiler. Bathy 2010 Overview.

E N D
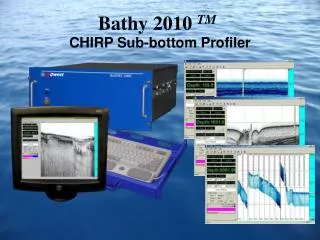
Bathy 2010 TM CHIRP Sub-bottom Profiler
Bathy 2010 Overview The Bathy 2010 TM is a high- resolution CHIRP Sub-Bottom Profiler capable of delivering 4cm of marine sediment strata resolution with bottom penetration of up to 250 meters. It is designed for inshore and offshore geophysical marine surveys up to 15,000 meters of water depth.
Bathy 2010 Product Improvements • Dual Channel FM CHIRP operation • Windows XP Operating System and PCI Architecture offers more flexibility on peripheral devices. • Raw data, Processed Raw data and SEG-Y data formats • FM Multi-Ping Mode • Improved Bottom Tracking on steep slopes • Enhanced Zoom Mode capabilities including Bottom Zoom, Bottom Lock Zoom, and Marker Zoom • Simplified User Interface with less parameters to change. • Selectable Color palettes or create your own. • DGPS, Heave Compensation and Sound Velocity inputs
100 Meter Penetration • Depth of 1000 meters with 100 meter of penetration
Laminated Sediments • Laminations and Pro-grading sand fill
Proven Bottom Tracking • Bottom tracking on the steepest of slopes at any depth
Bathy 2010 Zoom Modes • Normal Mode: This mode displays the normal bottom data by itself without any zoom information. When selected, this mode will use the entire viewing area.
Bottom Zoom • Bottom Zoom • When selected, this mode will split the viewing area in half (as shown on next slide). The left side will be used to show zoom information, and the right side for normal bottom data. Bottom Zoom mode centers the zoom display around the current depth allowing you to follow it up and down the water column at a high resolution. In addition, the user can use the Zoom Range Control to zoom in or out. The Zoom Range value represents the zoom range in whichever units are currently selected. When the zoom window moves up or down to track the bottom, it does so in Zoom Range / 2 increments.
Bottom Lock Zoom • Bottom Lock Zoom: This mode functions the same way as Bottom Zoom, however it does not show the bottom moving through the water column. Instead, it will lock the bottom to the upper portion of the zoom view so that the user may continuously monitor sub-bottom information.
Marker Zoom • Marker Zoom provides a high-resolution zoomed view of the water column, however in this mode, the user can specify where in the water column the zoom range will begin. This is accomplished by dragging the marker zoom bar up or down the normal view scale bar to the point you want the zoom range to begin. The start of the zoom range can be observed at the top of the zoom window while you drag the marker zoom bar, but the marker zoom isn’t set until the mouse button is released.