Download
1 / 29
290 likes | 302 Vues
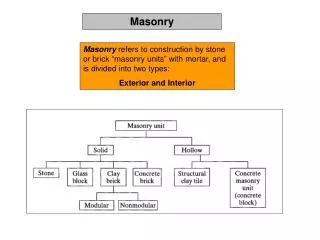
Metal Work in Masonry Module 28204-05. Transparency 1. Objectives. Upon completion of this module, you will be able to: 1. Describe the uses and installation of vertical reinforcement. 2. Describe the uses and installation of different types of horizontal joint reinforcements and ties.

E N D
Metal Work in Masonry Module 28204-05
Transparency 1 Objectives • Upon completion of this module, you will be able to: • 1. Describe the uses and installation of vertical reinforcement. • 2. Describe the uses and installation of different types of horizontal joint reinforcements and ties. • 3. Describe the uses and installation of different anchors, fasteners, and embedded items. • 4. Install hollow metal frames. • 5. Describe the functions of sills and lintels. • 6. Install sills and lintels. • 7. Install metal hardware.
Transparency 2 Performance Tasks • 1. Install a knockdown door frame in a 2- or 3-course brick wall. • 2. Install a slip sill. • 3. Lay one wythe of brick against one side of the frame. • 4. Install hardware cloth unit ties in every other course.
Transparency 3 Figure 1 – Sliding Failure
Transparency 4 Figure 2 – Bending Failure
Transparency 5 Figure 3 – Bowing Failure
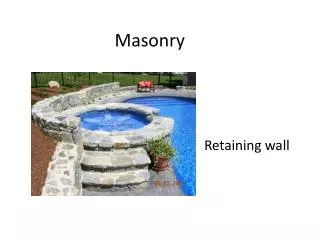
Transparency 6 Figure 4 – Reinforced Retaining Wall
Transparency 7 Figure 9 – Types of Ties
Transparency 8 Figure 10 – Continuous Joint Reinforcements
Transparency 9 Figure 11 – Continuous Joint Reinforcements in Single-Wythe Walls
Transparency 10 Figure 12 – Continuous Adjustable Joint Reinforcements in Multi-Wythe Walls
Transparency 11 Figure 13 – Box and Z-Type Unit Ties
Transparency 12 Figure 14 – Typical Metal Anchors
Transparency 13 Figure 15 – Adjustable Unit Ties
Transparency 14 Figure 16 – Adjustable Assemblies
Transparency 15 Figure 17 – Simple Rod Anchor Bolts
Transparency 16 Figure 18 – Complex Anchors
Transparency 17 Figure 20 – Standard Hollow Metal Door Frame
Transparency 18 Figure 22 – Adjustable Frame Tie
Transparency 19 Figure 23 – Braced Assembled Door Frame
Transparency 20 Figure 24 – Telescoping Brace
Transparency 21 Figure 26 – Lug and Slip Sills
Transparency 22 Figure 27 – Typical Detail for Slip Sill
Transparency 23 Figure 28 – Rowlock Brick Window Sill
Transparency 24 Figure 29 – Angle Iron Used Over Openings
Transparency 25 Figure 30 – A Four-Inch Minimum Bearing is Required for Each End of the Lintel
Transparency 26 Figure 31 – Precast Concrete Lintel
Transparency 27 Figure 32 – Concrete Lintel in Block Wall
Transparency 28 Figure 34 – Masonry Anchors for Metal Door Frame