Download
1 / 37
400 likes | 1.14k Vues
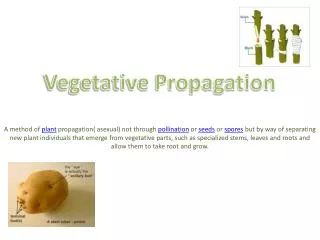
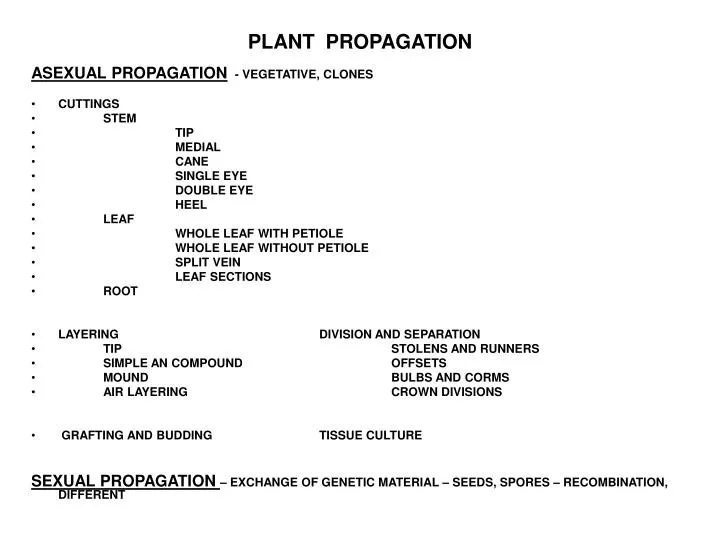
PLANT PROPAGATION ASEXUAL PROPAGATION - VEGETATIVE, CLONES CUTTINGS STEM TIP MEDIAL CANE SINGLE EYE DOUBLE EYE HEEL LEAF WHOLE LEAF WITH PETIOLE WHOLE LEAF WITHOUT PETIOLE SPLIT VEIN LEAF SECTIONS ROOT LAYERING DIVISION AND SEPARATION

E N D
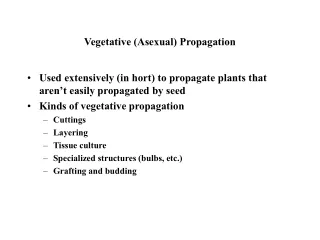
PLANT PROPAGATION ASEXUAL PROPAGATION - VEGETATIVE, CLONES • CUTTINGS • STEM • TIP • MEDIAL • CANE • SINGLE EYE • DOUBLE EYE • HEEL • LEAF • WHOLE LEAF WITH PETIOLE • WHOLE LEAF WITHOUT PETIOLE • SPLIT VEIN • LEAF SECTIONS • ROOT • LAYERING DIVISION AND SEPARATION • TIP STOLENS AND RUNNERS • SIMPLE AN COMPOUND OFFSETS • MOUND BULBS AND CORMS • AIR LAYERING CROWN DIVISIONS • GRAFTING AND BUDDING TISSUE CULTURE SEXUAL PROPAGATION– EXCHANGE OF GENETIC MATERIAL – SEEDS, SPORES – RECOMBINATION, DIFFERENT
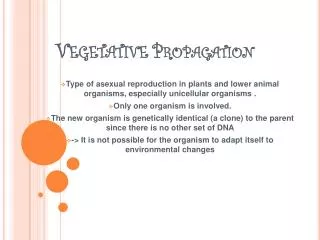
ASEXUAL PROPAGATION Advantages • The offsprings are genetically identical and therefore advantageous traits can be preserved. • Only one parent is required which eliminates the need for special mechanisms such as pollination, etc. • It is faster. Organisms multiply quickly . . • Many plants are able to tide over unfavorable conditions. This is because of the presence of organs of asexual reproduction like the tubers, corm, bulbs, etc. • Vegetative propagation is especially beneficial to the agriculturists and horticulturists. They can raise crops like bananas, sugarcane, potato, etc that do not produce viable seeds. The seedless varieties of fruits are also a result of vegetative propagation. • Tissue culture is used to grow virus-free plants. Disadvantages • The plants gradually lose their vigor as there is no genetic variation. They are more prone to diseases that are specific to the species. This can result in the destruction of an entire crop. • Since many plants are produced, it results in overcrowding and lack of nutrients Asexual propagation does not involve exchange of genetic material, so it almost always produces plants that are identical to a single parent
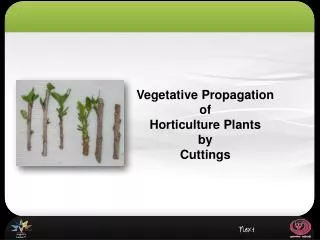
STEM CUTTINGS TIP MEDIAL CANE SINGLE EYE DOUBLE EYE HEEL
LEAF CUTTINGS WHOLE LEAF SPLIT VEIN LEAF SECTIONS W/ PETIOLE W/O PETIOLE ROOT CUTTINGS
LAYERING TIP SIMPLE COMPOUND MOUND
DIVISION AND SEPARATION STOLENS & RUNNERS 0FFSETS BULBS CORMS CROWN DIVISION
TISSUE CULTURE This asexual method consists of asceptically growing plant tissue such as cells, meristems, shoot tips, embryos, ovides, root or stem and leaf sections in a laboratory vessel containing a microbe-free nutrient medium under controlled environmental conditions. Can be used to propagate various species of plants, both easy (African violets, coleus, chrysanthemums) and difficult (orchids, ferns, weeping figs) to propagate GRAFTINGAND BUDDING Grafting and budding are methods of asexual plant propagation that join plant parts so they will grow as one plant. These techniques are used to propagate cultivars that will not root well as cuttings or whose own root systems are inadequate. One or more new cultivars can be added to existing fruit and nut trees by grafting or budding.
SEXUAL PROPAGATION • Sexual propagation involves the union of the pollen (male) with the egg (female) to produce a seed. The seed is made up of three main parts: the outer seed coat, which protects the seed; a food reserve (e.g., the endosperm); and the embryo, which is the young plant itself. When a seed is mature and put in a favorable environment, it will germinate, or begin active growth.
ENVIRONMENTAL FACTORSTHAT AFFECT GERMINATION MOISTURE HEAT OXYGEN LIGHT
SEED ANATOMY • 1. 2cotyledons 2. microphyle(hole) • 3. hilium (scar) • 4. seed coat • 6. plumule • 7. radicle
WHAT SEEDS NEED TO GROW • SOIL MUST USE SEED STARTING MIX WITHOUT FERTILIZER NOT PLAIN GARDEN SOIL • TEMPERATURE SEEDS GERMINATE BETTER IF THEIR SOIL (NOT AIR, SOIL) IS CONSTANTLY 70O OR ABOVE. (SOME 80O TO 85O) • MOISTURE SEEDS NEED TO BE KEPT CONSTANTLY MOIST BUT NOT TOO WET • LIGHT MOST SEEDS DO NOT NEED LIGHT TO GERMINATE BUT THE MOMENT THE SEED HAS GERMINATED LIGHT IS NECESSARY • OXYGEN RESPIRATION TAKES PLACE IN ALL VIABLE SEED. THE RESPIRATION RATE IN DORMANT SEED IS LOW, BUT SOME OXYGEN IS REQUIRED. THE RESPIRATION RATE INCREASES DURING GERMINATION.
SOWING YOUR SEEDS • MATERIALS: CONTAINERS: Either purchased pots or flats or containers you've saved. Used pots should be cleaned and disinfected by soaking in 1 part bleach to 10 parts water • SOIL: Seeds do best in a soilless mix where there are fewer inherent problems than with garden soil • PLANT LABELS: To remember what's what • INDELIBLE INK PEN, PENCIL, OR MARKER • STIFF CLEAR PLASTIC OR PLASTIC BAGS: Will trap warmth and humidity where the seeds need it • WATER: Use tepid water for seeding and until seedlings develop true leaves • LIGHT: Will need some kind of florescent or high density plant light
Seed Starting Materials • 1. The Seedmaster, a rotating wheel seeder for dispersing small seed as you rotate the wheel (the yellow pieces are click-in filters for different seed sizes) • 2. plastic plant labels • 3. a dibbler or dibber for poking little holes in soil • 4. a fine-point black waterproof marker (Sharpie) for labeling • 5. the mini-transplanter is essentially a tiny, stainless steel shoehorn for easy liberation of plugs from their cells • 6. a moisture meter to stick in the soil • 7. plant snips for thinning seedlings • 8. Mini-Sim seeder: fill and shake out • 9. suction seeder with three tip sizes: squeeze the bulb, put the tip on a seed, release to hold, squeeze again to drop • 10. digital timer for keeping track of repetitive tasks like bottom-watering trays one by one • 11. plant light meter, reads in footcandles, with settings for indoor and out • 12. digital indoor/outdoor min/max thermometer/hygrometer, mainly for keeping track of temperature • 13. magnifying glass with light, for examining seedlings up close • 14. soil scoop for filling plug sheets and pots with seedling mix • 15. spray bottle with good quality spray head (more water per pull) • 16. small plastic flats • 17. small bulldog clips
STARTING YOUR SEEDS • PREPARE A SEED STARTING WORKSHEET • TYPE OF SEED (SPECIES, CULTIVAR) • SOURCE (SEED COMPANY) • CATALOG NUMBER • SEED PER PACKET OR SEEDS SOWED • WEEKS TO LAST FROST DATE OR PLANTING OUT DATE • DAYS TO GERMINATION • COVER SEED? • DATE SEEDED • DATE TRANSPLANTED • NOTES: ACTUAL GERMINATION DAYS, % GERMINATION, SEED REQUIREMENTS, CROP FAILURE, ETC. TIMING YOUR PLANTINGS RELATIVE TO L.F.D. USING INFORMATION ON CHARTS AND SEED PACKS
Worksheet Seed Packet Information • On the front of the pack you will be given the common plant name plus the specific cultivar. Usually on flowers you will also be given the botanical name. • The maturity date will be given in days. For example on a lettuce pack, it will grow to baby size in 28 days and fully mature in 52 days. These are excellent guidelines if you intend to plant seeds so that they will mature in succession for a steady supply of produce. The number of seeds in the package will be listed along with the sell by date. • The minimum germination in percentages, very helpful when a specific number of plants are required. For example if you need 100 plants and the minimum germination is listed at 85% you should plant more than 115 seeds to be sure that you get required 100. • Cultural information includes the following: germination temperature. If starting seed indoors you can control the temperature of the heat mat or whatever source of heat that you are using to ensure maximum germination. Planting depth, the depth that the seeds need to be planted. Some seeds require light to germinate so you just need to lay them on the soil surface and not cover them with anything. Some require total darkness so that you need to cover the planting container so that no light is available until the seeds germinate. • Scarification, this term applies to seeds that have a very hard outer coating. You need to nick or break the outer covering so that moisture can penetrate and germination can begin. This is usually accomplished by using a sharp knife or sand paper to penetrate the outer coating. If this procedure is not followed on seeds that require it you will have a very low or zero germination rate. • Stratification, this term means the seeds need to be exposed to a period of cold for a set amount of time. This term usually applies to perennials and biennials. If the seeds are not given a cold period, again you will have a zero or very low germination rate.
STARTING YOUR SEEDS • PLANTING YOUR SEEDS • PREPARING SOIL • FILLING CONTAINERS • SOWING SEEDS FOLLOWING EACH SEED’S REQUIREMENTS • COVERING SEEDS • WATERING SEEDS • PROVIDING HUMID ENVIRONMENT • PROVIDING PROPER TEMPERATURE (SOIL) • PROVIDING PROPER LIGHT
Preparing Planting Medium • Loosen and dampen the potting mix before you put it into your seed starting containers. It is easier to get a uniform level of moisture if you do it this way. • Dampen the mix to the consistency of a rung-out sponge. It should be wet, but not dripping, with no dry lumps. • There are many good potting mixes available. Using a soilless potting mix rather than outdoor soil is preferable because potting mixes don't readily compact, don't contain weed seeds and don't have disease spores and other possible problems. • Also, since new seedlings don't require fertilizer until they sprout their first true leaves, you don't really need a mix with fertilizer already in it.
Filling Containers With Soil • Use the pre-dampened potting mix to fill your seed starting containers. • Don't pack the potting mix into the container. • Fill to about 1/4” from the lip of the container and tap the container on the table top, to help the potting mix settle. • Gently firm and level with a spoon or a small board.
Sowing Seeds in Containers • Make sure you read the seed package for special instructions. Some seeds may require a period of pre-chilling or soaking. • Small seeds can be sprinkled on top of the potting mix. Larger seeds can be counted out and planted individually. • Use at least 3 seeds per container, since not all seeds will germinate and not all that do germinate will survive. You can thin extras later.
Covering Your Seeds • Cover the seeds with more dampened potting mix and then gently firm again. • Re-check your seed packet for information on how much potting mix should go on top of the seeds. Generally, the smaller the seed, the less you need to cover them. • There are a few seeds, like lettuce, that require light to germinate and should barely be covered with potting mix, if at all.
Watering Newly Planted Seeds • Although the potting mix was pre-dampened, it is still a good idea to spray some additional water over the newly planted seed. This insures that the top layer of mix won't dry out and it also helps to firm the potting mix and insure good contact between the seed the mix
Providing Humid Environment Create a Greenhouse Effect: Your seeds are now ready to be covered loosely with some type of plastic. This will help hold in both heat and moisture. You can place the whole container into a plastic bag or simply lay a sheet of plastic over the container. If you have special seed starting trays with plastic covers, use those.
Providing Proper Soil Temperature • Heat: Move your container to a warm, draft free spot and check it daily. Most seeds germinate best when the soil temperature is between 70 and 75 degrees F. The top of a refrigerator is an ideal spot or you could consider purchasing heating mats specially made for germinating seed.
Providing Proper Light • Move into the Light: Your seeds and seedlings need between 12-18 hours of light each day. This may seem extreme, but artificial light and even winter sun are not as intense as full summer sun. The best way to insure regular long doses of light is to attach your florescent plant lights to an automatic timer. Plant lights should never be more than 2 – 4 inches above the seeds or plants. It will not harm the plants even if they touch the fluorescent lights.
MONITORING YOUR SEEDS DAILY • CHECK HUMIDITY – moisture on bag or glass • CHECK LIGHT CONDITIONS – 12-16 hours, 2-4 inches above soil • CHECK HEAT CONDITIONS – maintain proper soil temperature (65o, 70o, or 75o as per seeds requirements) • LOOK FOR GERMINATION – as soon as you see germination, remove the cover or plastic bag and bottom water if on the dry side.
Emerging Seedlings-First Signs of Growth • Once your seedlings begin poking through the soil, they will start to straighten up and unfurl. What look like two leaves will appear. These are actually leaf-like structures, called cotyledons, that are part of the seed and serve as food sources until true leaves are formed and the plant is capable of photosynthesis. At this point you should remove your seedlings from their plastic greenhouse environment. • MONITOR • LIGHT – 12-18 hours, 2-4 inches above seedlings • MOISTURE – use tepid water, bottom water when needed • TEMPERATURE (air) - above 55o – 60o (soil) >70o for good root development • FERTILIZATION - none needed at this point
GROWING TO TRANSPLANT SIZE As the seedling grows, the cotyledons will wither and what are called the first "true" leaves will form. This is when your seedling begins actively photosynthesizing. Since it is growing in a soilless mix, you will need to give it some supplemental feeding at this point. Use a weak solution of a balanced fertilizer or one high in nitrogen and potassium, to encourage good roots and healthy growth. If more than one seedling is growing in the same pot, either separate the seedlings into individual pots or cut off all but the strongest seedling. Don't try to pull out the extra seedlings, since this will hurt the roots of the seedling you are keeping. • LIGHT – 16 hours, 2” above seedlings • WATERING AND FERTILIZING – bottom water with a dilute fertilizer solution using tepid water • TEMPERATURE – warm soil, cool air • AIR CIRCULATION – use a fan to control fungus
TRANSPLANTING SEEDLINGS As soon as seedlings have developed at least one set of true leaves and are large enough to handle, they should be transplanted to individual pots or spaced out in flats. This is called “potting up”. Failure to transplant promptly results in crowded spindly seedlings that can’t develop properly. Generally, seedlings are transplanted with soil up to their cotyledons. Many transplants will have to be “potted up” a second time to larger size pots to maintain vigorous growth.
CARING FOR TRANSPLANTS • LIGHT – At least 16 hours, fluorescent lights 2” or less above seedlings • WATERING AND FERTILIZING –only bottom water with a dilute fertilizer solution • TEMPERATURE – no need for heating mats and air temperatures of 55o to 60o for sturdy compact plants • AIR CIRCULATION – maintain use of a fan to control fungus
HARDENING OFF TRANSPLANTS • By the time you want to move your plants into the garden or sell them at the plant sale, you should have stocky, healthy young plants in four or six inch pots. But before you do either you will need to take a week to two weeks to gradually introduce them to their new growing conditions. This is called hardening off. It gives the plants a chance to acclimate to sunlight, drying winds and climate changes that they will have to endure. • Move the plants outside to a shady spot for increasing amounts of time, several days in a row. • Bring them in or cover them if the temperature looks like it will dip below 50 degrees. • Gradually increase the amount of time they spend outside and the amount of sunlight they receive until you see that they are growing strong and appear ready to go out on their own. • If they are in a greenhouse or cold frame they are used to sunlight and can acclimate to temperature by leaving the greenhouse open and ventiliated.
PREGERMINATION • Another method of starting seeds is pregermination. This method involves sprouting the seeds before they are planted in pots (or in the garden). This reduces the time to germination, as the temperature and moisture are easy to control. A high percentage of germination is achieved since environmental factors are optimum. Lay seeds between the folds of a cotton cloth or on a layer of vermiculite in a shallow pan. Keep moist, in a warm place. When roots begin to show, place the seeds in containers or plant them directly in the garden. While transplanting seedlings, be careful not to break off tender roots. Continued attention to watering is critical. • When planting seeds in a container that will be set out in the garden later, place 1 seed in a 2- to 3-inch container. Plant the seeds at only 1/2 the recommended depth. Gently press a little soil over the sprouted seed and then add about 1/4 inch of milled sphagnum or sand to the soil surface. These materials will keep the surface uniformly moist and are easy for the shoot to push through. Keep in a warm place and care for them as for any other newly transplanted seedlings.
WHY START PLANTS FROM SEED ? • STARTING FROM SEED IS LESS EXPENSIVE • UNAVAILABILITY OF THE PLANTS YOU WANT LOCALLY: • QUANTITIES • VARIETIES • GROW PLANTS THAT ARE HIGHER QUALITY FOR PLANTING • HAVING PLANTS SUITABLE FOR YOUR PLANTING SCHEDULE • SATISFACTION OF GROWING YOUR OWN PLANTS FROM SEED • PLANT SALES
JERRY BABSKI • burgflem@yahoo.com