Download
1 / 22
220 likes | 335 Vues
How to replace a windscreen on a 1996 750i. By Paul Dean. Tools required. These are the main tools I use everyday to fit windscreens at work. Dash knife Scraper Safety gloves Single edged blade scraper Panel tool Latex gloves 13mm socket and ratchet Small dibber Large dibber

E N D
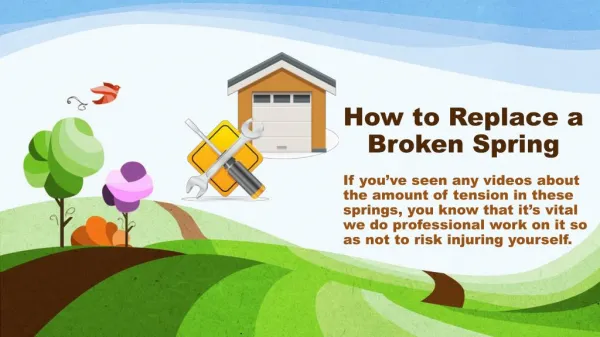
How to replace a windscreen on a 1996 750i By Paul Dean
Tools required These are the main tools I use everyday to fit windscreens at work • Dash knife • Scraper • Safety gloves • Single edged blade scraper • Panel tool • Latex gloves • 13mm socket and ratchet • Small dibber • Large dibber • Kent tool
We first start inside the car we remove the tax, insurance and mot discs from inside the windscreen. Then we remove the mirror grab the mirror by its support bar and twist anti clock wise.
Now use the small dibber (8) to gently Pry the tabs on each side of the rain sensor
Now you should end up with something like this Now with the drivers door open pull On the edging trim to make it easier to Remove the A post cover (non air bag)
In the corner at the bottom of the A post you will see the connection For the heating element squeeze the tabs together and pull upwards to Disconnect.
Use the small dibber (8) to remove The dust caps on the drivers side wiper Arm. There are 2 of them then, undo both 13mm nuts underneath with the socket And ratchet (7) Now lift the dust cover on the Passenger wiper arm and undo the 13mm nut underneath with the socket And ratchet (7)
These are pullers, I had to use 2 different types as the driver and passenger wiper Arms are different widths. The one on the left fits the drivers side and the larger one on the right does the passengers side. The legs grip the under side of the wiper arm And the threaded part of the tool screws down on to the wiper spindle to apply Pressure to pull the wiper arm off the spindle . These are often sized on.
Now you should be at this stage Ready to remove the scuttle or cover Under the wipers. In the picture you can see the small Rectangular clips that hold the scuttle To the bulk head. There are 10 to remove. Use the small dibber(8) to lever up the Centre of the clip enough to get the panel Tool( 5) in to remove the centre completely.
Once you have the centre part of the Clip out, use the small dibber(8) again To remove the bottom part of the clip, Do this to all the clips and then remove Scuttle. Now you should be at this Stage.
We now go to the 2 side trims 1 on each A post. Using your hands Lift up the trim, its on locking tabs. Moving down the trim gently lifting until its free from all its clips. Use the small dibber(8) pry out the top Rubber trim, Be careful it has metal in it And can be easily be damaged. I would Replace this with a new one but didn’t Realise at the time I would need one. But fortunately I was able to reuse it.
The windscreen on this car had been Replaced before. As you can see, this Is a sign that it has been badly done. This excess glue was blocking the path Of the water flow from the sunroof drain tube on the drivers side. Now use the Kent tool (10) to cut out The top half of the windscreen. I started Cutting out the corner that had too much Glue, it was very difficult to cut through, A bad sign that there is worse to come.
With the top half of the windscreen Cut out we need to cut out the bottom Along the dash. Using the Dash Knife(1) and some glass cleaner dash Out the bottom of the windscreen. Start in the corners first then along The middle. The glass cleaner helps The blade of the Dash Knife(1) slide Through the glue while cutting. This picture shows that there was way Too much glue used to bond the old Windscreen into the car.
As you can see again too much glue was used and no spacers were used to Stop the windscreen being pushed down too far making it very difficult to dash Knife out, I ended up breaking the drivers side bottom corner of the windscreen To remove it from the car.
Use the scraper tool (2) to cut the old Glue away. Clean any dirt and moisture that may Be near the glue line. Then using a Etch primer wipe all the way along The glue line on the car. This helps The new glue to bond to the car.
Take the tin of black top primer and shake it for 30 seconds. Use a swab apply the black top to the car anywhere the old glue is missing and where paint is showing. Also apply black Top primer to any where metal is showing through from when Cutting back the old glue, or where the bond line is missing. Along the bottom of The windscreen bond line use 3 lengths of damming tape. This looks like draft Excluder tape, this stops the new windscreen from being pushed flat and makes Is easier to cut out next time.
This is the new windscreen, part number 2433gngn3 for my car. There are 6 types In total, all the same shape but with different features, 2433 is the windscreen Number. Gn (green) is the glass colour, the second gn (green) is the colour of the Top tint (sun shading). There are different types of sensor, sensor on the glass and A sensor clips to a bracket like mine, hence 3 in the order code. But there is also a Difference in the gap from the mirror boss and rain sensor bracket. which you need To watch Out for, as the cover that clips over the sensor when the sensor is Reattached to the bracket will not fit around the mirror. There are 2 measurements 32mm and 50mm, mine is the 32mm.
Clean the inside of the windscreen With glass cleaner and tissue, this Is to remove any grime and dirt. Then etch prime the windscreen Around the edge where the glue will Bond to the windscreen. Turn the windscreen over and clean, use Some masking tape to hold the electrical Connection out of the way on the inside. Straighten the top trim and fit to the top Of the windscreen. Place 2 pieces of Masking tape on the top of the windscreen Folded over to be used to hold the Windscreen in place, so it doesn’t slide Down while the glue is drying. Not doing This can let the windscreen slide down And cause wind noise or worse leak.
Using the cordless 12v glue gun apply a bead of glue to the old glue line The nozzle on the glue gun has a inverted v cut into it, so when you place the Windscreen on to the new glue line it flattens the inverted v to form a even width across the glue. In the factory the robot is able to do this glue line in One movement with one joint. I can’t do this so you have a few joints one at the top And in the case of the 7 series the bonnet(hood) is in the way so you end up with 3. Using a dibber mix the start and stop points of the glue at each joint to form a Continuous glue line.
Using 2 single suction cup lifters, 1 on each side of the windscreen and a double in the Middle. Lift the windscreen up and guide the windscreen under the bonnet before Placing in one movement down on the glue lining up the windscreen with the top edge Of the aperture and side. Use the masking tape closest to you at the top of the screen Tape it to the roof to hold the windscreen in place while you then run around the other side and align the windscreen and use the masking tape on that side to hold The windscreen in place. Then gently push down on the windscreen to make sure It has contacted the glue evenly all the way around.
Once the windscreen is in place start rebuilding the car starting with the scuttle, The wipers, as a precaution we advise to fit new wiper blades as the old ones May scratch the new windscreen. Then fit the side trims, rain sensor, mirror, Connect the heating element connection, refit A post cover and edging trim. Test wipers and the rain sensor is functioning. Place a new disc holder for the tax, insurance and mot discs. The car can not be driven for 1 hour from when the Windscreen was placed on the glue.
Once the hour has passed remove the masking tape from the roof/windscreen. Inform the customer they can not wash around the windscreen with a power Washer for 3 days. Most cars can be done in 1 hour or less from start to finish, So now you know how its done, I took my 7 for a test later on and no wind Noise great!!!! All set till the next time. Author and photography Paul Dean Myse7en The 7 Series Register