Download
1 / 42
420 likes | 662 Vues
Nextgen Transactions. Presented by Bridget Clayton Local Government Corporation Resource 2014. Transaction Menu Options. Import Transactions Transaction Batches Transactions Transaction Templates Post Transactions. Import Transactions.

E N D
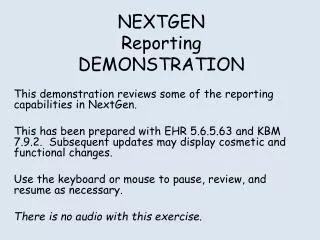
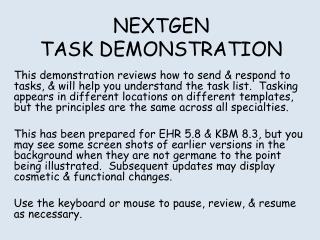
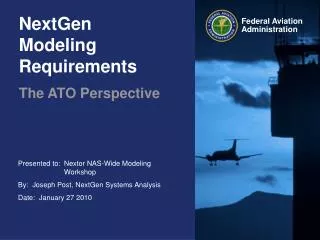
Nextgen Transactions Presented by Bridget Clayton Local Government Corporation Resource 2014
Transaction Menu Options • Import Transactions • Transaction Batches • Transactions • Transaction Templates • Post Transactions
Import Transactions • Division-this will fill in automatically if you only have 1 Division (multiple divisions will need to select one) • File Definition-select the File Definition that has been setup • File-may fill in automatically • Batch ID-You will select a batch that has already been created or you may create one here.
File With Errors A red shield will be displayed if there are errors on the file. Click NEXT to receive a message detailing the errors.
Example Errors in File • Account Control 101 is invalid because it does not allow entries for 2013-2014 fiscal year and January Period • (would be because the January Period is not open) • GL account number 101-31100- - - is invalid because it does not exist for 2013-2014 fiscal year • (would be because this account number is not setup for this year)
File Without Errors There will be no error shield. Review the complete transaction. Click NEXT to continue.
Review the summary, if all info is correct, click FINISH to import.
After the transaction imports you will receive a confirmation. Click Close
Transaction Batches • Importing a Transaction File will create a batch containing the transaction. The entry is not posted until you close and post the batch. • You may create a batch from the Transaction Batch Menu. • Or you may create a batch while entering a transaction.
Transaction Batches • Financial Management • Transactions • Transaction Batches • Select New from the Ribbon Bar to add a new batch • Click FIND to list unposted batches. • Double click the batch to open
General Tab lists Batch Id, Date, Status and Created by. Tasks are Print Batch, Close Batch and Post Batch Click on the Transactions Tab to see the transactions in the batch.
The transaction will be detailed. • The total transaction amount listed. • Add Transaction allows you to add more transactions to the batch. • Click on the General Tab to switch back to the previous screen.
You will be able to now Print the Batch, Close the Batch, and Post the Batch.
Post Batch After selecting POST Batch it will display the batch information. Select NEXT to continue.
Review the Summary Click FINISH to post.
The confirmation screen will display once the batch posts. Click CLOSE
Transactions • Financial Management • Transactions • Transactions • Click NEW from the ribbon bar
Another way to enter a batch is to add a new Transaction and not check to Post this Transaction. Checking this option allows you to immediately post the transaction. Click the drop down arrow to select an existing batch or click the ellipses to add a new batch. Fill in all the required info Click NEXT to proceed with the transaction.
Enter the accounts, debits and credits. Hit NEXT to continue.
Summary Screen Review Summary Screen Click FINISH
Transactions Viewing Options • You can view posted transactions and unposted transactions by: • Date • Number • Amount • Batch ID • Reference
Viewing Transactions • Financial Management • Transactions • Transactions • Select your View option • Enter selections • Click FIND • Double Click on the transaction you wish to view.
The General tab shows the general info for the transaction such as status, date, type, number description, etc. If this was a manual transaction you can Void the transaction here.
If any Internal Notes have been entered they will show on the Internal Notes tab.
Fill in the required info Click NEXT
The entries will pull in based on the original transaction. Click NEXT to continue
View Summary Screen Click FINISH
Post Transactions • Financial Management • Transactions • Post Transactions • All closed batches will display. • Select the batches you wish to post. • Click NEXT • Click Finish on the Summary Screen
Review Posting Transaction Options • Can be done automatically as the transaction is entered. • Can be done thru the Transaction Batch Menu Option • Can be done thru the Post Transaction Menu Option
File Definition • Financial Management • Administration • File Definition • Select NEW from the ribbon bar.
File Definition • Select your Division • Key in your Description • Type Import Transaction • Select Transaction Type • Select Delimiter (CSV or Excel) • Click ellipses to browse to file path. • Click ellipses to browse to filename. • You can allow public or private access. • If file contains a header row, check the box. • Active should be checked. • Click NEXT to continue
Creating A File Definition Select the column names that match your file. If column needs formatting select the appropriate format. Field number is the column number for a CSV file, for excel files you will select the starting point and end point. Select NEXT to continue.
Review the summary screen and click FINISH if all is correct.
Adding GL Accounts • Financial Management • General Ledger • GL Accounts • New from the Ribbon Bar
GL Accounts • GL Accounts enter Fund-Sub Fund-Function-Object- Cost Center-Sub Object. • Account Type • Add Fiscal Year
Adding Fiscal Year to GL Account Mark if this is a cash account
A Common Error This GL Account number is being used for an existing GL Account The GL Account may have been setup for a prior year, but not the current year. Select close this will take you back to the Untitled GL Account Screen. Click on the Back button from the Ribbon Bar. This will take you to the GL Account Search Screen
Search for GL Account Change Fiscal Year to NONE Type in GL Account Number Hit Find Loads Your Search Results Then you can select the Account Number Results
Add Fiscal Year to Existing GL Account Click the Add Fiscal Year Tab This will take you to the add Fiscal Year Screen There you will add the Current Fiscal Year Save and Close This will bring you back to this screen with the Year added Save and Close
Nextgen Transactions This concludes our Training class. Thank you for Participating in Our Resource 2014 Class.