Download
1 / 74
880 likes | 1.85k Vues
Eric Ryder’s Visual Storytelling Course - Course 01. storyboarding. What is Storyboarding ?. Once a concept or script is written for a film or animation, the next step is to make a storyboard. A storyboard visually tells the story of an animation panel by panel, kind of like a comic book.

E N D
Eric Ryder’s Visual Storytelling Course - Course 01 storyboarding
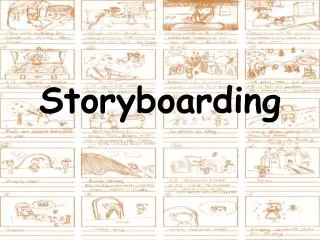
What is Storyboarding ? Once a concept or script is written for a film or animation, the next step is to make a storyboard. A storyboard visually tells the story of an animation panel by panel, kind of like a comic book. Your storyboard will should convey some of the following information: • What characters are in the frame, and how are they moving? • What are the characters saying to each other, if anything? • How much time has passed between the last frame of the storyboard and the current one? • Where the "camera" is in the scene? Close or far away? Is the camera moving?
The Story of Storyboarding The story of storyboarding is best told as a trilogy. It starts with Leonardo da Vinci's using cartoons to illustrate his ideas. Centuries later cartooning was revitalized by Walt Disney to evaluate ideas for movies and animated cartoons. In the second part, Disney and Mike Vance, a Disney colleague, saw that storyboarding could be adapted effectively for business planning in a mode they termed "displayed thinking." In part three, architects applied visuals to "way finding," an architectural term of art referring to the process used to orient and navigate. The trio of storyboarding techniques fall out by the type of people using it: • Film industry - Sequenced frames like a comic strip used to compress plot, characters, setting and point of view for movies, videos, animated cartoons, multimedia and commercials • Business and politics - Displayed thinking for group problem- solving and strategic planning • Architects - Helping people to find their way in man-made environments All three types contain similar design elements: • Sequencing • Visuals • Framing • Storytelling • Displayed thinking • Compressed ideas • Universally understood language
Why make a storyboard? Creating a storyboard will help you plan your animation out shot by shot. You can make changes to your storyboard before you start animating, instead of changing your mind later. You will also be able to talk about your animation and show your storyboard to other people to get feedback on your ideas.
So I need to be an artist? Well you can be, but looking at storyboards by Hitchcock or Spielberg you have to admit that they can't draw. There are professional storyboard artists that can give you results that look better than the final film. However its a good idea to bash them out yourself, it allows you to experiment quickly and cheaply, testing out different versions of how a scene may look and play on camera.
How do I make a storyboard? Most commonly, storyboards are drawn in pen or pencil. If you don't like to draw you can also take photos, cut out pictures from magazines, or use a computer to make your storyboards. Keep in mind that your drawings don't have to be fancy! In fact, you want to spend just a few minutes drawing each frame. Use basic shapes, stick figures, and simple backgrounds. If you draw your storyboard frames on index cards, you can rearrange them to move parts of the story around.
Storyboard Language • Camera Shots • Camera Moves • Camera Techniques
Camera Shots Close Up Description: Shows enlarged view of part of subject. Purposes: Draws attention to details and adds emotion.
Camera Shots Medium Close Up Description: Shows part of subject. Purposes: Focuses attention to details.
Camera Shots Bust Shot Description: Shows subject from mid-chest area up. Purposes: Provides intimate view of subject, focuses attention on face.
Camera Shots Medium Shot Description: Shows subject from waist up. Purposes: Allows connection with subject while providing room for gestures. Most frequently used shot.
Camera Shots 3 Quarters Shot Description: Shows most of body or space. Purposes: Allows room for movement and other subjects to enter frame.
Camera Shots Wide Shot Description: Shows whole body or space. Purposes: Establish scene or setting, allow room for action.
Camera Shots Extra Wide Shot Description: Shows environment more than Characters. Purposes: Establish scene or setting, allow more room for action.
Camera Shots Profile Description: Side shot of one or more characters. Purposes: shows expression of character and movement interacting with the opposed.
Camera Shots Back Shot Description: shows back of character. Purposes: to lead the spectators eye towards situations in front of the protagonist.
Camera Shots Top Shot Description: The camera is higher than eye level, looking down from above. Purposes: A camera angle which looks up at its subject; To show situations more clearly or it makes it’s subject less important or powerful.
Camera Shots Low Angle Shot Description: with camera facing up. Purposes: A camera angle which looks up at its subject; it makes the subject seem important and powerful.
Camera Shots 2 Shot Description: 2 characters in frame. Purposes: the give a mood of conversation.
Camera Shots 3 Shot Description: 3 characters in frame. Purposes: to express a group situation.
Camera Shots Oblique (Dutch) angle Description: at an oblique angle. Purposes: oblique angles suggest tension, transition, and impending movement .
Camera Shots POV A shot which is understood to be seen from the point of view of a character within the scene.
Camera Moves Pan Description: Shows what's to the left or right of the screen. Purposes: Reveal setting, sweep across subject wider than screen, show relationship between two subjects.
Camera Moves Tilt Description: Shows what's above or below the screen. Purposes: Reveal parts of vertical subject, useful for showing tall objects, show relationship between parts of a subject, can add suspense or surprise.
Camera Moves Track Description: Camera physically moves to left or right around subject. Purposes: Reveal another side of subject, add dimension, show physical relationship between objects or subjects.
Camera Moves Dolly Description: Camera physically moves toward or away from subject. Pg. 4. Purposes: Change focus of attention from broad view to detail of subject or vice versa. Provides sense of physically moving closer or farther from subject.
Camera Techniques Zoom Description: View of subject changes from tight to wide or wide to tight using the zoom control on the lens. The camera does not move. Purposes: Change focus of attention from broad view to detail of subject or vice versa, keep size of moving subject the same in frame, reveal surroundings of subject (zoom out). Provides sense of magnifying subject without getting physically closer (zoom in).
Camera Techniques Follow Action Description: Camera follows subject as they move. May involve panning, tilting, and zooming. Purposes: Keep subject in frame, add energy and movement to scene.
Camera Techniques Let in/out Description: Camera is stationary and subject enters or leaves frame. Purposes: Allow subject to enter or leave scene, a transition between scenes or subjects. Let in can establish a setting and then bring attention to subject walking into setting. Let out can be used to end a scene.
Camera Techniques Let in & Follow Description: Subject enters camera frame and then camera follows moving subject. Purposes: Establish a scene and then follow action, change attention from one subject to another, pickup pace of scene, transition between subjects.
Camera Techniques Shift Attention Description: Uses a pan, tilt or combination to change the main subject of a shot from one element to another. Purposes: Shift attention from one element in the frame to another, show physical relationship between subject elements, follow action by changing framing when main action changes between subject elements or show secondary activities happening while main action occurs.
Transition Grammar DISSOLVE A transition between two shots, where one shot fades away and simultaneously another shot fades in. FADE A transition from a shot to black where the image gradually becomes darker is a Fade Out; or from black where the image gradually becomes brighter is a Fade In. CUT A cut is an instantaneous change from the last frame of the outgoing shot to the first frame of the incoming shot.
Transition Grammar Black Editing in a second or two of "black" can help to provide a distinct break between scenes. When you watch television, you may notice that many times when a program goes to commercial, there is a moment of black just before a commercial starts. This helps the audience to know that the commercial is not part of the program. Refocus/Defocus If your camera doesn't have a fade feature, you could use a technique where you start or end a scene out of focus. You may notice that many times when television programs display text information on the screen, they usually produce it over a defocused scene. Of course, to do this, you must learn how to manually focus your video camera first.
Transition Grammar Follow a moving object To transition into a scene, you can try to record footage where you follow an object or person (that is not the main focus of the scene) moving across until you stop the camera and stay focused on your intended subject. From there you can record any scripted dialog. This helps to avoid having everything jump out at your audience as you transition between scenes. Be careful in what you select as your transitions in and transitions out, particularly as you go from one "out" to an "in." If the transition out on one shot is a "medium shot, cut" you typically don't want to follow with a similar "cut, medium shot" on the transition in of the next shot. If you have the same type of shots following each other, you need to further examine the details of the segments to make sure that this similarity won't confuse the audience.
Movements Arrows Generally I try and use thick white arrows to show camera moves and thin black arrows to show objects moving.
Movements The floating frame What if you want to show the camera panning to show a cityscape, or following a character as they walk through an airport? There's two options here: 1) Illustrate one shot using more than one storyboard frame showing the key stages of the shot's movement across a number of frames or 2) Draw out the entire scene (e.g.. the horizon of a city) and place a frame on it with an arrow indicating the direction of movement.
Rules in Storyboarding Every scene must serve a purpose When creating your storyboard do not cut to another scene, unless there is a reason to do so. Very often, I see unnecessary cutting, and all it does is confuse the viewer. Many times, board artists think they are creating an artistic mood in rapid cutting, but this is not always the case. Cutting is used to shift the audience’s focus to important aspects of the story.
Rules in Storyboarding Do not move the camera unless necessary I try to use camera moves as little as possible. I might use one for an establishing shot at the beginning of the sequence, but more often than not, that is all. Use camera moves to reveal jokes, or again, to direct the audience’s focus to something necessary for the comprehension of the story. Many people use a camera move because their original staging does not work for the entire scene, so they “adjust” the framing as necessary.
Rules in Storyboarding Watch for “jump cuts” A “jump-cut” is a cut from scene to scene that appears to “pop”. It usually comes from cutting from one angle/framing to a very similar angle/framing. This is very jarring to look at, as it will appear that things in your scene (i.e. character) will jump into their new position in the field. When cutting to a new angle on a character, a storyboard artist needs to make sure that the camera in the new scene is dramatically either closer or further away to that character. If the character is too similar in size, your scene will jump-cut. A rotation will not solve this at all either. (ABOVE) Notice the cut from scene 2 to scene 3. With this cut, only the camera angle changes slightly, thus giving the character a popping effect. She will appear to change in position just slightly, and the result will be jarring for the viewer.
Rules in Storyboarding Watch for “jump cuts” A “jump-cut” is a cut from scene to scene that appears to “pop”. It usually comes from cutting from one angle/framing to a very similar angle/framing. This is very jarring to look at, as it will appear that things in your scene (i.e. character) will jump into their new position in the field. When cutting to a new angle on a character, a storyboard artist needs to make sure that the camera in the new scene is dramatically either closer or further away to that character. If the character is too similar in size, your scene will jump-cut. A rotation will not solve this at all either. (ABOVE) Here you will see that I cut to a close-up of the male character first in scene 3 so that we could see his excited dazed, love-struck expression, and THEN cut to the profile shot of the two characters. This allows for a smoother transition, and the cut will not jump.
Rules in Storyboarding Watch your composition Be sure that you make the most of your negative space. Don’t draw a little tiny character in your frame, and nothing but background around him, unless you are doing it for a reason, such as showing how alone the character is, for example. If your focus is on the character as a whole, be sure that the character fits (just fitting all of the character and his action) in the frame. You want your shots to turn out as interesting as possible.You should try as much as possible to show some depth in each shot as well. By using foreground elements sometimes you can achieve this. By setting up your scenes so that they are not shot straight on the character or in a straight profile, you can achieve this as well. These two angles, unless done for an artistic reason should be avoided, as a profile or straight on view of a character is more often than not ugly as sin.On a side note, an over the shoulder shot of a character speaking with another is a lot more interesting to look at than a straight close-up. The over the shoulder shows the relation in space between the two characters and adds a bit of depth to your scene. (ABOVE) An example of over the shoulder. Notice the small amount of negative space in the scene, and the scene is filled up with characters, which is much more interesting to look at than empty space (background). This also adds a small sense of depth to the scene, and if one really wanted to get artistic with the scene at compositing stage, a slight blur could be applied to the girl in the foreground, adding to the depth effect.
Rules in Storyboarding Watch your axis In a scene, there is an imaginary line, called an axis. It is a line that your camera can never jump across. Consider, if you will, two characters speaking to each other. The axis would be found by drawing a straight line through the centers of these characters. You cannot cross that line, and if you absolutely NEED to, you have to cut first, placing your camera on the axis, and then you can cut to the other side. (ABOVE) In this setup, we see two characters talking. Notice the dotted line drawn through the two characters. That is the AXIS. DO NOT CROSS that line with your camera. You can place your camera anywhere you want on one side of the line, but if you do want to cross it, you first need to cut to an angle where the camera is ON the axis, and then you can go to the other side.
Rules in Storyboarding Avoid complicated anglesIt is highly recommended that you avoid overcomplicating your camera angles. If you do not NEED to have an extreme up-shot or down-shot (again, only do these if there is a specific reason for doing so), then do not do them. It makes your scene very difficult to animate, and the end result could be something very atrocious. You can usually get your point across visually without overcomplicating things, so I suggest that is what you do. (ABOVE LEFT) This is an example of a shot to avoid. An extreme down-shot is extremely hard to draw ONE frame of, let alone 100. This is a better solution. You could also, to make matters even easier, do a straight profile of the character walking across the screen, but it is not as nice to look at. This character is still walking in perspective, which some people still have problems animating, but at least, the character is level with the camera, so it is much easier to draw.
Rules in Storyboarding Watch your continuity One of the most common mistakes found in storyboards is a lack of continuity. You need to make sure that everything remains constant throughout a sequence. Characters need to be in the correct positions from scene to scene, and you need to keep track of where they move to. Props need to be all accounted for, and sizes or characters and objects in the background need to be followed closely.
Rules in Storyboarding Don’t be lazy with your poses A lot of people try to take short-cuts when storyboarding, and put as few poses into their board as possible. They assume that the animator will use their imagination and make the action work, and act naturally. The problem is that many animators believe it not to be their job to think about the action so much, and don’t; especially if they are foreign animators being paid minimal salaries to get the job done.
Rules in Storyboarding Indicate the light source If your film has shadow effects in it, you will want to make it clear as to where your light is coming from. If you do not, an animator will (more than likely) take it upon himself to put the shadows wherever he wants to, which will probably be in the place that will make the least amount of work for him. This will make some mass confusion, and your shadows will be all over the place from scene to scene. Draw and shade your shadow areas, or simply indicate your light direction using an arrow (if you really want or need to save some time). Drawing and shading your shadows is the best approach though.
Rules in Storyboarding characters should be in the correct camera direction When characters are speaking, and you are cutting from one to the other and back again, etc., you must make sure they appear to be speaking to each other. If one character is speaking to screen right, the other character must reply to screen left. Otherwise, they will not appear to be speaking to each other at all, and the audience will be confused. This is particularly a problem when cutting from a close-up of one character to a close-up of the other, and your scenes will jump-cut (the first character will appear to magically turn into the other). Also with camera direction and characters’ interaction in the camera, be sure that if your character is exiting for example in one scene and entering in the next, that they are moving in the same direction. It is very jarring to see the character exit screen left and then in the next scene, enter from screen right.
Rules in Storyboarding Important action should happen center screen Many people have a tendency to always put a character’s eyes (the character who the focus should be on) exactly in the center of the screen. This is the wrong approach. You should favour the character to one side or the other, so that there is less negative space behind them, and more in front of them. (ABOVE) This is wrong. It is not terribly pretty to look at, and there is too much negative space behind the character. The red area is the T.V. cut-off. (ABOVE) This is better. The character fills the screen better, and there is much less useless space behind her.
Rules in Storyboarding Be sure that your posing is strong Posing needs to be strongly drawn. There needs to be a strong line of action, and the characters’ poses need to be well silhouetted. This means that if you were to colour your entire character black, you could still tell what the character is doing. You achieve this by ensuring that you draw the characters’ arms away from the body, instead of in front of it, etc. (ABOVE) This is an example of a weak pose. Look at the dark version on the right, and notice that you cannot see what it is, or what the character is doing. (ABOVE) This is a better pose. When painted black, we can see what she is doing by way of the negative space around her.
Storyboard Forms • Standard ratio (4:3) - 20 frames • Standard ratio with space for overhead plan - 8 frames • Widescreen (16:9) - 15 frames