Download
1 / 42
440 likes | 671 Vues
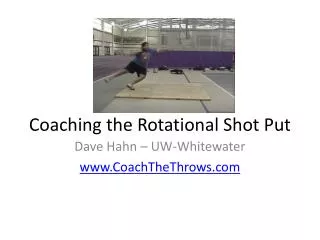
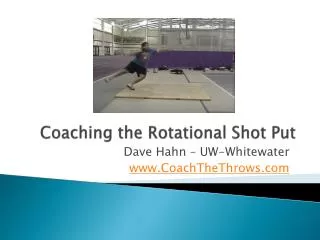
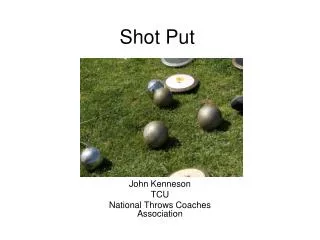
Shot Put. Darin Schmitz Head Track and Field Coach Neosho County Community College. Two Basic Techniques. Glide Spin Myth: Spin is better the Glide Fact: Even though many of the top shot putters in the world currently use the spin, there are still some who throw just as far with the glide.

E N D
Shot Put Darin Schmitz Head Track and Field Coach Neosho County Community College
Two Basic Techniques • Glide • Spin • Myth: Spin is better the Glide • Fact: Even though many of the top shot putters in the world currently use the spin, there are still some who throw just as far with the glide.
Which Do You Teach? • Whatever you are most comfortable with. • If you are not comfortable or don’t know the technique then you may just be hurting the athlete.
What will we be going over • Short time period • I will cover the glide in depth • Give some workout concepts • Weight training ideas
Glide • Five Phases • Preparation Phase • Drive Phase • Load Phase • Release Phase • Recovery Phase
Preparation Phase • This phase may be the most important • Also the one phase that may be the most done incorrectly. • The whole idea behind the glide is linear speed and force • Anything that takes away from that straight line will take off of your throw
Preparation Phase • Start Tall • Push the shot in hard into the neck with fingers together and elbow up • Don’t start with the legs bent for a long period of time • This is all about acceleration • Your most powerful position (Vertical Jump)
Preparation Phase • Make your throw preparation the same for every throw. • Consistency is the key • Take a deep breath then drive
Drive Phase • Bring in your left leg parallel to your right leg. • Start your upper body descent • Start bringing your weight to the heal of your right foot • While relaxing your upper body drive off your heal
Drive Phase • Use your left leg to aid in your drive never letting it get more then a few inches off the ground. • Get ready to load
Drive Phase • Key points to look for incorrect technique: • The use of the upper body in the drive phase • The left getting very high off the ground • Driving off the toe, not the heal • Crossing the legs when the left comes in
Load Phase • The quickest phase, but the most technical. • In the best of throwers this phase looks lightning quick.
Load Phase • Upon finishing your drive phase the right will hit in front of the middle of the ring pointing as close to the right sector line as possible. • The right hip will then drive towards the front of the ring while at all times turning that right foot. • Upon hitting the middle the right foot should never stop moving
Load Phase • It is then and only then your upper body will begin to move. • By thrusting the right hip the upper body will be forced to turn creating a “sling shot effect.” • It is here that you will begin the throw phase.
Load Phase • Things to look for: • Is the foot turned when it lands? • Is the upper body back and relaxed upon landing? • Do the hips drive hard at the end?
Release Phase • This is when the upper body begins its work • With the right hip driving and the right foot turning RIP the left arm to open the chest like you’re slamming a door shut.
Release Phase • Keep your left leg straight and drive with your right leg. This is the most powerful position!!! • Do not throw off of your left leg. • Example of strength differential…
Release Phase • With your chest perpendicular to the throwing field push through the shot put. • Keep you head facing the throwing area peaking at the shots flight with your right eye. • It is now time for the recovery phase
Release Phase • Things to look for: • Was the weight over the left or right at point of throwing • Did the hand stop when the shot was released or did it continue • Did they “throw the head” at release • Was the left used as a block or did it collapse • Did the elbow drop
Recovery Phase • The non reverse vs. reverse
Recovery Phase • Non-Reverse • The thrower ends with their right and left still touching the ground in a cork screw fashion. • The right foot is turned to its maximum capability as the leg cork screwed around the left.
Recovery Phase • Reverse • The thrower powers off of the right so that it ends landing closest to the toe board. • This is done by jumping off of the right and there being no body contact with the ring until the feet are switched.
Recovery Phase • Pro’s and Con’s of non reverse
Recovery Phase • Pros and cons of reverse
Recovery Phase • What I think: • Both have great assets, but I truly feel that the reverse is very important and does allow the maximum explosiveness • The problem is that it is rarely done correctly and the athlete loses a lot on their throw.
Recovery Phase • Solution: I have the athletes practice early in the season with the non reverse which allows them to use the legs correctly. This may carry over into the first few meets. When I feel they are doing it correctly they will then start to work on the reverse. • It will be ingrained in them to power off that right before they get airborne hence resulting in a much further throw.
Workouts • Early Season: • We have one of the shortest early seasons in the country. • Train to compete well in May not in March or early April. • The name of the game early is repetition. They need to get used to throwing the shot.
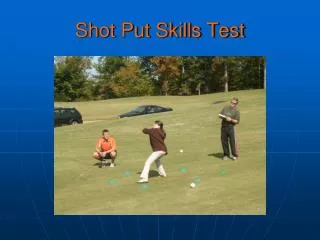
Early Season • Do drill after drill • Break up the different parts of the glide. • Do them separately • Put two or three together • Put the whole thing together with or without the shot. • If you are without a shot have them still hold something like they have a shot, a softball works great.
Early Season • Film • This allows the athlete to see what you are talking about first hand. Many times they may not feel what they are doing wrong, but when they see it it is easier to comprehend.
Early Season • This is the time to explore the non reverse, make sure they are releasing in a good power position. • If you have a thrower with good concept allow them to throw a heavy shot no more then 4 pounds over the weight they competitively throw. • Alternate the heavy shot and competitive shot in practice.
Early Season • Too many throwers worry about distance at practice instead of technique. • If you have an indoor shot have them throw it against the wall for practice, this will allow them to focus more on technique and less on distance.
Early Season • There are no greater drills then breaking up the actual throw. Allow them to slow it down, when they get a concept they may then speed it up. • The glide is quick and explosive, but there are many things that are being done in that short amount of time and they have to get those small things perfect before the glide will actually work as a whole.
Mid-Late Season • This is when the many different parts become one. • Think of it as the early season puts the glide as 5 different steps. In late season it must be back to just one, the glide as a whole.
Mid-Late Season • An athlete must enter the ring at this point thinking of the glide as a whole and not in many parts. • They shouldn’t think about where the foot goes, where this goes or that goes, instead they need to think about just the throw. The glide should be just second nature at this point.
Mid-Late Season • Great track athletes know the correct technique like riding a bike or walking. You get this by repetition of the correct technique. • The worst thing you can do as a thrower late in the season is think!!!
Mid-Late Season • During practice do not break apart the throw any more. If you had them doing drills of breaking apart the throw in 2-3 different parts now make them throw with the technique as a whole. • If they struggle in a spot, just slow it down and work on it, but keep the throw whole.
Mid-Late Season • During this part of the season take out the heavy shot and sprinkle in a light shot. If they throw a 12 lb shot bring in a 10 pound shot and have them throw it 8-10 reps on a 25-30 rep day really working on their arm speed.
Workouts • Anything that deals with explosion • Med Ball circuits • Jump circuits • Explosive sprints (nothing greater then 40m)
Weightroom • This is very important. Be sure they are lifting for explosiveness and not slow twitch bulk. • Implement the Olympic Lifts • Snatch • Clean • Jerk • Have them go “In the hole” for squats but also have them do ¼ squats that same week.
Weight Room • Have them do bench, incline bench, and explosive bench • Use bands to imitate acceleration • Do event specific lifts (mimic the motion of the throw) • Most importantly they must really focus on their abs and back. This is core strength that is so important.
Key Points • Know and study the technique whether you are an athlete or a coach. • Repetition is the key, but be sure that you are repeating the correct technique. • Mix it up a little, throwing is fun, but can be rather mundane in the early season. I always buy some pumpkins or watermelon and put it in the landing area for “target practice.” It really breaks it up and they have fun.
Contact Info • I hope you enjoyed and thanks for coming. • Contact Info: Darin Schmitz Head Track and Field Coach Neosho County Community College P:620-431-2820 Ext 272 E-mail: dschmitz@neosho.edu