Download
1 / 27
290 likes | 872 Vues
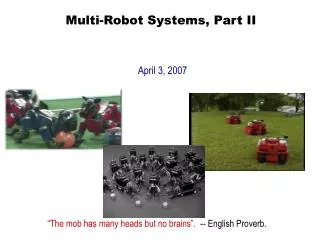
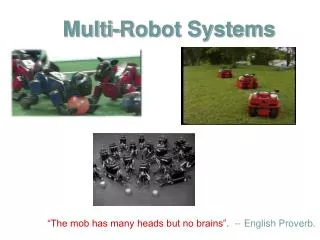
Multi-Robot Systems with ROS Lesson 7. Teaching Assistant: Roi Yehoshua roiyeho@gmail.com. Agenda. Gazebo 3D Simulator Spanning multiple robots in Gazebo Controlling multiple robots in Gazebo. Gazebo. Gazebo is a 3D multi-robot simulator ROS Hydro comes with Gazebo V1.9.1

E N D
Multi-Robot Systems with ROS Lesson 7 Teaching Assistant: RoiYehoshua roiyeho@gmail.com
Agenda • Gazebo 3D Simulator • Spanning multiple robots in Gazebo • Controlling multiple robots in Gazebo (C)2014 Roi Yehoshua
Gazebo • Gazebo is a 3D multi-robot simulator • ROS Hydro comes with Gazebo V1.9.1 • Composed of two processes: • Server: Runs the physics loop and generates sensor data • Client: Provides user interaction and visualization of a simulation (C)2014 Roi Yehoshua
Running Gazebo • To launch gazebo (both client and server components) run: • $ gazebo (C)2013 Roi Yehoshua
Loading World Files • You can use roslaunch to load world models • For example, to open willowgarage_world type: • There are other 5 world files examples in the /launch subdirectory of gazebo_ros package • $ roslaunchgazebo_roswillowgarage_world.launch (C)2014 Roi Yehoshua
Add a Model • To add a model to the world: • Move to the Insert tab • left-click on the desired model in the Insert Tab • move the cursor to the desired location in World View • left-click again to release • Use the Translate and Rotate modes to orient the model more precisely (C)2013 Roi Yehoshua
Add a Model • For example, we will add two Pioneer robots to our world (C)2013 Roi Yehoshua
Robot Description Package • Typically, each robot comes with a robot description package that contains its URDF and mesh files for simulation and visualization • We will use r2d2_description package that we have built in the Introduction course • This package contains r2d2 URDF file and the mesh file for the Hokuyo laser • You can download this package from the link: • http://u.cs.biu.ac.il/~yehoshr1/89-685/demos/lesson11/r2d2_packages.zip (C)2014 Roi Yehoshua
URDF File • Make sure that the laser topic used in the URDF file does is without the /, otherwise it will be shared • <plugin name="gazebo_ros_head_hokuyo_controller" filename="libgazebo_ros_laser.so"> • <topicName>base_scan</topicName> • <frameName>hokuyo_link</frameName> • </plugin> (C)2014 Roi Yehoshua
gazebo_multi package • Let’s create a new package called gazebo_multi • Create a launch subdirectory within the package and add the following launch file called one_robot.launch • $ cd ~/catkin_ws/src • $ catkin_create_pkggazebo_multistd_msgsrospyroscpp (C)2014 Roi Yehoshua
Add Joint and State Publishers • To work with the robot model in ROS, we need to publish its joint states and TF tree • For that purpose we need to start two nodes: • a joint_state_publisher node that reads the robot’s model from its URDF file and publishes /joint_states messages • a robot_state_publisher node that listens to /joint_states messages and publishes the transforms to /tf (C)2014 Roi Yehoshua
Launch File For One Robot • There are two arguments to pass for robot initialization: name and position • Notice that -param /robot_description is with the slash i.e. fully-qualified, as it will be shared • <launch> • <arg name="robot_name"/> • <arg name="init_pose"/> • <node name="spawn_urdf" pkg="gazebo_ros" type="spawn_model" args="$(arginit_pose) -urdf -param /robot_description -model $(argrobot_name)" output="screen"/> • <node name="joint_state_publisher" pkg="joint_state_publisher" type="joint_state_publisher"/> • <node pkg="robot_state_publisher" type="robot_state_publisher" • name="robot_state_publisher" output="screen"/> • <!-- All the stuff as from usual robot launch file go here --> • </launch> (C)2014 Roi Yehoshua
Robots Launch File • <launch> • <!-- No namespace here as we will share this description. • Access with slash at the beginning --> • <param name="robot_description" textfile="$(find r2d2_description)/urdf/r2d2.urdf"/> • <!-- ROBOT 1--> • <group ns="robot1"> • <param name="tf_prefix" value="robot1" /> • <include file="$(find gazebo_multi)/launch/one_robot.launch" > • <arg name="init_pose" value="-x 1 -y 1 -z 1" /> • <arg name="robot_name" value="robot1" /> • </include> • </group> • <!-- ROBOT 2--> • <group ns="robot2"> • <param name="tf_prefix" value="robot2" /> • <include file="$(find gazebo_multi)/launch/one_robot.launch" > • <arg name="init_pose" value="-x -1 -y 1 -z 1" /> • <arg name="robot_name" value="robot2" /> • </include> • </group> • </launch> (C)2014 Roi Yehoshua
Simulation Launch File • gazebo_multi.launch • <launch> • <param name="/use_sim_time" value="true" /> • <!-- start world --> • <include file="$(find gazebo_ros)/launch/willowgarage_world.launch"/> • <!-- include our robots --> • <include file="$(find gazebo_multi)/launch/robots.launch"/> • </launch> (C)2014 Roi Yehoshua
Launch Simulation • To launch the simulation run: • This will open an empty world with the two r2d2 robots • $ roslaunchgazebo_multigazebo_multi.launch (C)2014 Roi Yehoshua
Launch Simulation (C)2014 Roi Yehoshua
Robots Topics • You can see that both robots publish the base_scan and cmd_vel topics in the correct namespace (C)2014 Roi Yehoshua
Moving the Robot with Teleop • Now we are going to move one of the robots using the teleop_twist_keyboard node • Run the following command: • You should see console output that gives you the key-to-control mapping • $ rosrunteleop_twist_keyboard teleop_twist_keyboard.py cmd_vel:=/robot2/cmd_vel (C)2014 Roi Yehoshua
Moving the Robot with Teleop (C)2014 Roi Yehoshua
Node controlling the robot • We will now add a node that will make one of the robots start random walking in the environment • The code of the node is the same as the one we used to control the robot in Stage simulator • Since the robots are using the same topics • Add random_walk.cpp to your package (C)2014 Roi Yehoshua
random_walk.cpp (1) #include <ros/ros.h> #include <geometry_msgs/Twist.h> #include <sensor_msgs/LaserScan.h> #include <string> using namespace std; #define MIN_SCAN_ANGLE_RAD -45.0/180*M_PI #define MAX_SCAN_ANGLE_RAD +45.0/180*M_PI boolobstacleFound = false; voidreadSensorCallback(constsensor_msgs::LaserScan::ConstPtr &sensor_msg); (C)2014 Roi Yehoshua
random_walk.cpp (2) int main(intargc, char **argv) { if (argc < 2) { ROS_ERROR("You must specify robot id."); return -1; } char *robot_name = argv[1]; ROS_INFO("Moving robot %s", robot_name); ros::init(argc, argv, "random_walk"); ros::NodeHandlenh; string cmd_vel_topic_name = robot_name; cmd_vel_topic_name += "/cmd_vel"; ros::Publisher cmd_vel_pub = nh.advertise<geometry_msgs::Twist>(cmd_vel_topic_name, 10); string laser_topic_name = robot_name; laser_topic_name += "/base_scan"; ros::Subscriber base_scan_sub = nh.subscribe<sensor_msgs::LaserScan>(laser_topic_name, 1, &readSensorCallback); (C)2014 Roi Yehoshua
random_walk.cpp (3) geometry_msgs::Twist moveForwardCommand; moveForwardCommand.linear.x = 1.0; geometry_msgs::Twist turnCommand; turnCommand.angular.z = 1.0; ros::Rate loop_rate(10); while (ros::ok()) { if (obstacleFound) { ROS_INFO("Turning around"); cmd_vel_pub.publish(turnCommand); } else { ROS_INFO("Moving forward"); cmd_vel_pub.publish(moveForwardCommand); } ros::spinOnce(); // let ROS process incoming messages loop_rate.sleep(); } return 0; } (C)2014 Roi Yehoshua
random_walk.cpp (4) voidreadSensorCallback(constsensor_msgs::LaserScan::ConstPtr &scan) { boolisObstacle = false; intminIndex = ceil((MIN_SCAN_ANGLE_RAD - scan->angle_min) / scan->angle_increment); intmaxIndex = floor((MAX_SCAN_ANGLE_RAD - scan->angle_min) / scan->angle_increment); for (inti = minIndex; i <= maxIndex; i++) { if (scan->ranges[i] < 0.5) { isObstacle = true; } } if (isObstacle) { ROS_INFO("Obstacle in front of you!"); obstacleFound = true; } else { obstacleFound = false; } } (C)2014 Roi Yehoshua
Launch Random Walk Node • To launch the random walk node type: • $ rosrungazebo_multirandom_walk [robot name] (C)2014 Roi Yehoshua
All Robots Random Walk • To make all robots random walk, you can add the random_walk node to one_robot.launch file • <launch> • <arg name="robot_name"/> • <arg name="init_pose"/> • <node name="spawn_urdf" pkg="gazebo_ros" type="spawn_model" args="$(arginit_pose) -urdf -param /robot_description -model $(argrobot_name)" output="screen"/> • <node name="joint_state_publisher" pkg="joint_state_publisher" type="joint_state_publisher"/> • <node pkg="robot_state_publisher" type="robot_state_publisher" • name="robot_state_publisher" output="screen"/> • <!-- All the stuff as from usual robot launch file go here --> • <node name="random_walk" pkg="gazebo_multi" type="random_walk" args="$(argrobot_name)" output="screen"/> • </launch> (C)2014 Roi Yehoshua
Homework (not for submission) • Pioneer 3-AT (P3AT) is one of the world's most popular robot for research and teaching university robotics • Download Pioneer’s URDF file from here • Spawn 3 Pioneer robots in Gazebo and move them around with the keyboard (C)2014 Roi Yehoshua