Download
1 / 37
4.44k likes | 13.07k Vues
Intravenous cannulation. What is IV cannulation?. Intravenous cannulation is a technique in which a cannula is placed inside a vein to provide venous access. Venous access allows: sampling of blood administration of IV fluids and medications,. Cannula. This device is available in various

E N D
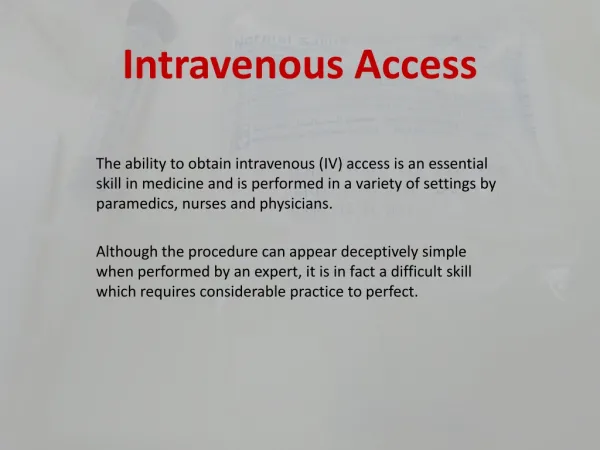
What is IV cannulation? • Intravenous cannulation is a technique in which a cannula is placed inside a vein to provide venous access. • Venous access allows: • sampling of blood • administration of IV fluidsand medications,
Cannula • This device is available in various • gauges (16-24 G), • lengths (25-44 mm), • compositions, and • designs.
Cannula GaugeSize • 22 Gauge: 0.8 mm • 20 Gauge: 1.0 mm • 18 Gauge: 1.2 mm • 16 Gauge: 1.7 mm
Tips • Routinely, use the smallest size (largest gauge number) of catheter if possible to prevent damage to the vessel intima • In an emergency situation use a large gauge catheter to allow administration of large volumes of fluid quickly
Tips • The superficial veins of the upper extremities are preferred to those of the lower extremities for peripheral venous access • they interfere less with patient mobility and pose a lower risk for phlebitis.
Tips • It is recommended to choose a straight portion of a vein to minimize the chance of hitting valves. • Use the patient’s non-dominant arm (if possible) • For prolonged courses of therapy, it is recommended to start distally and move proximally as distal catheters are replaced.
Indication • Repeated blood sampling • Intravenous administration of • IV fluids • Medications • Chemotherapy • Nutritional support • Blood or blood products administration • Radiological contrast agents for computed tomography, magnetic resonance imaging, or nuclear imaging
Contraindications • No absolute contraindications to intravenous cannulation exist • Avoid peripheral venous access in an injured, infected, or burned extremityif possible
Equipment • Non-sterile gloves • Tourniquet • Antiseptic wipes • 5-ml syringe • Sterile gauze • Cannula • Saline • Adhesive Plaster
Before the procedure • Introduce yourself to the patient. Explain the procedure to the patient and gain informed consent to continue • Make sure there is adequate light and that the room is warm enough to encourage vasodilation • Make sure the patient is in a comfortable position and place a pillow or a rolled towel under the patient’s extended arm • The patient’s skin should be washed with soap and water if visibly dirty
Before the procedure • If difficulty is encountered in finding an appropriate vein, one of the following techniques may be used: • Inspection of the opposite extremity • Opening and closing the fist • Using gravity (holding the arm down) • Gentle tapping or stroking of the site • Applying heat (warm towel/pack)
Technique • Apply tourniquet and select the appropriate vein • Apply an antiseptic solution with friction for 30-60 seconds, allow to air dry for up. Once cleaned, do not touch or repalpate the skin • Remove the cannula from its packaging and remove the needle cover ensuring not to touch the needle • Stretch the skin distally and tell the patient to expect a sharp scratch
Technique • Insert the needle, bevel upwards at about 30 degrees • Advance the needle until a flashback of blood is seen in the hub at the back of the cannula • Once this is seen, progress the entire cannula a further 2mm, then fix the needle, advancing the rest of the cannula into the vein
Technique • Insert the needle, bevel upwards at about 30 degrees • Advance the needle until a flashback of blood is seen in the hub at the back of the cannula • Once this is seen, progress the entire cannula a further 2mm, then fix the needle, advancing the rest of the cannula into the vein
Technique • Release the tourniquet, apply pressure to the vein at the tip of the cannula and remove the needle fully • Remove the cap from the needle and put this on the end of the cannula • Carefully dispose of the needle into the sharps box
Technique • Check function by flushing with saline. If there is any resistance, if it causes any pain, or you notice any localized tissue swelling; immediately stop flushing, remove the cannula and start again • Apply the plaster to the cannula to fix it in place • Finally, ensure that the patient is comfortable and thank them
Complications • Pain • Failure to access the vein • Blood stops flowing into the flashback chamber • Arterial puncture • Thrombophlebitis • Hypersensitivity reaction • Peripheral nerve palsy • Skin and soft tissue necrosis • When some irritant solutions leak into the tissue e.g. chemotherapeutic agents • More safely infused into a central vein
Complications • Thrombophlebitis
Complications • Thrombophlebitis • Hypersensitivity reaction • Peripheral nerve palsy
Complications • Thrombophlebitis • Hypersensitivity reaction • Peripheral nerve palsy • Skin and soft tissue necrosis • When some irritant solutions leak into the tissue e.g. chemotherapeutic agents • More safely infused into a central vein
Indications • Maintain or replace body store • Restore acid abase balance • Restore the volume of blood component • Administer of medication • Provide Nutrition • Monitor CVP
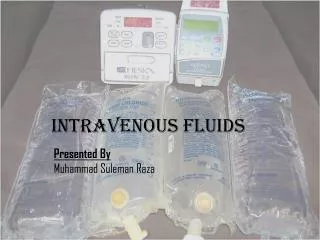
Equipment • Tray • Sterile syringes • Spirit swabs • Drip stand • Drip + set
Technique • Introduce yourself to the patient. • Check the patient’s name and the type of fluid to be given • Explain the procedure to the patient and gain informed consent • Prepare your equipment • Assemble the tubing solution according to the manufacturer’s instruction
Technique • Let out the air from the tubing by letting some of the fluids run down the tubing • Close the drip set to prevent fluid from flowing out • Hang the bag in the drip stand • Open the cannula and connect it to the drip • Adjust the drips according to the appropriate dose (X drops per minute) • Check regularly to see that the fluid is dripping at the same rate and that fluid is going in to the vein properly and that the puncture site is not swollen.
Types Of IV Fluids 1. CRYSTALLOIDS • Isotonic • 0.9% Sodium Chloride (NS) • Lactated Ringers • Dextrose 5% in Water (D5W) • Hypotonic • 0.45% Sodium Chloride • Hypertonic • 5% Dextrose in NS • 5% Dextrose in Lactated Ringers • 5% Dextrose in 0.45% ½ NS • 10% Dextrose in water 2. COLLOIDS (plasma expanders) • Albumin • Plasma Protein fraction • Dextran • Hetastarch
Indications • Treatment of anaemia • Treatment of coagulation, platelet disorders • Treatment of hypovolemia
Before the procedure • Two people to check details (name, blood group and compatibility) • Blood transfusion report form; Unit(s) of blood • Patient with IV access and wrist ID band • Sterile blood giving set • Prepare adrenaline, antihistamine and hydrocortisone beside the patient • Warm the blood
Technique • Introduce yourself to the patient • Explain the procedure and indication • Gain verbal consent • Ensure patient has patent venous access by running NS through • Check equipment – Correct unit of blood and blood giving set • With a partner – check patient’s name, blood group and number of units of blood to be given • Check cross matching of blood
Technique -2 • Put on gloves • Attach unit of blood to giving set and run through blood correctly emptying the air in the set • Connect the blood giving set to cannula; Secure the giving set and cannula with bandaging. • Ensure blood is flowing and set at correct rate • Inform nurses blood is running and to make sure routine observations are made. • If any reaction has occurred the nurse should stop the transfusion and call the doctor on call immediately
Calculating the rate • Drip Rate (drop/min) = Volume to be infused (ml) x Drop Factor (drp/ml) Time (minutes)
Blood products • Whole Blood • Packed Cells • Platelets • Fresh Frozen Plasma (FFP) • Cryoprecipitate
Complications • A. Acute complications: • Acute intravascular hemolysis • Febrile non-hemolytic reactions • Allergic reaction and anaphylaxis • Septicemia • Transfusion Related Acute Lung Injury (TRALI) • Hypothermia (why? – How to avoid?) • Volume overload
Complications • B. Delayed complications • Delayed haemolytic transfusion reaction • Transfusion associated Graft versus Host disease • Post Transfusion Purpura • Citrate Intoxication and Hyperkalemia • Infectivity-Hepatitis B & C, HIV, CMV, Syphilis and malaria
Summary • IV cannulation is a very common daily procedure • Used to obtain blood samples, insert IV fluids, medications, nutrients, and blood transfusion and blood products • Could be life-saving • Should be performed following proper procedure to avoid problems and complications