Download
1 / 53
530 likes | 997 Vues
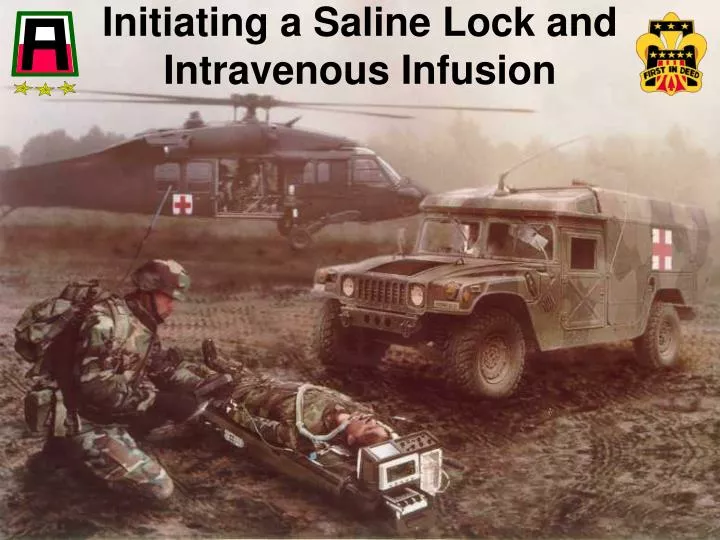
Initiating a Saline Lock and Intravenous Infusion. Initiating a Saline Lock and Intravenous Infusion. On the battlefield, preventing hypovolemic shock is accomplished by controlling bleeding and increasing the fluid in the circulatory system by adding fluids intravenously.

E N D
Initiating a Saline Lock and Intravenous Infusion On the battlefield, preventing hypovolemic shock is accomplished by controlling bleeding and increasing the fluid in the circulatory system by adding fluids intravenously
Hextend • Hextend has recently been selected to replace other resuscitative fluids (such as normal saline and Ringer’s solution) in the CLS bag for the treatment of casualties with significant trunk or extremity injuries • Hextend treats or prevents shock, following serious injury, bleeding, surgery, or burns, by increasing the volume of blood plasma • one 500 ml bag of Hextend is functionally equivalent to three 1000ml bags of lactated Ringers
Hextend • Hextend is not as effective as saline to rapidly and uniformly re-hydrate all fluid spaces in dehydrated soldiers, but also is not expected to cause harm and is expected to be superior than delivery of no IV solution at all • oral fluid consumption should be the first option of re-hydration when soldiers are conscious and can hold down fluids. If soldiers require rapid re-hydration without trauma/bleeding, then a normal saline IV would be optimal
Hextend • if soldiers are unconscious and trauma/bleeding is suspected or known, then Hextend should be the first choice for infusion. If heat injury or dehydration is present in soldiers with trauma/bleeding, Hextend can be given initially with appropriate fluids given later at the Medical Treatment Facility (MTF) • give one bag of Hextend, if after 30 minutes there is still no radial pulse give one final bag of Hextend (No more than two bags)
Lactated Ringer's Solution indicated for replacement of extracellular losses of fluid and electrolytes when administered intravenously, these solutions provide sources of water and electrolytes WARNING: can cause fluid and/or solute overloading resulting in dilution of serum electrolyte concentrations, overhydration, congested states or pulmonary edema
0.9% Sodium Chloride(Normal Saline) • Normal saline (NS) is used frequently in (IVs) patients who cannot take fluids orally and have developed severe dehydration. Normal saline is typically the first fluid used when dehydration is severe enough to threaten the adequacy of blood volume • not your first or second choice for hypovolemic shock
Saline Lock Sometimes, a casualty who is wounded may not need an IV at the time of initial treatment, but still may need fluids at a later time. Unfortunately, by the time fluids are needed, it may be difficult to insert a catheter into the vein, then seal off the catheter until you or medical personnel are ready to administer fluids intravenously
Saline Lock A saline lock gives you the ability to stop giving IV fluids, then start again at a later time without performing another venipuncture
Obtain Needed Supplies • 18 gauge catheter/needle unit • saline lock • constricting band • tegaderm dressing • alcohol pad
Obtain Needed Supplies • gloves • 21-23 gauge 1 1/4” needle • 3-5 milliliter syringe • IV solution (Normal Saline, Hextend, Lactated Ringers)
Select a Site for Venipuncture • preferred sites are the peripheral veins of the antecubital fossa (anterior to and just below the elbow) • large, visible, accessible • non-dominant arm if possible
Select a Site for Venipuncture • expose the site • palpate (feel) for a vein • select a vein that can be easily felt and seen, large enough to accommodate the catheter, straight, springy, does not roll, and is free of scars, moles, and excessive hair
Select a Site for Venipuncture site needs to be above an injury palpable pulse areas, valves and veins near or below injuries always start above the site of an unsuccessful IV attempt
Perform a Venipuncture and Initiate a Saline Lock • wrap the constricting band around the limb about 2 inches above the selected site • loop the longer end and draw it under the shorter end so the band can be released with one hand • be sure the tails point away from the venipuncture site • constricting band should remain in place no longer than 2 minutes
Perform a Venipuncture and Initiate a Saline Lock • tell the casualty to clench and relax his fist several times, then keep it clenched • palpate vein to ensure vein is still suitable • cleanse selected site with an alcohol pad • wipe site using a back and forth motion
Perform a Venipuncture and Initiate a Saline Lock • remove catheter/needle unit from package • put on gloves • hold the unit in your dominate hand and remove protective cap without contaminating the needle
Perform a Venipuncture and Initiate a Saline Lock • hold the flash chamber of the unit with the thumb and forefinger of your dominant hand and position the unit so that the bevel of the needle is up and directly above the selected vein • pull the skin over the venipuncture site taut by pulling the skin approximately 4-6 inches below the site with your non-dominate hand
Perform a Venipuncture and Initiate a Saline Lock • position the point of the needle (bevel up) about ½ inch below the venipuncture site at approximately a 20 to 30 degree angle • insert the bevel of the needle beneath the skin
Perform a Venipuncture and Initiate a Saline Lock • check for blood in the flash chamber (only bevel is in the vein) • lower the angle of the catheter/needle until almost parallel to the skin surface
Perform a Venipuncture and Initiate a Saline Lock • advance the catheter/needle unit approximately 1/8 inch farther to ensure that the catheter (not just the bevel) is in the vein • stabilize flash chamber with dominant hand, grasp catheter hub with non-dominant hand and thread catheter into vein, to catheter hub without moving needle.
Perform a Venipuncture and Initiate a Saline Lock • release constricting band with non-dominant hand • hold the catheter hub with your non-dominate hand, press firmly on the skin just beyond the catheter tip • remove the flash chamber with the attached needle from the catheter with your dominate hand and place in SHARPS Container
Perform a Venipuncture and Initiate a Saline Lock • tell the casualty to unclench his/her fist • uncap the male end of the saline lock • insert the male end into the hub of the catheter • release pressure from over the vein • stabilize hub of catheter and tighten saline lock to hub
Perform a Venipuncture and Initiate a Saline Lock • remove the Tegaderm dressing from its package • apply it over the site so that the saline lock and site are covered
Flush the Saline Lock • if an IV is not to be started immediately, you should flush the catheter and examine the site for infiltration (fluid into the tissue instead of the vein) • use fluid from the IV bag to flush the saline lock • if you are going to administer fluids immediately, you do not need to flush the saline lock
Flush the Saline Lock • attach the 21-gauge needle to the 5 ml syringe • remove cover from IV bag port, fill syringe with sterile fluid from IV bag, and replace cover
Flush the Saline Lock • penetrate the Tegaderm dressing with the needle • inject the sterile fluid into catheter • look for signs of infiltration (pain, swelling, redness, fluid leaking from site) • withdraw needle from saline lock and properly dispose of the needle
Intravenous Infusion • referred to as an “IV” • fluids are introduced by piercing a vein with a catheter- and-needle unit (venipuncture) • needle is withdrawn leaving the catheter in the vein or saline lock • catheter attached to tubing and fluid
Intravenous Infusion • obtain the following: IV solution, IV infusion set, 18 gauge needle/catheter unit, tape, tegaderm dressing, exam gloves • check IV bag for expiration date, clearness of fluid, tears, fluid leakage, and contamination
Intravenous Infusion • remove infusion set from package • loosen the clamp, move the clamp along the tubing until it is 6 to 8 inches from the drip chamber, and tighten clamp OPEN CLOSED
Intravenous Infusion • remove protective covering from outlet port (long spout) on IV bag • remove protective cap from the spike on the infusion set without touching the spike • insert spike into exposed IV outlet port with a twisting motion IV Tubing Port Medication Port
Intravenous Infusion • squeeze the drip chamber until half of the chamber is filled with IV solution
Intravenous Infusion • remove air from the tubing by: • holding the end of the tubing above the bottom of the bag • loosening the tubing clamp to allow fluid into the tubing • gradually lowering tubing until fluid reaches end of adapter • re-clamping the tubing
Intravenous Infusion • remove 18-gauge catheter/needle unit from package • hold catheter/needle unit in dominant hand and stabilize the saline lock adapter with thumb and forefinger of non-dominant hand • insert catheter needle unit through Tegaderm dressing and saline lock adapter until it reaches catheter hub
Intravenous Infusion • remove non-dominant hand from saline lock, place finger/thumb of non-dominant hand over vein just beyond the catheter tip, and apply pressure to vein • retract and discard needle (catheter stays in place) • grasp end of IV tubing with dominant hand and remove adapter from tubing • grasp the hub of the catheter (outside Tegaderm dressing) with thumb and forefinger of non-dominant hand
Intravenous Infusion • insert end of tubing into hub of catheter • loosen clamp on tubing (about ½ way) to allow IV solution to flow into drip chamber • unroll about 2 inches of tape • place tape (sticky side up) on casualty’s limb and under IV tubing a few inches beyond catheter hub and beyond Tegaderm dressing
Intravenous Infusion • fold tape strip back over tubing, trapping tubing between sticky sides of tape • wrap additional tape around limb and IV tubing distal to first • ensure tubing is secure and IV flow is not impeded • check infusion site for signs of infiltration
Discontinue the Intravenous Infusion • due to evacuation • IV fluid has been used up • infiltration • other reasons
Discontinue the Intravenous Infusion • adjust clamp on tubing so flow is stopped • loosen and remove tape • remove IV catheter hub that is outside Tegaderm dressing • saline lock adapter may remain in place for later use
Remove Catheter from Vein • while securing hub of catheter, remove Tegaderm to hub. • grasp catheter hub and remove catheter from vein at an angle almost parallel to skin • cover puncture site with gauze dressing folded in half and hold pressure until bleeding stops • tape dressing in place
CHECK ON LEARNING Initiating A Saline Lock and IV • Intravenous infusions are used in an effort to control: Hypovolemic shock • You are treating a casualty that does not require IV fluids now, but you know that evacuation will be delayed and that the casualty will probably require IV fluids before evacuation. What should you do? Install a saline lock for future use • The needle should be inserted into the skin with the bevel: Up