Download
1 / 13
130 likes | 237 Vues
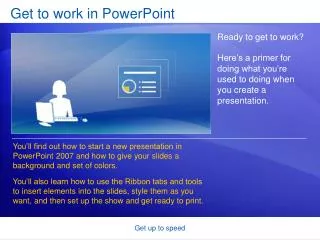
Get to work in Excel. The first lesson helped you get oriented to the new look of Excel 2007. Now it’s time to get to work. . Say you’ve got a half hour before your next meeting to make some revisions to a worksheet that you created in a previous version of Excel.

E N D
Get to work in Excel The first lesson helped you get oriented to the new look of Excel 2007. Now it’s time to get to work. Say you’ve got a half hour before your next meeting to make some revisions to a worksheet that you created in a previous version of Excel. Can you do the basic things you need to do in Excel 2007, in just 30 minutes? This lesson will show you how. Get up to speed
Open your file First things first. You want to open an existing workbook created in an earlier version of Excel. Do the following: Click the Microsoft Office Button . Click Open, and select the workbook you want. Also note that you can click Excel Options, at the bottom of the menu, to set program options. Get up to speed
Insert a column Now you want to add a column to your worksheet to identify product categories. It should go between two existing columns of data, Quantity and Supplier. Your worksheet contains rows of products ordered from various suppliers, and you want to add the new column to identify the various products as dairy, grains, produce, and so on. Get up to speed
Insert a column Follow this procedure to add the column between the Quantity column and the Supplier column: • Click in the Supplier column. Then on the Home tab, in the Cells group, click the arrow on Insert. • On the menu that appears, click Insert Sheet Columns. A new blank column is inserted, and you enter the new data in the column. • If you need to adjust the column width to fit the data, in the Cells group, click the arrow on Format. In the list that appears, click AutoFit Column Width. Get up to speed
Format and edit data You format and edit data by using commands in groups on the Home tab. For example, the column titles will stand out better if they are in bold type. To make it so, select the row with the titles and then on the Home tab, in the Font group, click Bold. Get up to speed
Format and edit data While the titles are still selected, you decide to change their color and their size, to make them stand out even more. In the Font group, click the arrow on Font Color. You’ll see many more colors to choose from than before. You can also see how the title will look in different colors by pointing at any color and waiting a moment. Get up to speed
Format and edit data You can use the Font group to take care of other formatting and editing options, too. • To increase the font size, click Increase Font Size . • While the titles are still selected, you decide to center them in the cells. In the Alignment group, click Center . • Finally, you find that you need to enter one more order for Louisiana Fiery Hot Pepper Sauce. Select that product name, and in the Clipboard group, click Copy . Then click in the bottom row, and in the Clipboard group again, click Paste . Get up to speed
Enter a formula Before handing off your report, you want to add up the numbers in the Quantity column. It’s easy: Use the Sum button . Place the cursor in the last cell in the Quantity column, and then click the Sum button on the Home tab. (It’s in the Editing group.) Press ENTER to see the formula result. Get up to speed
Add headers and footers As a finishing touch, you decide to add headers and footers to the worksheet. This will help make clear to everyone what the data is about. Here’s what to do: • Switch to Page Layout view. You can click the View tab, and then click Page Layout View in the Workbook Views group. Or click the middle button on the View toolbar at the bottom of the window. Get up to speed
Add headers and footers As a finishing touch, you decide to add headers and footers to the worksheet. This will help make clear to everyone what the data is about. Here’s what to do: • Click in the area at the top of the page that says Click to add header. • As soon as you do, the Header & Footer Tools and the Design tab appear at the top of the Ribbon. Get up to speed
Print It’s time to print the report. In Page Layout view, you can make adjustments and see the changes on the screen before you print. Here’s how to use Page Layout view: • Click the Page Layout tab. • In the Page Setup group, click Orientation and then select Portrait or Landscape. In Page Layout view, you’ll see the orientation change, and how your data will look each way. Get up to speed
Print It’s time to print the report. In Page Layout view, you can make adjustments and see the changes on the screen before you print. Here’s how to use Page Layout view: • Still in the Page Setup group, click Size to choose paper size. You’ll see the results of your choices as you make them. (What you see is what you print.) Get up to speed
The New Workbook window The New Workbook window offers the perfect place to start in Excel. When you click the Microsoft Office Button and then click New, the New Workbook window opens. At the top of the window, you can select either a new blank workbook or a template. Get up to speed