Download
1 / 18
180 likes | 318 Vues
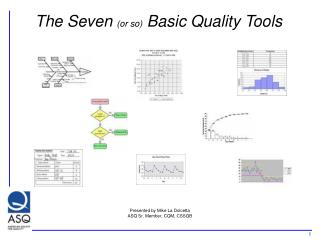
CMS I – BASIC WEB EDITING INTRODUCTION TO THE CMS. Presented By: Rodneikka Scott, MS – Implementation Project Manager Lila Elliott , MA – Manager Client Support. Learning Objectives of Presentation. What is a CMS? Understanding Inputs on Core Admin Pages

E N D
CMS I – BASIC WEB EDITING INTRODUCTION TO THE CMS Presented By: Rodneikka Scott, MS – Implementation Project Manager Lila Elliott, MA – Manager Client Support
Learning Objectives of Presentation • What is a CMS? • Understanding Inputs on Core Admin Pages • Adding, hiding and moving content items • HTML Content Items and the WYSIWYG Editor • Who sees what & who can do what • Adding text, images, links using within the HTML (WYSIWYG) editor. • How pages are constructed • Updating a Page
CMS I –Exercise Guide • After the session, download the CMS I – Web Editing PowerPoint and “How To Guide” from the HUG Super Forum 2013. • The exercise guide contains: • Examples and screenshots of the topics covered in CMS I • Detailed directions to assist you in applying your newly acquired CMS knowledge • Active links that point to the Support and Documentation site http://support.higherlogic.com/ • Additional HUG training opportunities including Higher Logic Academy and training webinars.
What is the CMS? • Abbreviated as CMS, a Content Management System • It is a web application designed to make it easy for non-technical users to add, edit and manage a website. • It is a system for managing content in a web site that doesn’t require special software for uploading pages.
CMS Basics Today we will learn by editing the microsite for Super Forum CMS 1. The Higher Logic Platform is based on Microsites CMS – our Content Management System. The CMS provides Super Admins with the ability to edit the website's navigation, content and branding.
Getting Started • All icons will take you to a different area of the CMS Admin. • However, by selecting the CMS admin gear you will be taken to an area to quickly access site wide options. • From the home page of your site login as a super administrator. • You will know that you have super admin credentials by seeing the following options.
CMS aka NavigationNavigate to your site and then click “Edit Navigation.” This screen is referred to as the “CMS” or “Navigation.” • Navigation Items/Pages are on the left. • Content Items (for the highlighted page) are on the right.
The Navigation Each tab on the Primary Navigation is represented by a folder in the Navigation Menu accessible via Edit Navigation. Expand each folder (or Parent item) to view the sub-tabs (or Child items)
Navigation Tools and Functions New. Creates a new page/folder. Create a New child. Also creates a new page/folder. Folders appear at the bottom of child folders. Edit. Opens the “Navigation Edit” window for the page folder selected. Delete. This permanently deletes a page folder and all it’s children. Cut. Cut is the first step to moving a page folder to another part of the site. Copy. Allows you to create a “clone” of the page. Paste. Relocates a folder that has been cut or copied. Paste as Child. Nests a cut or copied file/page under a parent.
Edit the NavigationClick the “Edit” button in the left column toolbar. The Navigation Title will display in the navigation and on the page. If you want a different title to display on the page, enter it into the Page Title field. The URL Name is used in the full URL path. Example: http://hug.higherlogic.com/Profile1/Profile/?UserKey=62c701ce-ba17-45d0-902a-4537781e83f3 The Page Code Name must be unique. Page Code link http://hug.higherlogic.com/rodneikka The Security Roles Required to View field is used to restrict access to Navigation Items/Pages. The Page Layout selection determines the content item sections available for that page. Show/Hide Navigation. Do not delete Navigation items.
Adding Content Items • Highlight the page(folder) where you would like to add a new content item. On the Content Menu, click “New.” • Otherwise, you could navigate to the page where you would like to add a content item to and click the icon that is for Add to this Page. You can create a new content item on a page by:
Content Tools & Functions New. Create a new Content Item. Edit. Opens the add/edit content page for the page folder. Delete. This permanently deletes a content item. There is always a warning before you delete a content item. Cut. Cut is the firs step to moving a content item to another area. Copy. Allows you to create a “clone of a content Item. Paste. Relocates a Content Item that has been cut or copied.
Moving Content Items You can move a content item into a different section on the page by: Double-clicking the content item to edit it, and then using the arrows to change the content item section number; OR • highlighting the content item you want to move, • clicking the “Cut” button, • highlighting the content item you want the cut content item to appear under, • clicking the “Paste” button.
Entering/Editing a Content Item Name/Title. Required even if you chose not to show it. Show Content In Section. Required. It will determine where the item is placed. Hide this content item. Allows you to hide unused content items vs. deleting them. Content is available to. Required. The default is everyone. CSS Class. Try Adding HLLandingControl or Shadow. You may also add a custom class. Type of Content. There are 6 different types of content items allowed.
Content Types • HTML * • Uploaded File * • Hyperlink * • User Control * • Syndicated Content • JavaScript
Optional – Create a Sandbox Site For Practice CMS Admin (Gear Icon) > Site List > Copy Site > Name it “Sandbox” Not seeing the “Site List” icon? Then enter this suffix to your site url, and “Copy Site”: http://hug.higherlogic.com/HigherLogic/Microsites/SiteList.aspx?
Demo Time! • Go to your sandbox site • Follow along using this exercise guide • No sandbox site? no worries! Just watch, learn and relax http://hlsandbox.connectedcommunity.org/hugsfcms1
Rodneikka Scott, MSImplementation Project ManagerEmail: rodneikka@higherlogic.comLila Elliott, MAManager Client SupportEmail: lila@higherlogic.com