Download
1 / 85
860 likes | 1.03k Vues
Nonverbal Activities. August September October November December. January February March April May. *Created by Melanie LiCausi Gifted Resource Teacher at Kyrene del Norte & Niños *. August Nonverbal Activities. Grades K – 3 Visualization on Paper Grades 4-5

E N D
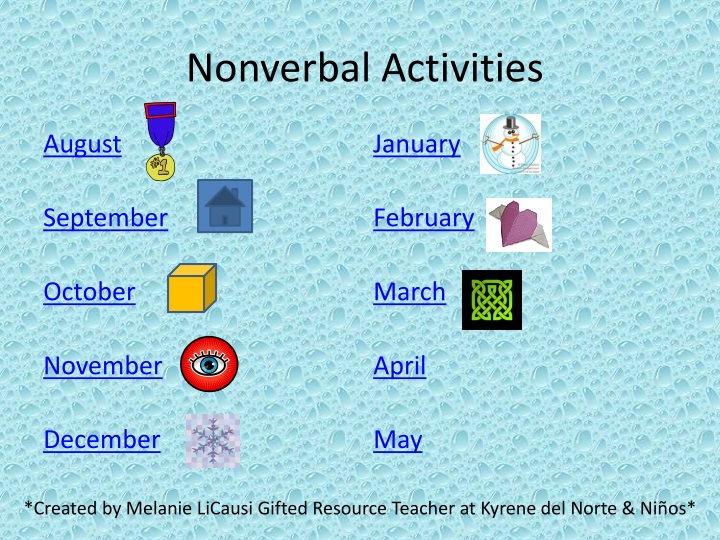
Nonverbal Activities August September October November December January February March April May *Created by Melanie LiCausi Gifted Resource Teacher at Kyrene del Norte & Niños*
August Nonverbal Activities Grades K – 3 Visualization on Paper Grades 4-5 Visualization & Goal Setting
Sept. Nonverbal Activities Grades K - 2 Tessellation Investigation Grade 3 Tessellation Investigation II Grade 4 Tessellation Exploration Grade 5 Tessellation Exploration II
Oct. Nonverbal Activities Grades K - 2 Solid Shapes Grade 3 Solid Shapes II Grade 4 Polyhedron Construction I Grade 5 Polyhedron Construction II
Mar. Nonverbal Activities Grades K - 2 Exploring Mazes & Puzzles Grade 3 Create a Puzzle Grade 4 Design a Maze Grade 5 Celtic Knot Construction
Dec. Nonverbal Activities Grades K – 2 3-D Gift Boxes Grade 3 Simple Pop-up Cards Grade 4 Pop-up Card Designs Grade 5 Design Your Own Pop-up Card
Jan. Nonverbal Activities Grades K - 2 Exploring Spirographs Grade 3 Creating Spirographs Grade 4 Symmetrical Snowflakes Grade 5 Sewing a Snowman
Feb. Nonverbal Activities Grades K - 2 Paper Airplanes Grade 3 Cootie Catchers Grade 4 Simple Origami Grade 5 The Sonobe Cube
Nov. Nonverbal Activities Grades K - 2 Exploring Art Grade 3 Observing Changes Grade 4 Become an Observer Grade 5 Become an Observer II
April Nonverbal Activities Grades K - 2 Grade 3 Grade 4 Grade 5
May Nonverbal Activities Grades K - 2 Grade 3 Grade 4 Grade 5
5th Tessellation Exploration 1. Complete the 6th Grade Scott Foresman Text Book pgs. 516-519. (worth 20 points) 2. Research the work of M.C. Escher. Use books and the internet to discover how he used polygons to create more complicated tessellations. Find three examples of his work and choose one to imitate. Now create another more complicated tessellation. 3. Create your own creative tessellation design using any technique you wish. • Your design MAY NOT be a simple or regular polygon. It must be a transformed polygon that resembles an object such as animals, plants, objects, or a more complex design. • Draw it neatly on white paper and color the design. It must fill the entire 8” x 11” paper. • Be ready to present your design in class. (worth 30 points)
4th Tessellation Exploration • 1. Complete the 6th Grade Scott Foresman Text Book p. 516-519. (worth 20 points) • 2. Search the Internet for three different examples of tessellations. • 3. Create your own creative tessellation design using any technique you wish. • Your design MAY NOT be a simple or regular polygon. It must be a transformed polygon that resembles an object such as animals, plants, objects, or a more complex design. • Draw it neatly on white paper and color the design. It must fill the entire 8” x 11” paper. • Be ready to present your design in class. (worth 30 points)
3rd Tessellation Investigation 1. Prove whether or not each shape can tessellate by drawing several next to each other. Use graph paper to draw a picture for each tessellation. You must use each shape at least 6 times to prove that it tessellates. Yes, you may trace the shapes. 1. trapezoid 2. arrow 3. parallelogram 4. pentagon 5. hexagon 6. star 2. Create your own creative tessellation design using any of the polygons that work. • Decorate your polygon so that it resembles an object such as animals, plants, objects, or a more complex design. Repeat the design in every polygon you draw! • Draw it neatly on white paper and color the design. It must fill the entire 8” x 11” paper. 3. When you’re done, visit http://www.protozone.net/ASHOCK/AJhext.html or http://www.coolmath4kids.com/tesspag1.html for more ideas to draw!
K-2nd Tessellation Investigation 1. Prove whether or not each shape can tessellate by drawing several next to each other. Use graph paper to draw a picture for each tessellation. You must use each shape at least 6 times to prove that it tessellates. Yes, you may trace the shapes. 1. trapezoid 2. arrow 3. parallelogram 4. pentagon 5. hexagon 6. star • Now find more 2 dimensional (flat) shapes that tessellate. • Now compare the shapes that tessellate and the shapes that do not. Print and use the Venn diagram here. Try to write ways that they are the same or different. *When you are done, you can visit these sites for more exploration! http://www.protozone.net/ASHOCK/AJQuil.html http://www.nga.gov/kids/zone/wallovers.htm http://www.protozone.net/ASHOCK/AJhext.html
Venn Diagram Tessellating Shapes Both Non-Tessellating Shapes
Polyhedron Construction II A polyhedron is a 3-dimensional solid that contains a certain number of faces. A Regular polyhedron will be composed of a regular polygon repeated several times. An Irregular polyhedron will be composed of the same or multiple irregular polygons. • Do some research on polyhedrons by visiting http://www.korthalsaltes.com/index.html . • Find out what the prefixes below mean and how many different kinds there are. • Use the templates from the website to design and build the polyhedrons that appear below. You may choose to do a regular or irregular polyhedron. Use stiff paper, a ruler, a protractor, tape, glue, etc. for construction. You may design a practice model from paper before building your final versions for presentation. You may do some research to find examples if necessary. SeptahedronOctohedronNonohedron Decahedron Dodecahedron Is it possible to make a 1, 2, or 3 faced polyhedron? Why or why not?
Polyhedron Construction I A polyhedron is a 3-dimensional solid that contains a certain number of faces. A Regular polyhedron will be composed of a regular polygon repeated several times. An Irregular polyhedron will be composed of the same or multiple irregular polygons. 1. Do some research on polyhedrons by visiting http://www.korthalsaltes.com/index.html. Find out what the prefixes below mean and find 3 examples for each type. • Use the templates from the website to design and build the polyhedrons that appear below. You may choose to do a regular or irregular polyhedron. Use stiff paper, a ruler, a protractor, tape, glue, etc. for construction. You may design a practice model from paper before building your final versions for presentation. You may do some research to find examples if necessary. Tetrahedron PentahedronSextahedron Is it possible to make a 1, 2, or 3 faced polyhedron? Why or why not?
Solid Shapes II A solid shape is called 3-dimensional because you can measure it in three different ways; length, width, and height. • Copy and cut out 5-10 of each shape below. Make sure they are exactly the same size! • Try to figure out how to tape or glue them together to make solid shapes. All of the sides and corners must be touching so that the new solid makes a closed container. • Keep track of how many different solid shapes you can make. Make a chart for all of the shapes, or label a note card to match each shape – write the name of the shape on the note card. • On each note card add as much information as you can about each shape. Write the number of sides, corners, and edges it has. Write the number of each flat shape you used to make it. Print and use the Solid Shapes II chart as an example or to help you organize your information.
Solid Shapes I • Do some research on solid shapes. Make a list of how many different solids you find and what their names are. • Look around your classroom to find all of the solid shapes that you can. Print and use the Solid Shapes chart to help you keep track. • Now make a new chart and try to find solids that are combined to make one object. Example: a cube and a pyramid might make a house. • Finally, use some blocks or make some solid shapes of your own and see how many different things you can build with the solids. Make a list with the names and pictures of what you made. Solid Shape Templates to copy and create.
Become an Observer Click on the following link, and select the Mobile function. http://www.nga.gov/kids/zone/zone.htm Print and use the Observer Record worksheet to record how you changed the moving mobile and what effects you saw after you made those changes. You are looking at the mobile in it’s parts, and as a whole object. For example, if you change the speed of one shape, the effect is that it moves faster, but what happens to all of the other pieces as well? How is the whole object changed by changing one of it’s parts? *When you are finished with the Mobile Activity, explore the other functions on the National Gallery of Arts website, or try the 3rd grade activity – Observing Changes.
Observer Record Ex. When I changed the speed of the green diamonds_____________________; I observed that the other shapes connected to the green diamonds swung faster also. When I _______________________________ _____________________________________; I observed ____________________________ _____________________________________. When I _______________________________ _____________________________________; I observed ____________________________ _____________________________________. When I _______________________________ _____________________________________; I observed ____________________________ _____________________________________. When I _______________________________ _____________________________________; I observed ____________________________ _____________________________________. When I _______________________________ _____________________________________; I observed ____________________________ _______________________________________ When I _______________________________ _____________________________________; I observed ____________________________ _____________________________________. When I _______________________________ _____________________________________; I observed ____________________________ _____________________________________. When I _______________________________ _____________________________________; I observed ____________________________ _____________________________________. When I _______________________________ _____________________________________; I observed ____________________________ _____________________________________.
Become an Observer II Click on the following link, and select the 3-D Twirlerfunction. http://www.nga.gov/kids/zone/zone.htm In any form of art, an artist is very aware of how the lines and shapes of an object appear differently on flat paper, when you look at it from different angles. For instance, the same 3-dimensional cube could have any of the following appearances. front face view top right angle bottom right angle bottom left angle top left angle corner view Print and use the Observing Multiple Perspectives worksheet to record how the object looked different every time you changed the angle of it’s position. Be sure to describe the angle you are viewing from, or the way that you changed the shape for each new drawing you make. * When you are finished, complete the same activity with the Cubits Function.
Observing Multiple Perspectiveshttp://www.nga.gov/kids/zone/zone.htm • Draw the front face view of the object you chose or created on 3-D Twirler. • Describe this view or change:____________________ ________________________________________________. 3. Describe this view or change:____________________ ________________________________________________. 4. Describe this view or change:____________________ ________________________________________________. 5. Describe this view or change:____________________ ________________________________________________. 6. Describe this view or change:____________________ ________________________________________________.
Observing ChangesVisit this website http://www.nga.gov/kids/zone/stilllife.htm. Print this slide. Spend some time exploring the different functions and learn how to create and change still life pictures. Notice how the shadows change when objects are moved; notice how the picture looks different when the lights get brighter or darker. Create a still life picture. Draw & color it below. Try to draw exactly what you see. Make one or two changes. Draw the new picture below. Which picture do you like better? Why?
Check out these websites for exploring and creating pictures! http://www.mrpicassohead.com/create.html The National Gallery of Art, Kids Zone http://www.nga.gov/kids/zone/ (many links on this page)
Simple Pop-Up Cards Pop-ups make cards interesting by adding a 3-D figure. The pop-up figure gets attached to a folded tab inside the card. • Print the templates for each pop-up card. Top-Tab Card Template Central-Tab Card Template 2. Follow the directions for making the two different kinds of pop-up tabs. Directions for Pop-up Cards Extension: Click here to see examples of pop-up cards. http://robertsabuda.com/popmakesimple.asp These cards have more difficult directions, but you may want to give them a try!
Directions for Pop-Up Cards Central-Tab Pop-up Card: 1. First, cut out the card template. 2. Then, fold the card in half. 3. Third, cut along the solid lines in the middle of the card. The two parallel lines should be the same length. 4. Next, unfold the card and refold the tab so it is pushed inside the card. 5. Now cut out the Figure box. 6. Draw a design or picture inside the box and color it completely. Cut it out. 7. When the symbol is ready, apply some glueto one side of the tab, inside the card. 8. Attach the picture onto the tab, making sure that you can still fold the card closed without bending the picture. 9. The picture should hide all the way inside the card when it is closed. 10. Finally, color and write in your card! Top-Tab Pop-up Card: 1. First, cut out the card template. 2. Then, fold the card in half. 3. Third, fold down the top corner of the card along the dotted lines. 4. Next, unfold the card and refold the tab so it is pushed inside the card. 5. Now cut out the Figure box, and fold it in half along the dotted lines. 6. Draw a design or holiday symbol on the box and cut it out. 7. Fold it in half so the blank sides touch each other. 8. Glue the design onto the tab inside the card. Make sure that the middle of the design lines up with the middle of the tab fold. 9. Adjust the tab fold so that the design hides all the way inside the card when it is closed. 10. Finally, color and write in your card!
3-D Gift Boxes • Print one of the following gift box patterns to color and fold together. Box 1 & Box 2 2. Color and cut out a box. 3. Fold the box and use some tape to secure it. 4. Fill the box with candy or a small gift! Here are some other box shapes to decorate and put together: Cone BoxTriangular Prism Box Pyramid BoxRectangular Pyramid Box Rectangular BoxCylinder BoxCube Box
Pop-up Card Designs Pop-ups make cards interesting by adding a 3-D figure. The pop-up figures are folded and attached inside the card in many ways. The website link will give you some excellent ideas to make cards of your own! If you have difficulty with the directions, follow the link below to make a more simple pop-up card. Once you feel comfortable, come back and try something harder! Simple Pop-up Cards Click here to see examples and directions for a variety of pop-up cards. http://robertsabuda.com/popmakesimple.asp • Choose one example, and follow the links for step-by-step directions. • The website above will give you links to print the templates. You will have to color and cut them out before assembling the pieces. Printing Tip* COPY AND PASTE the template into a word document and stretch it out to fit the page. Then it will print larger.
Design Your Own Pop-up Card Click here to see examples and directions for a variety of pop-up cards. http://robertsabuda.com/popmakesimple.asp • Choose one example, and follow the links for step-by-step directions. • The website above will give you links to print the templates. You will have to color and cut them out before assembling the pieces. • 3. Use your experiences making some of these cards, to design your own shapes to pop-up and surprise someone! • Play around with different shapes, sizes, and positions of pieces to create something unique. • 4. Once you have a design that works well, try to make a template for others to print and follow. • 5. Be sure to share your template with others to test it. • 6. If necessary, make changes to your template to make it better, and share it again! Your friends and classmates will appreciate your ideas! • * If you would like to share your new template to be added onto our *Nonverbal Monthly Activitiespower point, send a copy to Miss Wilk at Kyrene del Norte! Your teacher can help you to get it to me.
Exploring Spirographs Spirographs are made when lines are connected to the edges of circles in different ways. These lines are called chords. 1. Follow the link below and see how many different spirographs you can create! http://www.wordsmith.org/~anu/java/spirograph.html 2. To draw your own spirograph on paper, print the following links and follow the directions. Spirograph 1Spirograph 2Spirograph 3 What makes these graphs different? Which one do you like the best? 3. Now try these; Snowflake Designs.
Spirograph 1 1 to 9. 2 to 10 3 to 11 4 to 12 5 to 13 6 to 14 7 to 15 8 to 16 9 to 17 10 to 18 11 to 19 12 to 20 13 to 21 14 to 22 15 to 23 16 to 24 17 to 25 18 to 26 19 to 27 20 to 28 21 to 29 22 to 30 23 to 31 24 to 32 25. 25 to 33 26. 26 to 34 27. 27 to 35 28. 28 to 36 29. 29 to 37 30. 30 to 38 31. 31 to 39 32. 32 to 40 33. 33 to 41 34. 34 to 42 35. 35 to 43 36. 36 to 44 37. 37 to 45 38. 38 to 46 39. 39 to 47 40. 40 to 48 41. 41 to 1 42. 42 to 2 43. 43 to 3 44. 44 to 4 45. 45 to 5 46. 46 to 6 47. 47 to 7 48. 48 to 8 Draw chords to connect the points on the list. Use a ruler and colored pencils. 48 1 2 3 47 46 4 5 45 6 44 43 7 8 42 9 41 40 10 39 11 12 38 13 37 14 36 15 35 34 16 33 17 32 18 31 19 30 20 29 21 28 22 27 26 25 24 23