Download
1 / 99
990 likes | 1.2k Vues
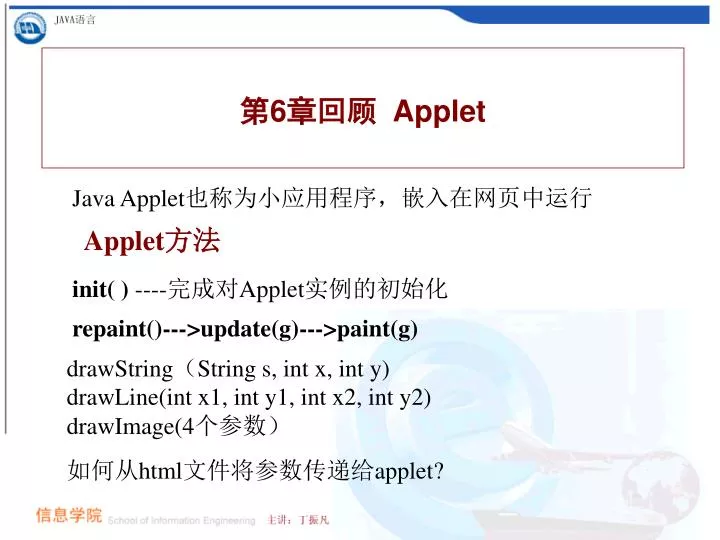
第 6 章回顾 Applet. Java Applet 也称为小应用程序,嵌入在网页中运行. Applet 方法. init( ) ---- 完成对 Applet 实例的初始化. repaint()--->update(g)--->paint(g). drawString ( String s, int x, int y) drawLine(int x1, int y1, int x2, int y2) drawImage(4 个参数). 如何从 html 文件将参数传递给 applet?. 第 7 章 图形用户界面的设计与实现.

E N D
第6章回顾 Applet Java Applet也称为小应用程序,嵌入在网页中运行 Applet方法 init( ) ----完成对Applet实例的初始化 repaint()--->update(g)--->paint(g) drawString(String s, int x, int y) drawLine(int x1, int y1, int x2, int y2) drawImage(4个参数) 如何从html文件将参数传递给applet?
第7章 图形用户界面的设计与实现 7.1 图形用户界面核心概念 7.2 容器与布局管理 7.3 常用GUI标准组件 7.4 鼠标和键盘事件 7.5 菜单的使用 7.6 对话框的使用
图形用户界面核心概念 容器---可以容纳GUI部件(按某种布局) ----窗体 、面板 GUI部件 • 部件---部署在容器中,实现某种交互。 • ----文本框、按纽、标签等
图形用户界面核心概念---创建窗体 Frame f=new Frame(“标题“) class MyFrame extends Frame …. Frame f=new MyFrame(“标题“)
图形用户界面核心概念 创建文本框、按钮、标签 TextField x=new TextField(10); Button b=new Button(“ok”); Label dis=new Label(“hint…”);
图形用户界面核心概念— 给容器中加入部件 布局设置setLayout(new FlowLayout()) • 加入部件 • add(部件对象1); • add(部件对象2); • …..
图形用户界面核心概念 事件处理------委托事件处理模型 • 事件源----发生事件 • 事件监听者---处理事件 ----符合相应接口要求
委托事件处理---过程 (1)给事件源对象注册监听者 button.addActionListener(ActionListener a); (2)给监听者编写事件处理代码 public void actionPerformed(ActionEvent e) { …… }
监听者事件处理编程 ---要设法在actionPerformed中能访问事件处理相关对象 (1)事件源对象的容器类作为监听者 addActionListener(this); (2)用内嵌类实现 addActionListener(new Process()); (3)用匿名内嵌类实现 addActionListener(new ActionListener() {…..} );
图形用户界面核心概念 在事件处理代码中区分事件源 ---ActionEvent提供方法 • getSource() • 用来获取事件源对象。 • getActionCommand() • 结果为字符串,用来获取按钮事件对象的命令名
编写一个程序改变Applet背景的颜色 在Applet中安排一个按钮,每次点击按钮随机换一种新颜色。 演练例子
布局管理 • FlowLayout(流式布局) • BorderLayout(边缘或方位布局) • GridLayout(网格布局) • CardLayout(卡片式布局) • GridBagLayout(网格块布局)
布局管理---FlowLayout(流式布局) • 从上到下、左到右排放,放不下再换至下一行 • -----不会改变控件的大小。 • 按照参数要求安排部件间的纵横间隔和对齐方式 • public FlowLayout() • 居中对齐方式,组件纵横间隔5个像素。 • public FlowLayout(int align, int hgap, int vgap) • 3个参数分别指定对齐方式、纵、横间距 • public FlowLayout(int align) • 参数规定对齐方式,组件纵横间距默认5个像素。
布局管理---BorderLayout(边缘或方位布局) • 将容器内部空间分为东(East)、南(South)、西(West)、北(North)、中(Center)五个区域
布局管理---BorderLayout(边缘或方位布局) • 控件的大小随容器大小改变。 • 按照参数要求安排部件间的纵横间隔和对齐方式 • public BorderLayout() • 各组件之间的纵横间距为0 • public BorderLayout(int hgap, int vgap) • 2个参数分别指定纵、横间距 • 加入组件 • add(方位名字符串, 组件)
布局管理---GridLayout布局 • 把容器的空间分为若干行乘若干列的网格区域 • 组件按从左向右,从上到下的次序被加到各单元格中 • 组件的大小将调整为与单元格大小相同。
布局管理---GridLayout构造方法 • public GridLayout() • 所有组件在一行中。 • public GridLayout(int rows,int cols) • 通过参数指定布局的行和列数。 • public GridLayout(int rows,int cols,int hgaps,int vgaps) • 指定划分的行列数以及组件间的水平和垂直间距。
GridLayout布局—加入组件 • add(组件名) public void init() { this.setLayout(new GridLayout(3, 3, 10, 10)); for (int i = 1; i <= 9; i++) this.add(new Button("Button #" + i)); }
布局管理---CardLayout布局 • 加入的部件叠成卡片的形式 • 构造方法 • public CardLayout() • 显示组件将占满整个容器,不留边界。 • public CardLayout(int hgap,int vgap) • 容器边界分别留出水平和垂直间隔,组件占中央。 • 组件加入 • add(字符串, 组件名) • 其中,字符串用来标识卡片名称。
CardLayout布局---卡片翻动 • show(容器,字符串):显示指定名称的卡片 • first(容器):显示第一块卡片 • last(容器):显示最后一块卡片 • next(容器):显示下一块卡片
Component类(抽象类) • Color getBackground() :获取部件的背景色 • Font getFont() :获取部件的显示字体 • Graphics getGraphics(): 获取部件的Graphics属性对象 • void repaint(int x,int y,int width,int height) : 对部件的特定区域进行重新绘图 • void setBackground(Color c) : 设置部件的背景 • void setEnabled(boolean b) :是否让部件功能有效,在无效情况下部件变灰 • void setFont(Font f) :设置部件的显示字体 • void setSize(int width,int height) :设置部件的大小 • void setVisible(boolean b) :设置部件是否可见 • void setForeground(Color c) :设置部件的前景色 • void requestFocus() : 让部件得到焦点 • void add(PopupMenu popup) :给部件加入弹出菜单
文本框(TextField) 文本框只能编辑一行数据 • 构造方法有四种: • TextField():构造一个单行文本输入框。 • TextField(int):指定长度的单行文本输入框。 • TextField(String):指定初始内容的单行文本输入框。 • TextField(String, int):指定长度、指定初始内容。 • 常用方法: • setEchoChar(‘*’)设置回显字符 • getText() :获取输入框中的数据 • setText() :往输入框写入数据 • isEditable():判断输入框是否可编辑。
文本框(TextField)---事件 ActionEvent事件----在文本框按回车键时引发 注册:addActionListener(); 接口:ActionListener 方法: public void actionPerformed(ActionEvent e) TextEvent事件---对文本输入部件数据更改操作 (添加、修改、删除) 注册: addTextListener() 接口:TextListener 方法:public void textValueChanged(TextEvent e)
文本域(TextArea) 特点1:可以编辑多行文字 构造方法有四种: TextArea():构造一个文本域。 TextArea(int, int):构造一个指定长度和宽度的文本域。 TextArea(String):构造一个显示指定文字的文本域。 TextArea(String, int, int):按指定长度、宽度和默认值构造多行文本域。 特点2:在已有内容的基础上补充新数据 append(String s):将字符串添加到文本域的末尾 insert(String s,int index):将字符串插入到文本域的指定位置
public ItemSelectable getItemSelectable() public Object getItem() public int getStateChange() 返回值: ItemEvent.SELECTED : 代表选项被选中。 ItemEvent.DESELECTED :代表选项被放弃不选。 1. 选择事件 (ItemEvent)类
⑴ 举例 : Checkbox backg = new Checkbox("背景色 "); ⑵ 常用方法 boolean getState(): 获取复选按钮的选中状态,返回true代表按钮被选中 void setState(boolean value) :设置复选按钮的状态,vlaue为true表示选中。 ⑶ 事件响应 itemStateChanged(ItemEvent e)方法 通过 e.getItemSelectable()获得事件源对象引用 调用 getState()获取事件 源对象的状态。 2.复选按钮 (Checkbox)
import java.awt .*; import java.applet .*; import java.awt.event.* ; public class FuXuan extends Applet implements ActionListener { String question[]={"Java test question1\n A. choice1\n B.choice2\n C.choice3" ,"Java test question2\n A. good\n B. bad\n C. luck"}; String ch[]={"A","B","C"}; String answer[]={"AB","BC"}; Checkbox cb[]=new Checkbox[3]; Label hint; TextArea content; int bh=0; Button ok,next, previous; 例7-11 一个简单的多选题练习程序
public void init() { setLayout(new BorderLayout()); content =new TextArea(10,50); add("Center",content); content.setText(question[bh]); Panel p=new Panel(); p.setLayout(new GridLayout(2,1)); Panel p1=new Panel(); for (int i=0;i<ch.length;i++ ) { cb[i] = new Checkbox(ch[i]); p1.add(cb[i]); }
p.add(p1); Panel p2=new Panel(); ok=new Button(" 确定 "); p2.add(ok); hint=new Label(" 对错提示"); p2.add(hint); next=new Button(" 下一题 "); p2.add(next); previous=new Button(" 上一题 "); p2.add(previous); p.add(p2); add("South",p); next.addActionListener(this); previous.addActionListener(this); ok.addActionListener(this); }
public void actionPerformed(ActionEvent e) { if (e.getSource()==ok) {String s=""; for (int i=0;i<ch.length;i++ ) if (cb[i].getState()) s=s+cb[i].getLabel(); if (s.equals(answer[bh])) hint.setText("对"); else hint.setText("错"); 例7-11(续4)解答判定
} else if (e.getSource()==next) { if (bh<question.length-1) bh++; content.setText(question[bh]); } else { if (bh>0) bh--; content.setText(question[bh]); } } } 例7-11(续5)//翻动试题
使用复选框组,可以实现单选框的功能。例如: CheckboxGroup style = new CheckboxGroup() ; Checkbox p = new Checkbox("普通 ", true, style); Checkbox b = new Checkbox("黑体 ", false, style); Checkbox i = new Checkbox("斜体 ", false, style); 【注意】把CheckboxGroup加入容器时必须将每个Checkbox对象逐一加入容器,不能使用CheckboxGroup对象一次性加入。 3. 单选按钮(CheckBoxGroup) 将按钮组合
每个单选按钮要单独注册监听者 在事件处理代码中通过CheckboxGroup的对象的getSelectCheckbox()方法可获取当前被选中的选项按钮对象,要设置选项按钮i为选中状态可通过方法setSelectedCheckbox(i)。 选项按钮的其他方法: getLabel()方法可获取选项按钮的标识 getState()可判选项按钮对象是否选中。 setState()设置某个单选按钮为选中状态。 事件编程处理
import java.awt .*; import java.applet .*; import java.awt.event.* ; public class ChangeColor extends Applet implements ItemListener { String des[]={"红色","兰色","绿色","白色","灰色"}; Color c[]={Color.red,Color.blue,Color.green ,Color.white,Color.gray}; Color drawColor=Color.black; 例7-12 用单选按钮控制画笔的颜色
public void init() { CheckboxGroup style = new CheckboxGroup(); for (int i=0;i<des.length;i++ ) { Checkbox one=new Checkbox(des[i],false,style); one.addItemListener(this); add(one); } }
public void paint(Graphics g) { g.setColor(drawColor); g.setFont(new Font("变色字", Font.BOLD,24)); g.drawString("变色字",80,80); } /*根据drawColor的颜色绘制文字 */
public void itemStateChanged(ItemEvent e){ Checkbox temp=(Checkbox)e.getItemSelectable(); for (int i=0;i<des.length ; i++) { if (temp.getLabel()==des[i]) { drawColor=c[i]; repaint(); break; } } } } 根据选择的按钮设置drawColor的颜色值
“多选一”控件 下拉列表是作为一个整体加入到容器,各个列表元素不是独立的操作对象。 下拉列表也是产生ItemEvent类的选择事件 对下拉列表的选项值的判定处理有两种方法可供选择:一种是根据选项在列表中的序号,即通过getSelectedIndex()方法;另一种是通过getSelectItem()方法获取列表项对应的字符串 。 4.下拉列表(Choice)
select(int index)和select(String item):强制将某列表项定为选中状态; add(String item) 和insert(String item,int index):添加新元素到列表中 remove(int index)和 remove(String item):删除某个列表元素 removeAll():删除所有元素。 相关方法:
import java.awt .*; import java.applet .*; import java.awt.event.* ; public class ChangeColor2 extends Applet implements ItemListener{ String des[]={"红色","兰色","绿色","白色","灰色"}; Color c[]={Color.red,Color.blue,Color.green,Color.white,Color.gray}; public void init() { Choice color = new Choice(); for (int i=0;i<des.length;i++ ) color.add(des[i]); color.addItemListener(this);add(color); } 例7-13 用下拉列表控制Applet的背景变化
public void itemStateChanged(ItemEvent e){ Choice temp=(Choice)e.getItemSelectable(); for (int i=0;i<des.length ; i++) { if (temp.getSelectedIndex()==i) {setBackground(c[i]); break; } } } 例7-13(续)
列表与下拉列表的区别有两点: 一是列表可以在屏幕上看到一定数目的选择项,而下拉列表只能看到一项; 另一点用户可能允许同时选择列表中的多项,而下拉列表只能选一项。 MyList = new List(4, true); 给列表添加选项用add方法 下拉列表的方法均可用于列表对象,另外,由于列表支持多选,因此,列表中还提供有getSelectItems()方法和getSelectedIndexs()方法,它们返回的均是数组,分别代表哪些选中的选项的字符串和序号。 5. 列表(List)
ItemEvent类选择事件,当单击某选项时触发。 ActionEvent类动作事件。当双击某选项触发。 值得注意的是,双击事件不能覆盖单击事件,当用户双击一个选项时,首先产生双击、然后产生单击。 列表可以产生两类事件:
import java.applet.*; import java.awt.*; import java.awt.event.*; public class TestList extends Applet implements ActionListener,ItemListener { List myList; Label result; String unit[]={"总务处","教务处","工会","科研处","信息学院","机械学院"}; 例7-14 假设有一个发文系统,需要将一份文件发给多个单位
public void init() { myList = new List(5,true); for (int i=0;i<unit.length;i++) myList.add(unit[i]); add(myList); myList.addActionListener(this); myList.addItemListener(this); }
public void actionPerformed(ActionEvent e) { if(e.getSource()==myList) showStatus("您双击了选项"+e.getActionCommand()); } /* 响应动作事件*/
public void itemStateChanged(ItemEvent e) { String sList[]; String str = ""; List temp = (List)(e.getItemSelectable()); sList = temp . getSelectedItems() ; for(int i=0;i<sList.length;i++) str = str + sList[i] + " "; showStatus("您选择了选项:"+str); } } /* 响应选择事件*/