Download
1 / 18
240 likes | 476 Vues
slab constructed cup. Flatten a lump of clay into a long shape as you will be rolling out a slab long enough to wrap around a tube form.

E N D
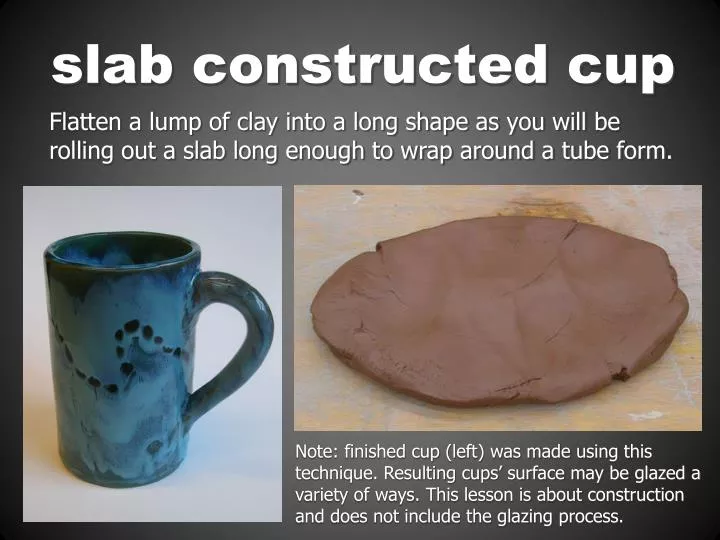
slab constructed cup Flatten a lump of clay into a long shape as you will be rolling out a slab long enough to wrap around a tube form. Note: finished cup (left) was made using this technique. Resulting cups’ surface may be glazed a variety of ways. This lesson is about construction and does not include the glazing process.
Create a long slab using a rolling pin. You will need a fairly long slab as it will be wrapped around a cardboard cylinder to take its shape. Be careful to maintain uniform thickness.
Way off to one side, cut one lengthwise edge so that it is straight. Leave yourself plenty of clay to make your cup.
Choose one of the ends and carefully cut a 90 degree angle (also called a “right angle”). Make this cut near to the end of the slab to leave plenty of clay to work with.
Measure and create two marks of equal distance from the long side of the slab. These will enable you to cut a parallel line. This distance will become the height of the cup.
After double-checking your measurements for accuracy, align your ruler with the two reference marks and cut the parallel line. Cut the entire length of the slab.
At this point, the slab should look like a long rectangle with an unfinished side to one end.
Wrap a piece of paper around a cardboard tube form (not too tight or too loose) and tape together. The paper will prevent the clay cylinder from sticking to the cardboard. Be sure not to tape the paper to the tube.
Roll the slab onto the paper-covered tube. Align the bottom of the tube and the edge of the slab so they are even.
Carefully observe where the two ends of the slab meet. Rather than making them overlap, cut off the excess slab so that both sides align well together.
Score and slip the two ends of the slab together to form a clay cylinder.
After connecting the two sides, take time to carefully smooth out the seam so it doesn’t show.
Carefully measure the bottom on another slab and lightly trace a circle. Score the inside of the circle and the bottom edge of the cup.
Cut off the excess clay from the bottom and smooth out the seam as you did earlier when creating the cylinder. Use great care because you don’t want your cup to leak.
Score and slip the handle onto the cup. You may want to attach the handle to the place where you had a seam to better hide whatever indication of a seam remains. Form the handle so that it fits comfortably in your hand. The handle should not be too large or too small and should be attached securely. A comfortable handle makes all the difference to the user when drinking from the finished cup.
Remove the cardboard tube from the cup by sliding it out of the paper that surrounded it. If the cup is too flimsy or delicate to safely remove the paper, it may remain during the drying process. The tube must be removed so that the cup will not shatter when it dries and shrinks (the tube will not shrink or give way). Smooth out the edge of the cup as that will be the surface that makes contact with the user’s lips. Check for quality and make needed repairs or adjustments.